Configuring and Pricing Items
Items are entities of certain type (e.g. Membership, Merchandise, Event, Donation, etc) that can be sold by the Merchant (Club) and purchased by workspace members. For example, participants may need to pay for player memberships, training equipment, various merchandise, summer school, or provide voluntary donations to the club. All of these items are created and configured by the Workspace Admin
New Item
To create an Item:
On the left nav-bar select 💲Sales → 🛒 Items
This opens the Items menu which contains the list of events from your workspace. The events menu consists of the following tabs:
Active
All
Hit ➕ New Item button in the upper right corner to create a new item
This opens a New item pop-up window to fill in the item details
Fill in the pop-up window to create a new item:
Item Icon - upload a photo of your product
Active switch-on button - items that are selected as inactive are not displayed to the applicant on the course and cannot be purchased
Name
Copy members from button - you can copy members from certain Groups, Events, or members with a certain role. The list of copied members will be displayed on the Assignments Tab, i.e. the item will be assigned to these users
Item Type - needs to be chosen from a drop-down list
Description
Price - amount value in the currency of your tenant country. The entered price will be listed on the Pricing tab
Survey template - if needed, you can choose a predefined set of participant questions that the course applicant needs to answer. Please check the following link for more details on this topic:
Once you have entered all the data press 💾 the Save button

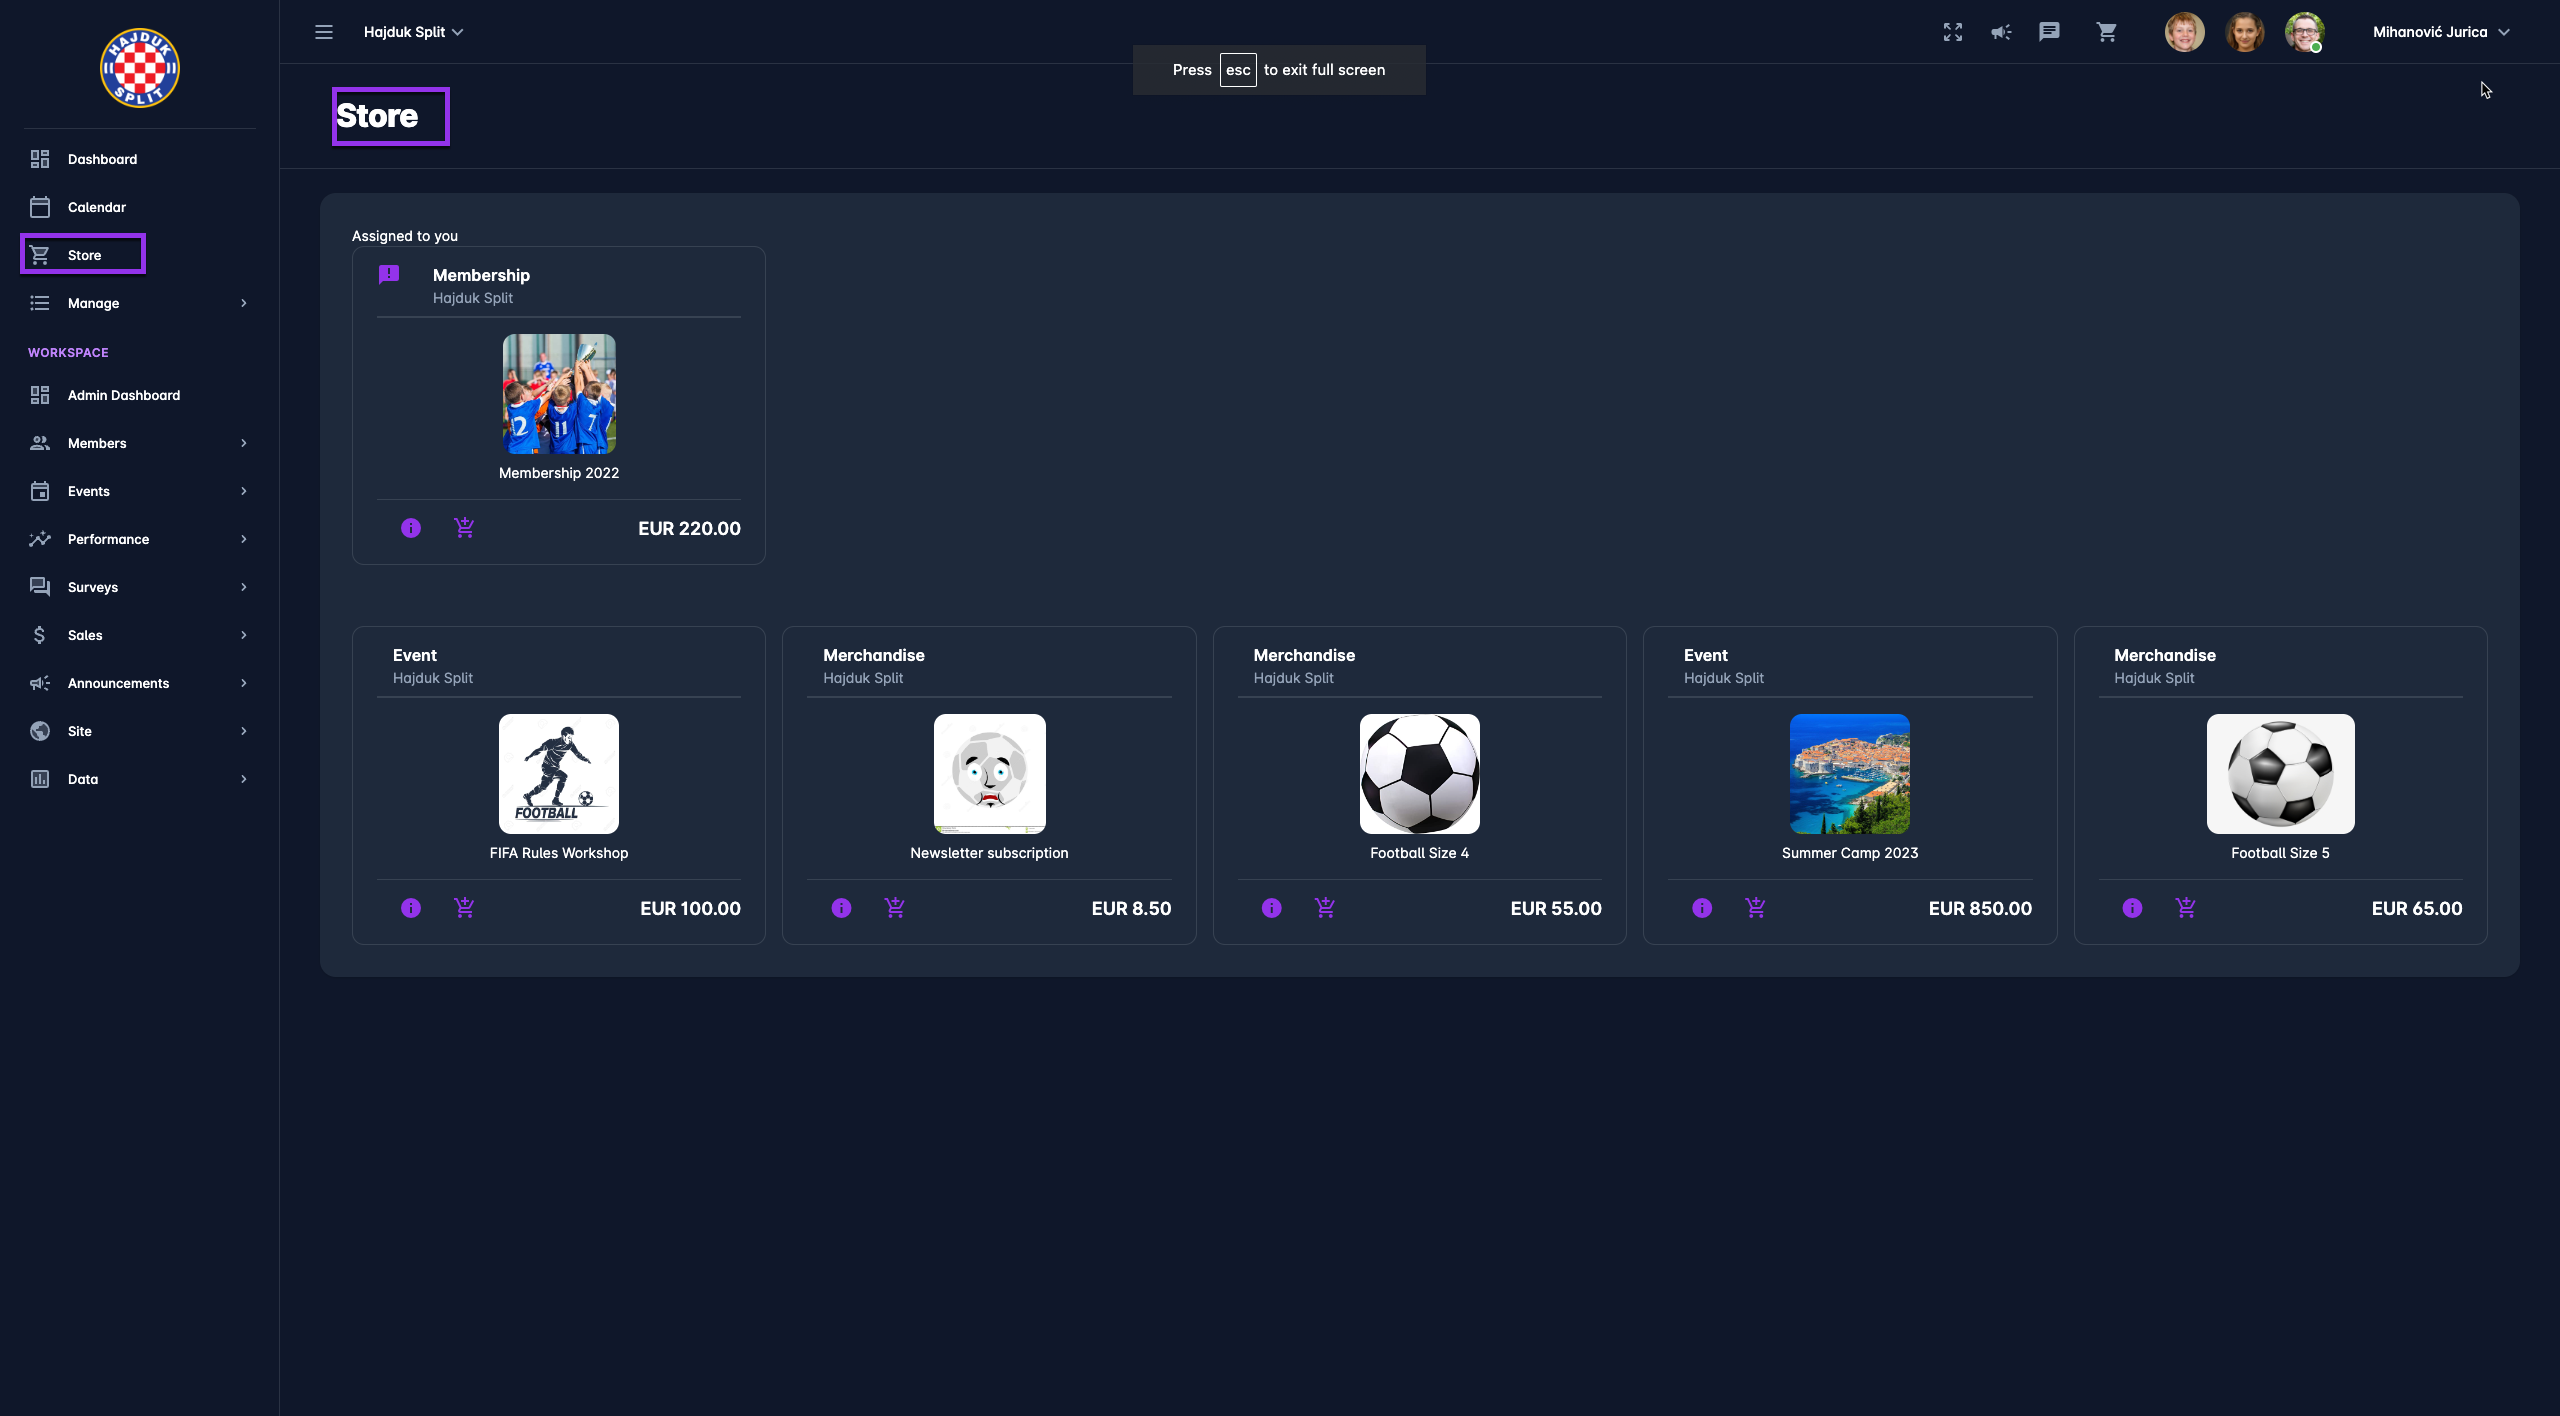
☑️ Once the item is saved it will appear on the Store menu (available for purchase to members).
Furthermore, once the item is saved and created it will be displayed on the Items menu, where it can be further edited and configured.
To review and edit the Item:
On the left nav bar select 💲Sales → 🛒 Items
This opens the Items menu which contains the list of events from your workspace.
Hit Item from the list
This opens an Item Page with the following tabs:
DETAILS
PRICING
ASSIGNMENTS
SURVEY
DETAILS TAB
The details tab contains General info that you have added while creating the item: Item Icon, Active switch-on button, and Description. In case you want to edit entered details:
Hit the Edit button at bottom of the page
Hit the Save button to save your changes
PRICING TAB (SPECIAL PRICES)
On the pricing tab, you can define special prices that are valid for a certain period (such as early bird prices) or special prices (e.g. discounts) that are visible only to members who have this price assigned to them.
To add new pricing:
Open the item and access the Pricing Tab
Hit ➕ New Price button in the upper right corner
This opens a New price pop-up window to fill in the item details
Fill in the pop-up window to create a new special price
Select a visibility option:
Visible to “All” - everyone will be able to see and purchase the item for this price
Visible to “Assigned” - only the users that have this price assigned will be able to purchase the item for this price
Select Amount
Select “Valid from” and “Valid to” dates - take into account that items will available for purchase at this price only during the selected period
Select Min number of recipients
Once you have entered all the data press 💾 the Save button

ASSIGNMENTS TAB
The Workspace Administrators you are able to assign a specific item to specific users. The members who are assigned a special price will be listed on the Assignments Tab. Also, when accessing the Store, the members will see the Items assigned to them highlighted on top of the Store.
To assign the item to members:
Open the item and access the Assignments Tab
Hit ➕ the Assign button in the upper right corner
This opens an Item Assignment pop-up window to fill in the details
Select the Member(s) to who you are assigning this price to
If you have prices with visibility=Assigned defined, then you will be able to select one of those prices
If you assign an Item to Members, but do not set an Assigned price, then the Item will be highlighted in store for that Member, but the price will remain the default/standard one.
Press 💾 the Save button
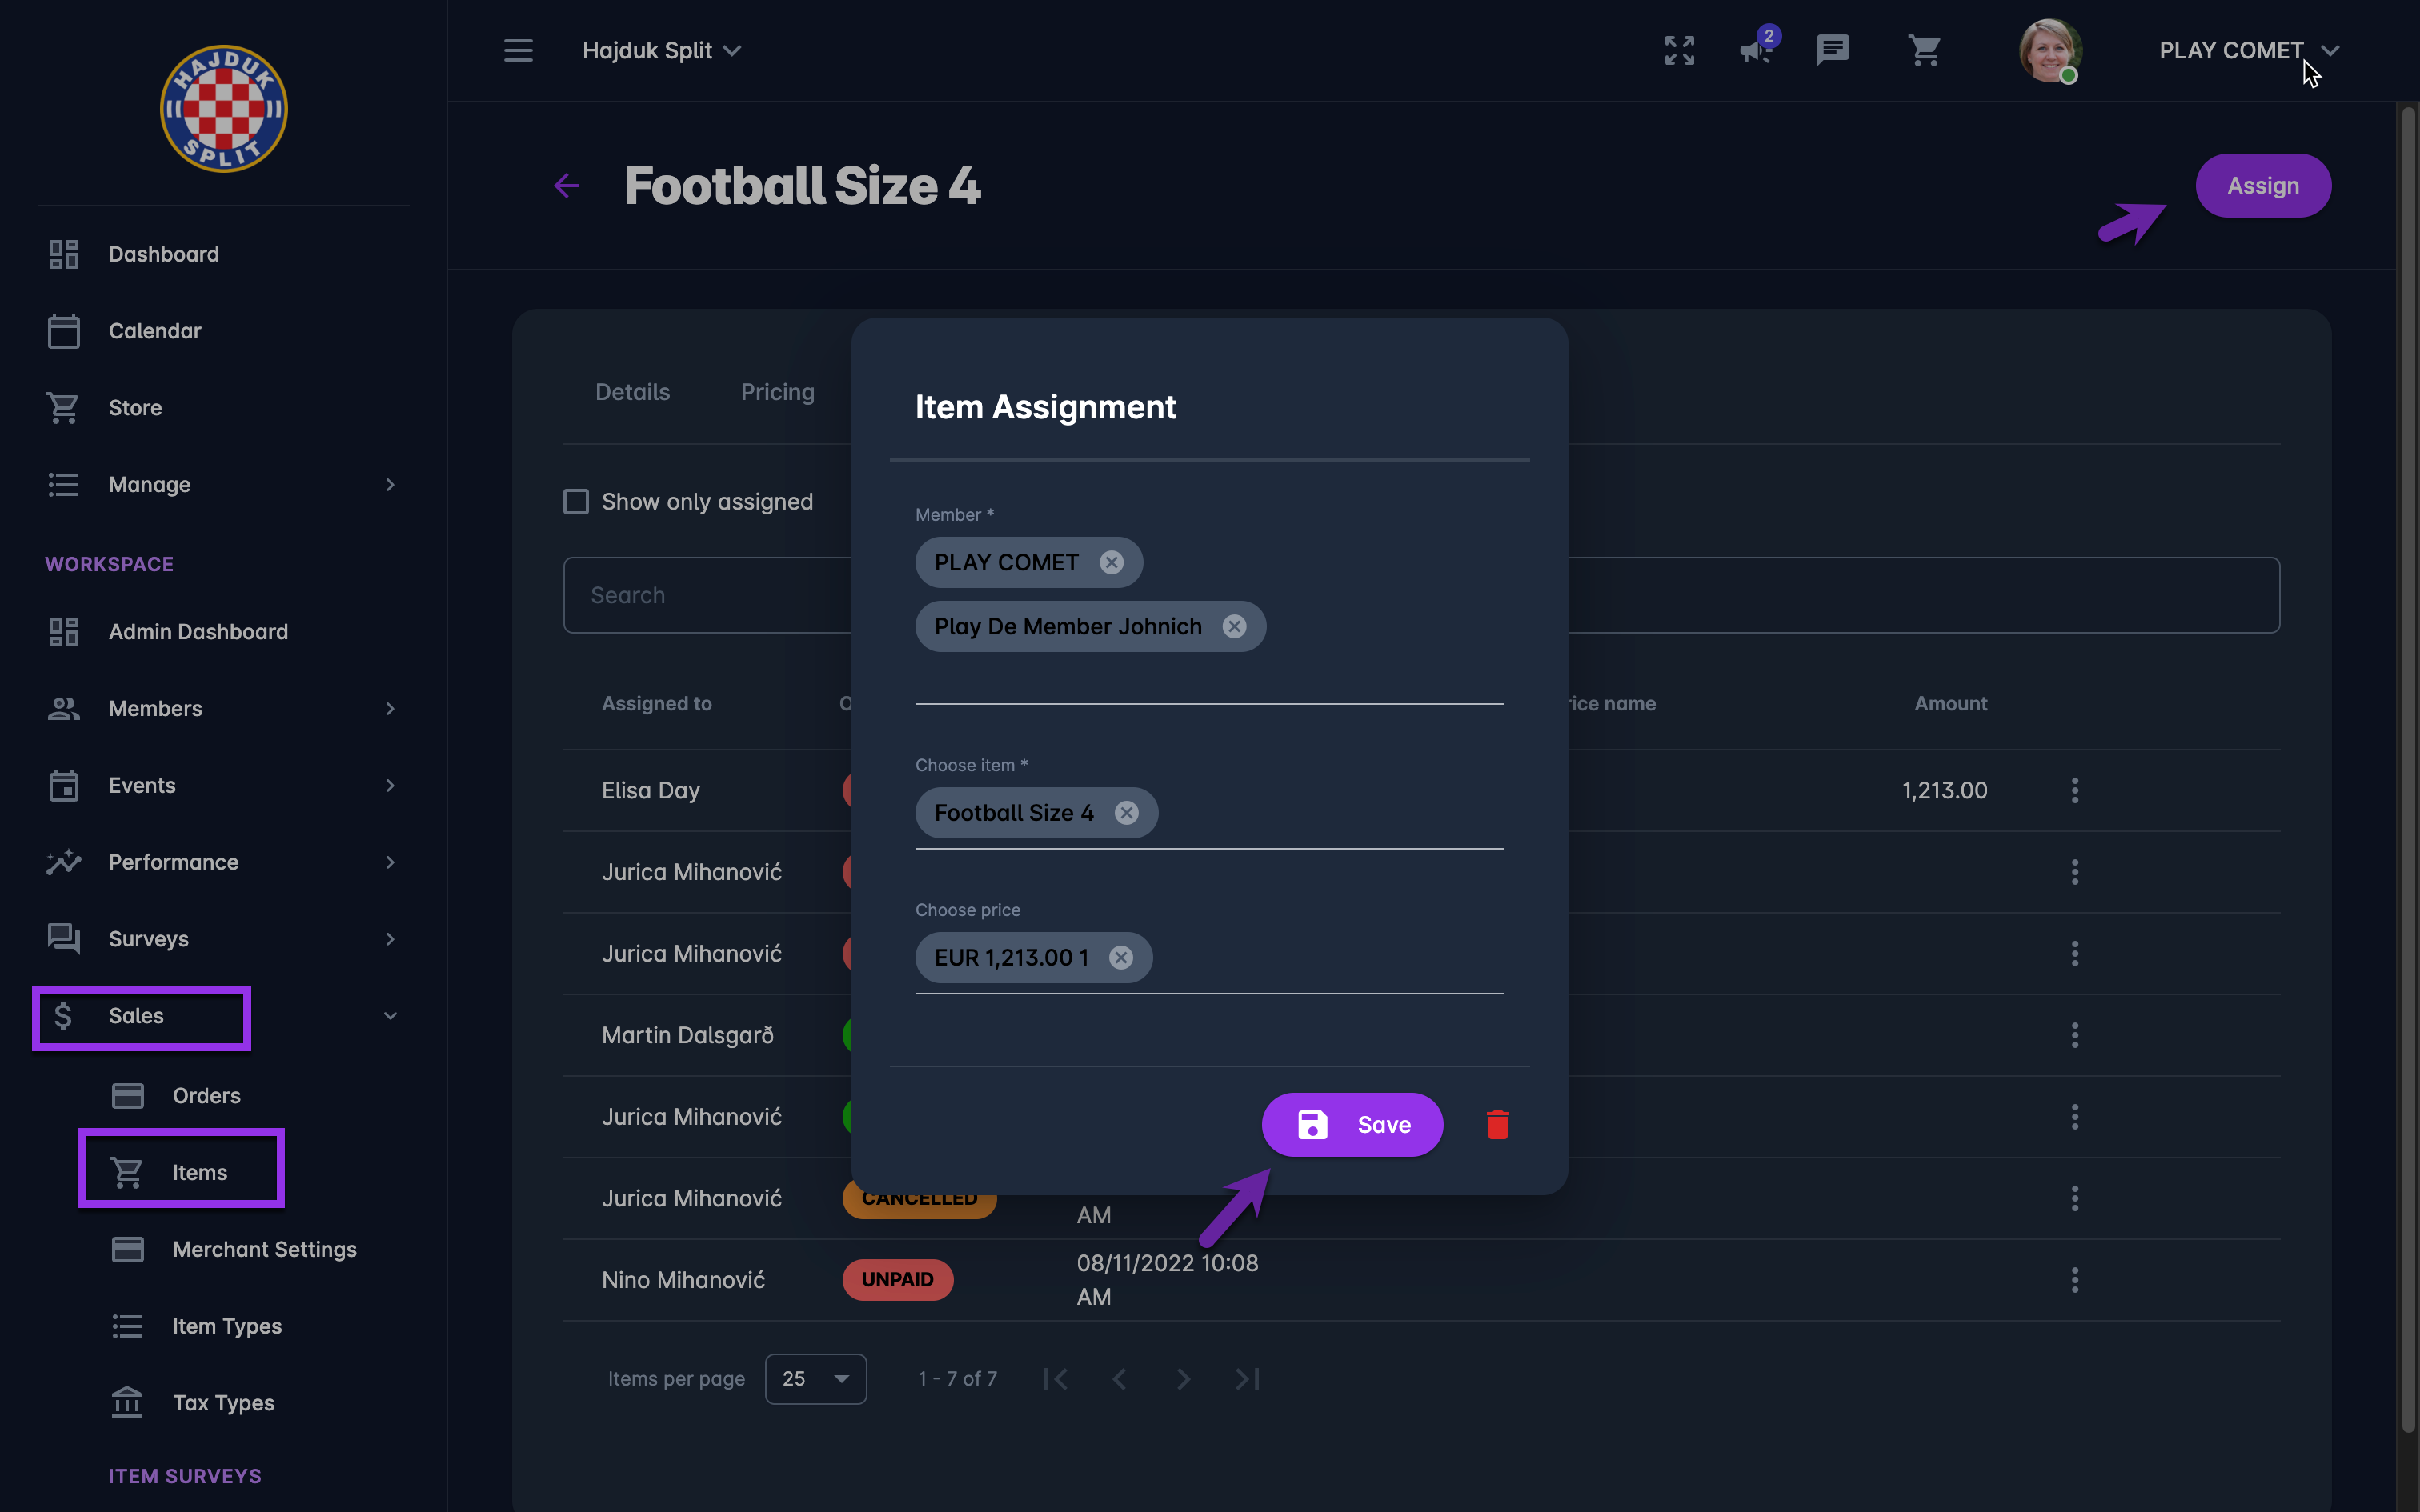
💡 If you have selected copied members from certain Groups, Events, or members with a certain role when you have created the item, the list of copied members will be displayed on this tab
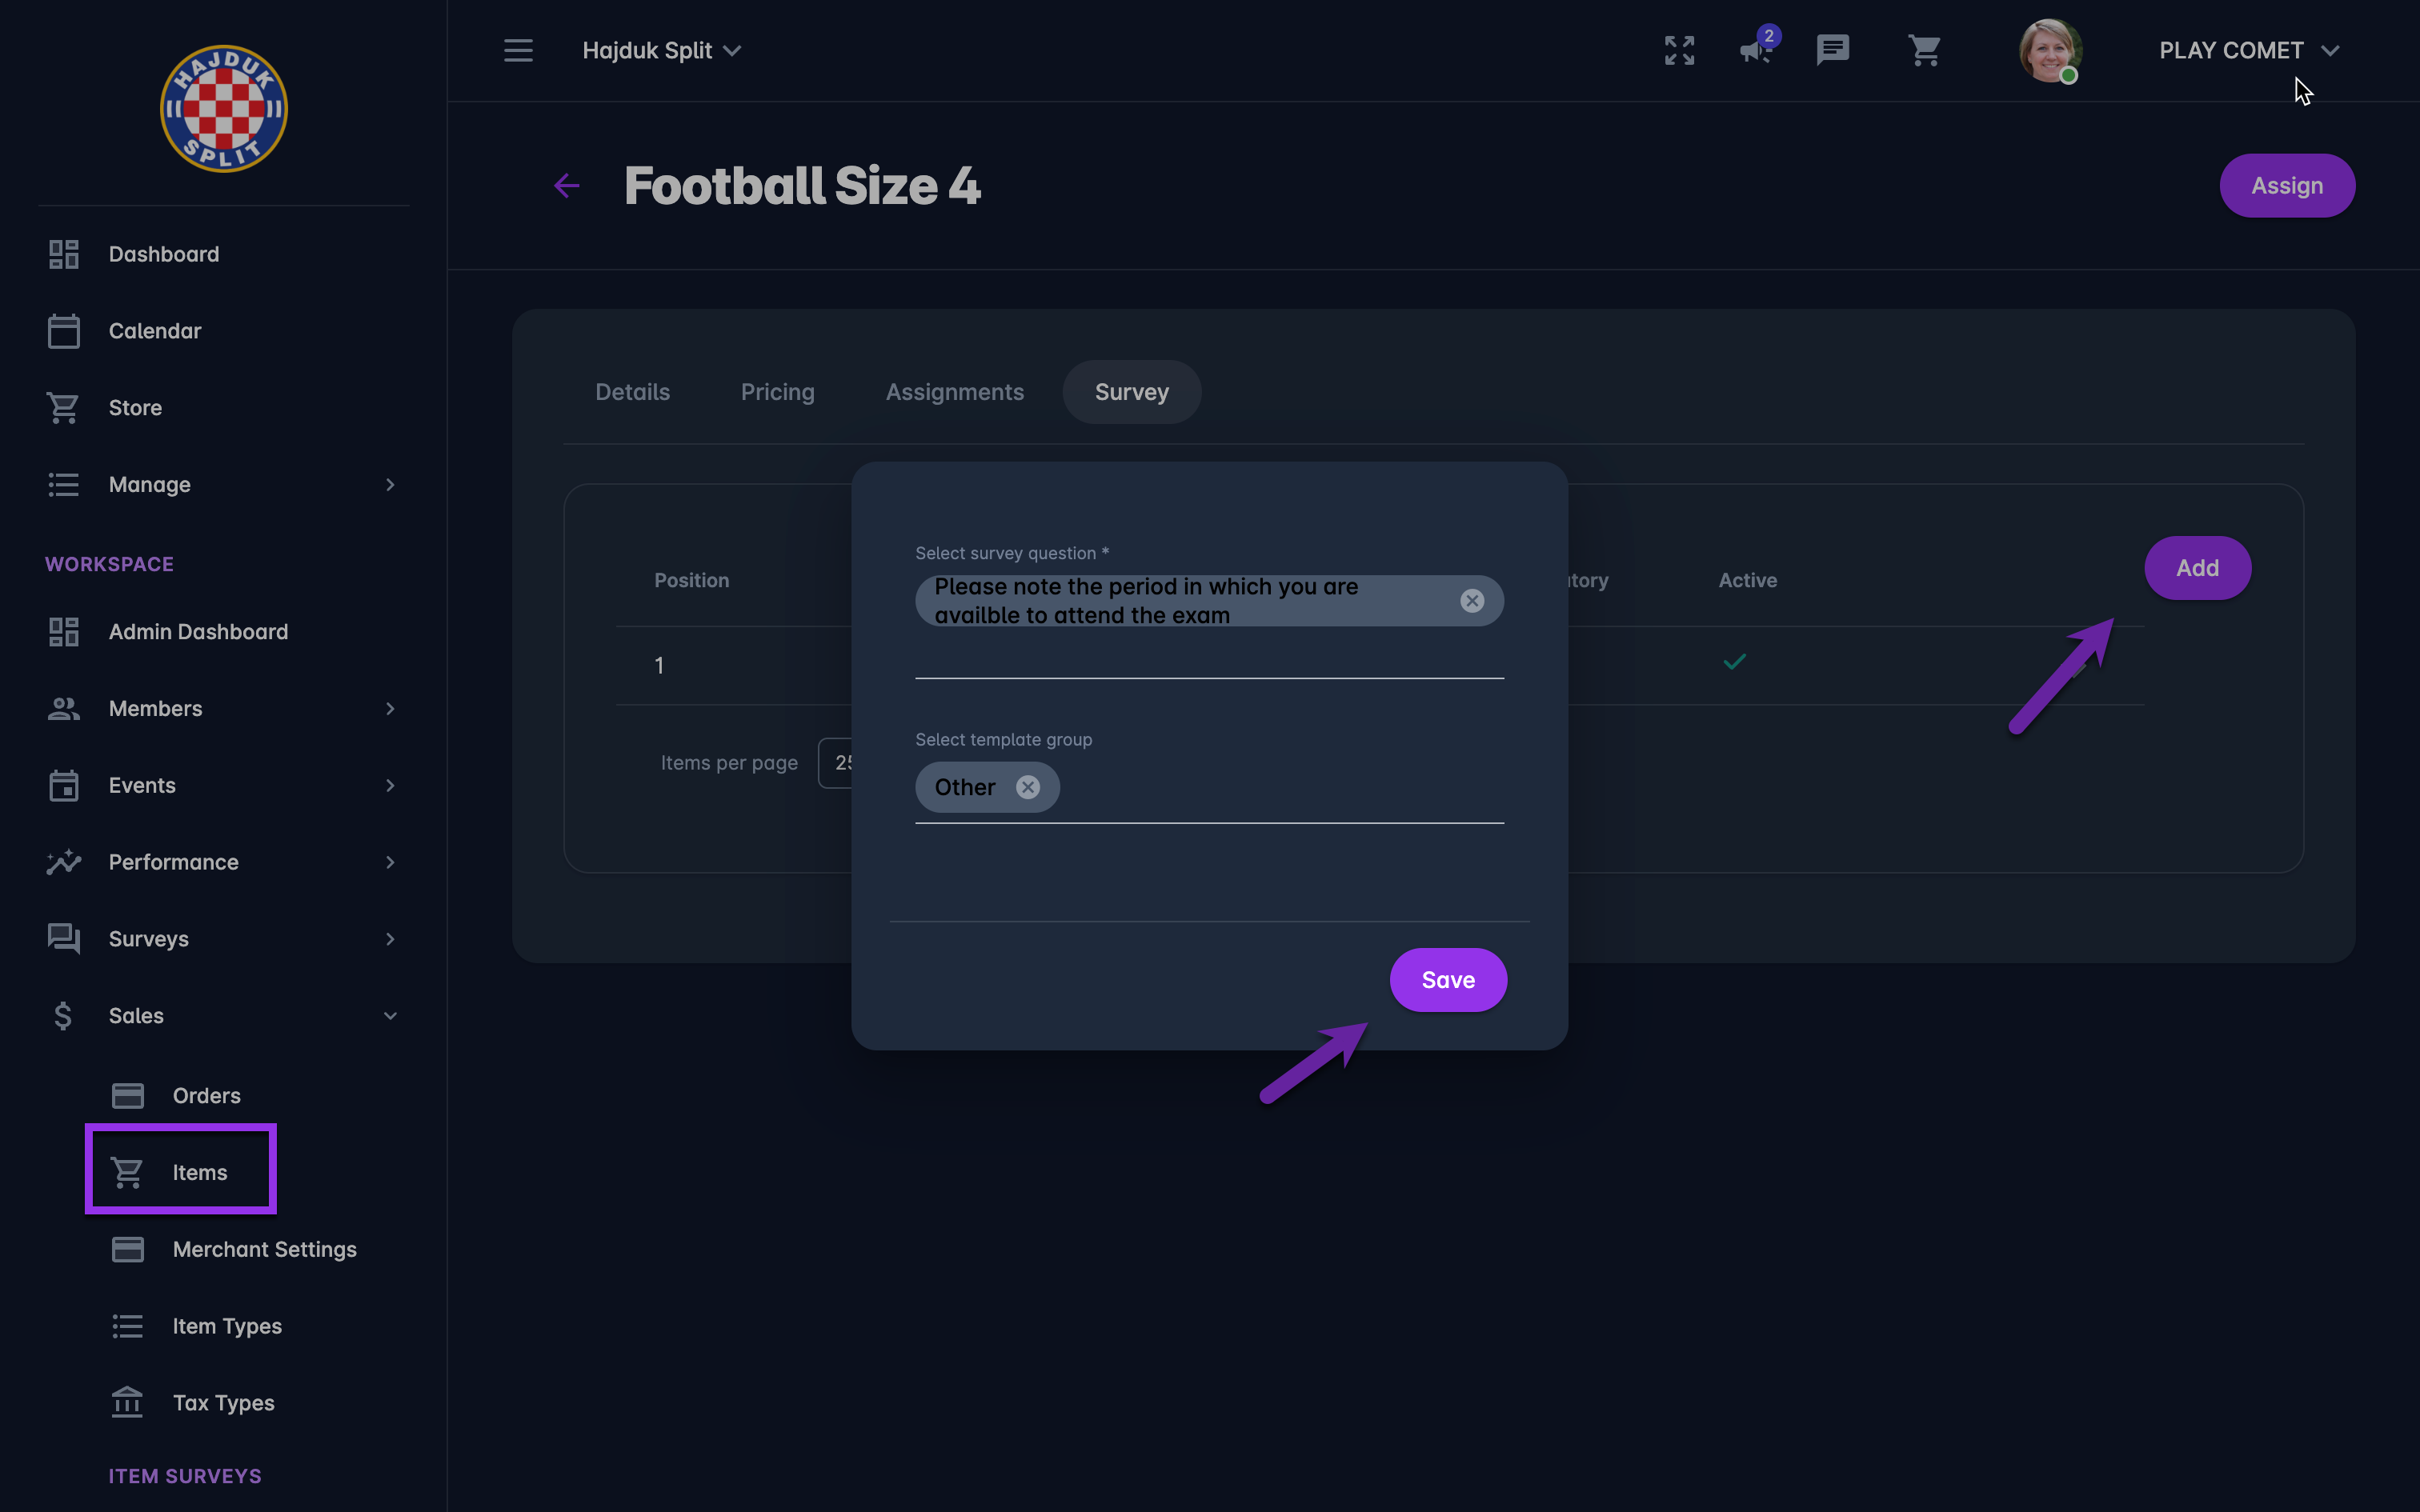
SURVEY TAB
COMET Play Administrators are able to define Item Surveys, i.e. the form /set of questions that need to be submitted by COMET Play Member prior to purchasing an item.
To add Item Item survey questions to the item
Open the item and access the Survey Tab
Hit the Add button in the upper right corner
This opens a Survey pop-up window select the details:
Select the Survey Question
Select the Template Group
Press 💾 the Save button
ℹ️ The created Item Survey will be displayed to the COMET Play members when purchasing the item/ adding an item to the chart