Within each category, there are configurable evidence types. Evidence Types can be Check (Yes/No), Single-line Text, Multiple-line Text, Document Upload, Date, Dropdown list of pre-defined options, etc.
Licensing Evidence consists of predefined units that provide proof for the required criteria, i.e., evidence used as values or proofs for these criteria. This feature optimizes the licensing process as Licensing Administrators can define and configure the units needed to prove and submit validity for specific licensing criteria. Some examples of evidence include legal documents, club details, staff records, and photographs.
To preview Evidence that is already in the system:
-
Select 🔎 Evidence under the Configuration menu on the left nav-bar
-
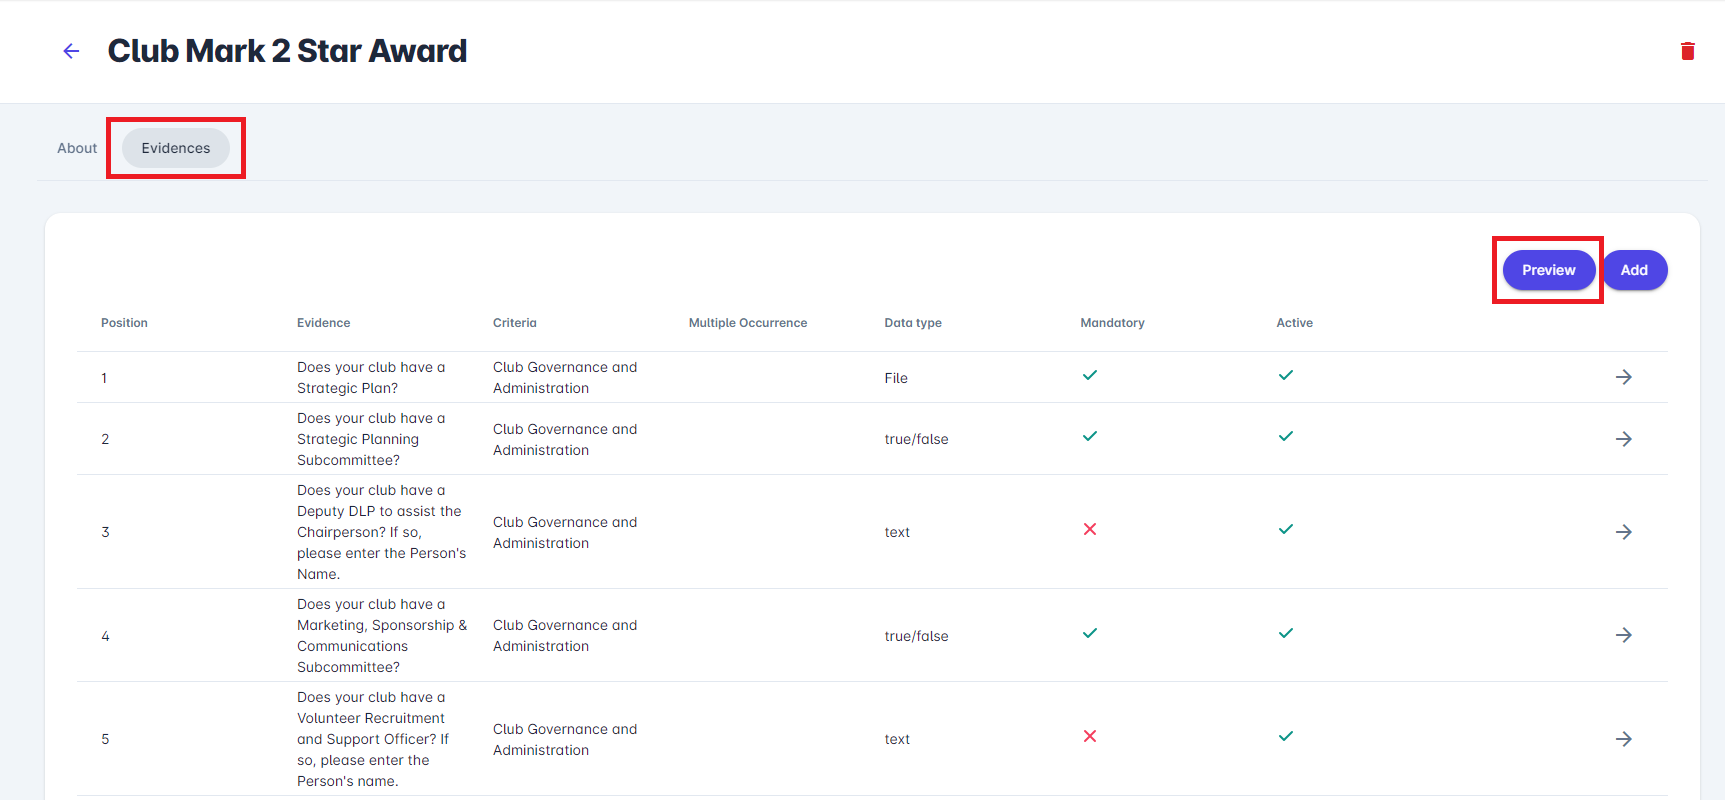
The list of all created Evidence is displayed in two tabs, Active and All. The list consists of the following details:
-
Name
-
Data Type
-
Description
-
The search box - use the search box to search the evidence that is entered into the system
-
Create Evidence
-
Click on the Add button in the top right corner to create Evidence
-
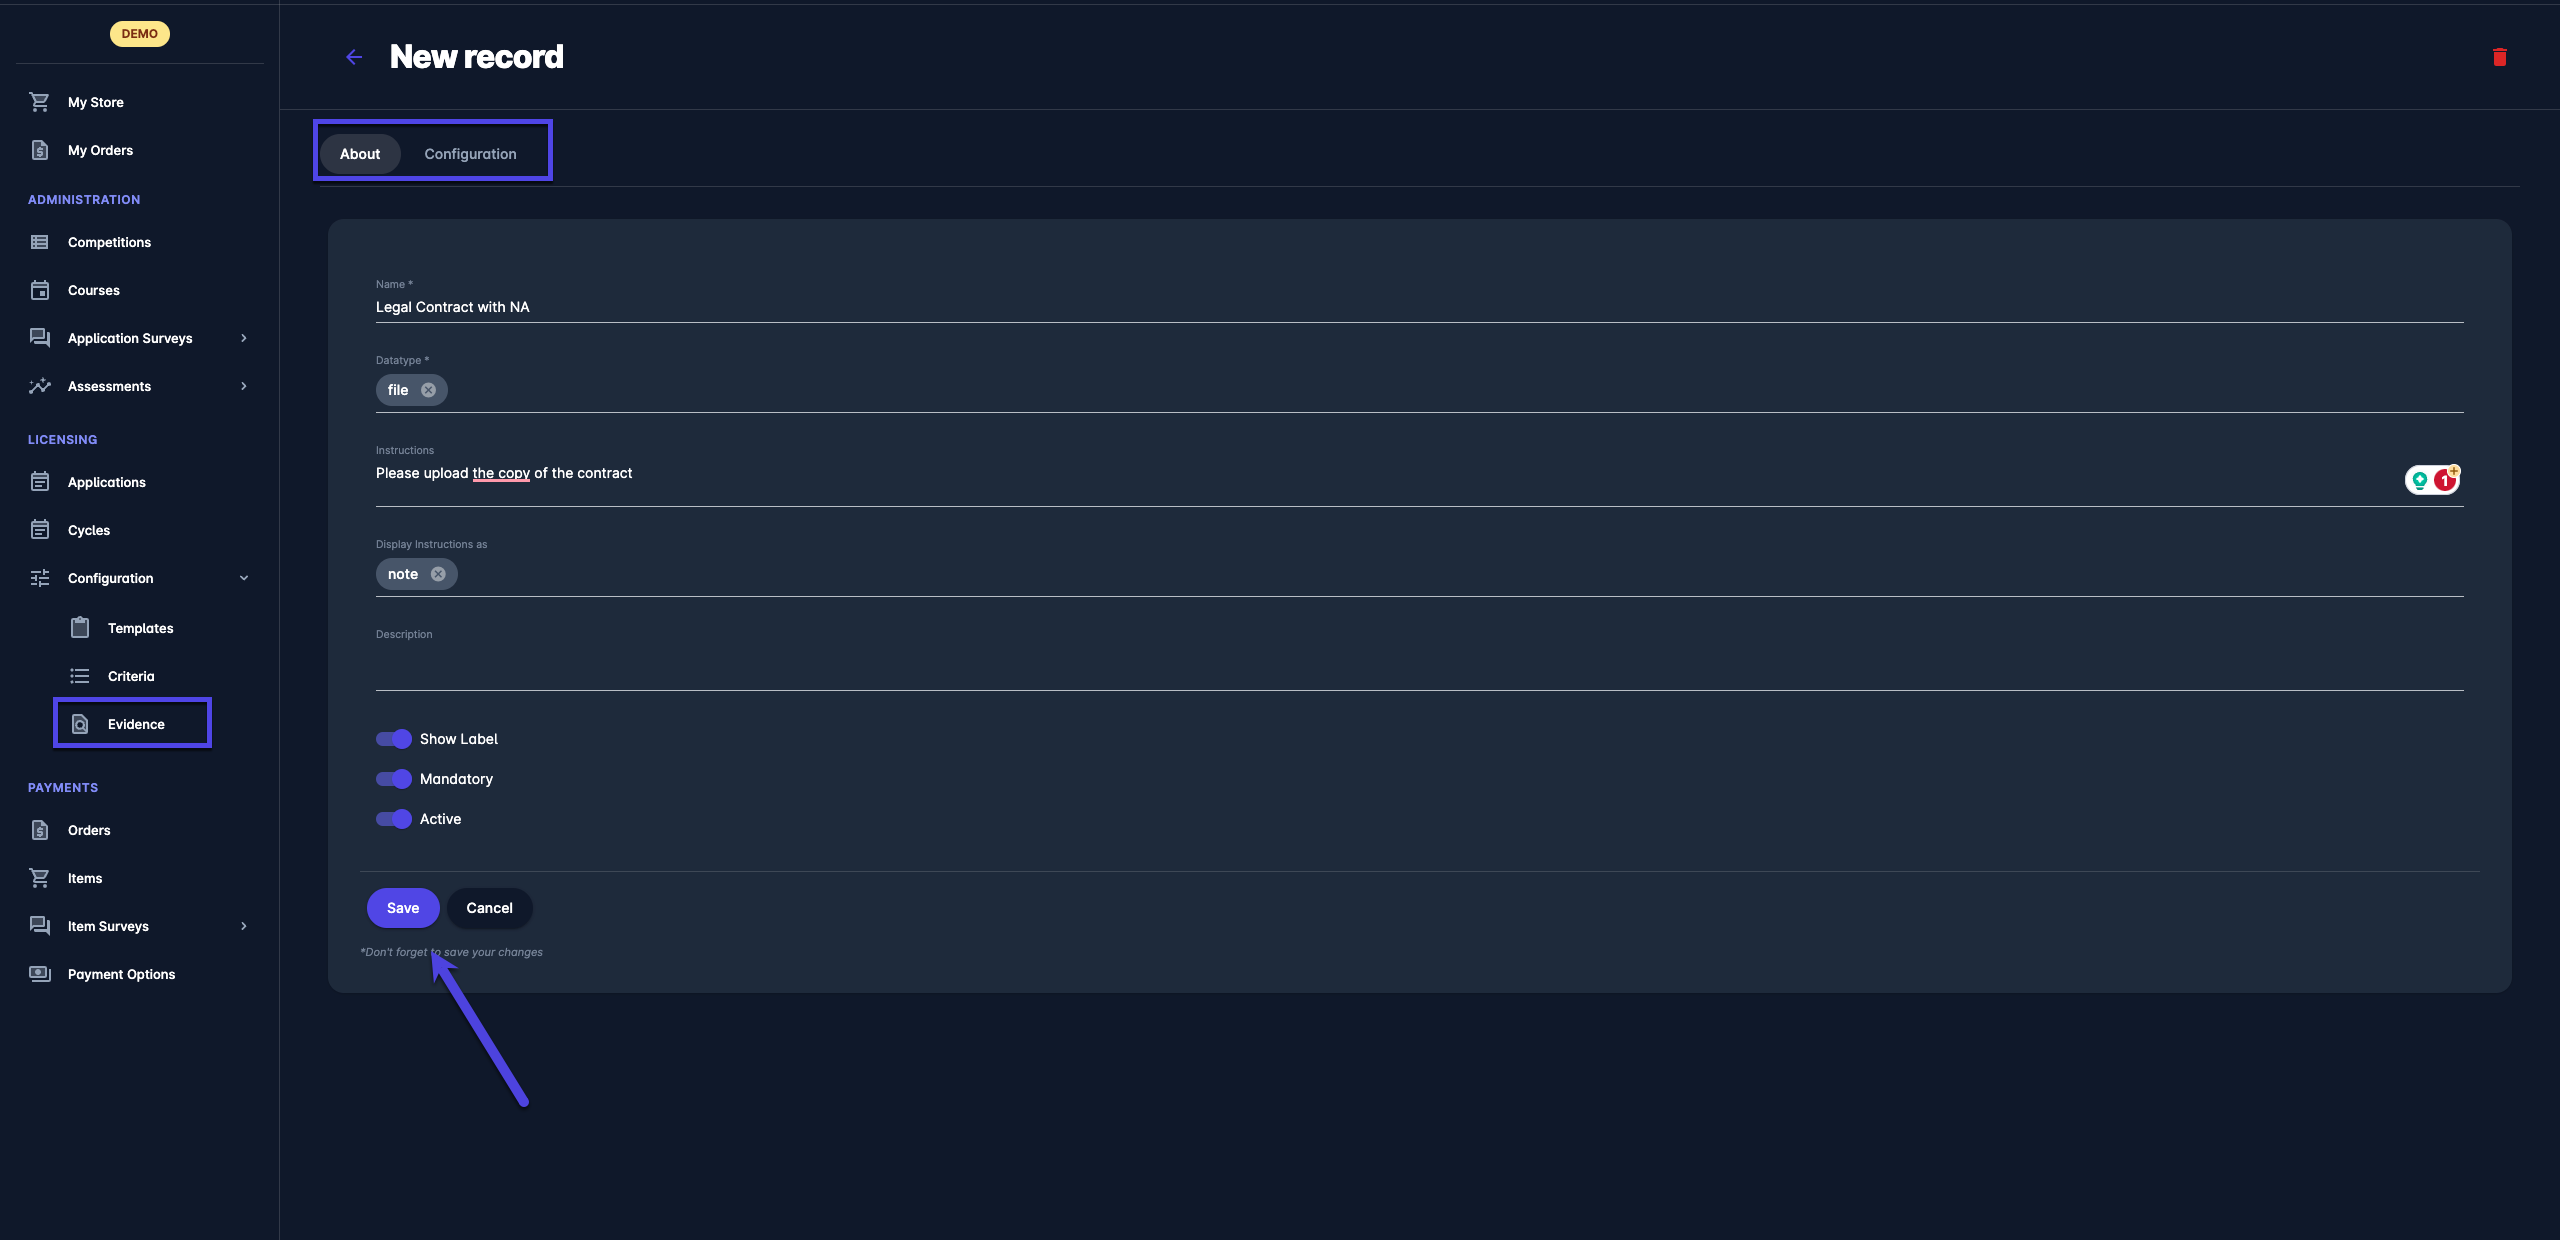
This opens an Evidence dialog to fill in the details:
-
About tab:
-
Name
-
Data type - choose between:
-
integer, decimal, text, date, datetime, true/false, list, file, or
-
automatic evidence (Data Snapshot):
-
Please note that if the “automatic evidence” is selected as the data type, choose a data snapshot report/precision that will be connected to that question (e.g., Person Registrations, Players Transfer report)
-
Please note that when the applicant is submitting the “automatic evidence”, the Create snapshot button will be displayed
-
Once a “snapshot”/“automatic evidence” is created, it can be edited, deleted, or recreated
-
-
-
-
Depending on the data type you have selected, you can set the validations for entering data. E.g.:
-
If the integer is selected as the data type, on this tab, you will be able to configure the min and max values
-
If the text is chosen as the data type, on this tab, you will be able to set the maximum number of characters
-
If the “automatic evidence” is selected as the data type, on this tab, you will be able to set the snapshot report/precision
-
-
Instructions
-
Display type → display instructions as a hint or note
-
Switch on buttons:
-
Mandatory - you can choose if the evidence is mandatory, and the application cannot be submitted if this entry is not filled out.
-
Show label - you can choose if the Evidence should be visible or hidden from the end-user on the form and the printed PDF.
-
Active/Inactive - only evidence that is set as active can be used for licensing or on templates
-
-
-
Once you have entered all the data, press the Save button.
-
2 Configuration tab:
-
Depending on the datatype you selected in the previous tab, you can configure the data entries for the evidence on the configuration tab. E.g.:
-
If “date”/ ”DateTime” is selected as the data type, on this tab, you will be able to configure the date interval and text decoration (e.g., the color displayed in the calendar)
-
If text/ list is selected as the data type, on this tab, you will be able to configure the text-decoration and the color
-
-
Once you have entered all the data, press 💾 the Save button
-
Evidence can be stored in the system without needing to fill out the configuration tab.
Preview
The Form Preview feature enables Administrators to conveniently visualize how the form will look to the end-users who will be entering the data.
To see the Preview, i.e., in the Club Licensing tab, navigate to Evidence:
-
select Cycles - select a Cycle from the list
-
from here, click on Categories - select a Category from the list
-
click on the Evidences tab.
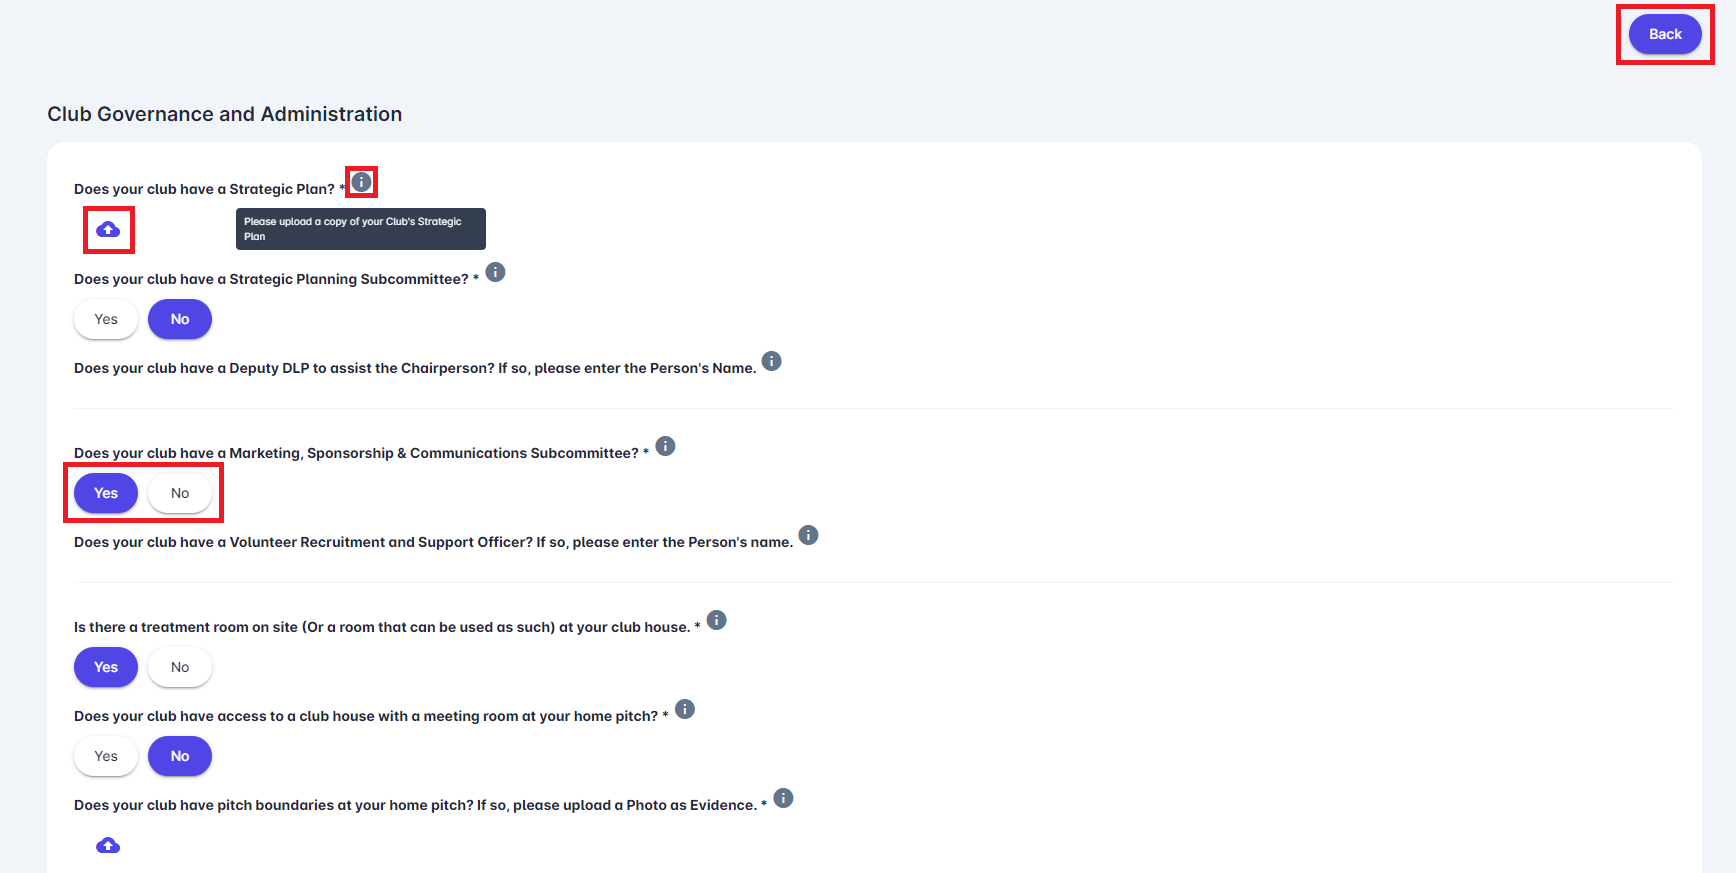
The following photo presents an example of a form.
To see how the form will be presented to the end user, click the Preview button in the upper right corner of your screen.
This opens a preview version of your form. On this screen, you can view the final appearance of your form, including the Yes/No buttons, the cloud icon for uploading a file, empty lines, and Info buttons, all of which depend on the data type you have set as a prerequisite for entering the form.
Close the preview by clicking the Back button.