Once an item is created and assigned to a specific event, it can be edited, altered, and assigned to a specific applicant.
To edit an Event Item:
-
Open the Event screen and access the Items tab
-
Click on the Item from the list that needs to be managed
-
This opens an item window with the following tabs for item administration
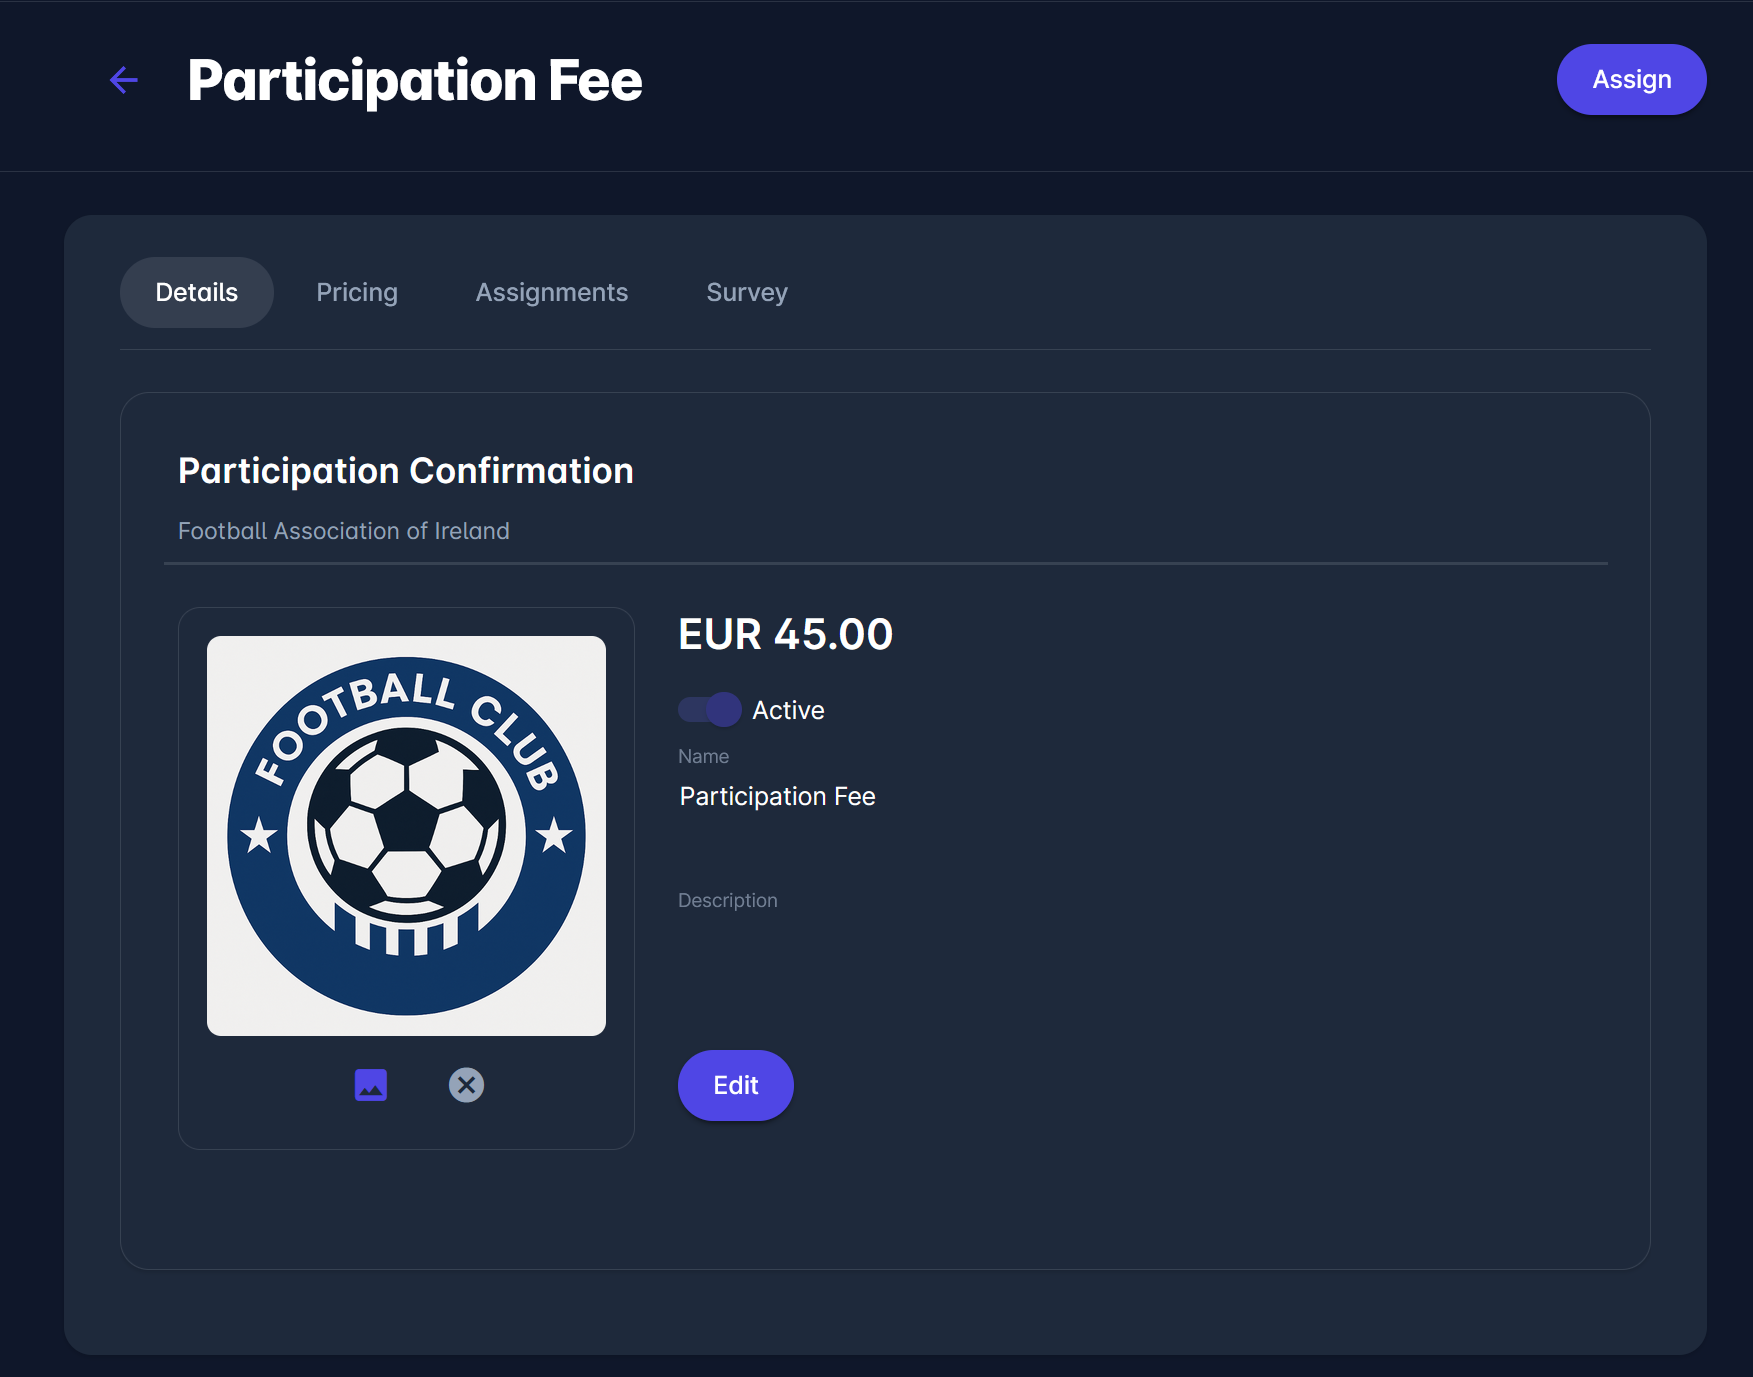
Details Tab
On the Details tab, you can update the following data of a created item:
-
Item Icon - upload a photo of your product
-
Active switch-on button - items that are selected as inactive are not displayed to the applicant on the event and cannot be purchased.
-
Name
-
Description
Click the Edit button to make changes to the Items' details. Once you have entered all the changes, press the Save button.
Pricing Tab
On the Pricing tab, you can update/edit the amount of the existing price and create new prices for the event. This feature of adding additional prices to items can be used for various scenarios, such as special prices for specific users, prices valid for a certain period, or special discounts.
The price form consists of the following data fields for managing pricing:
-
Visible to (All/Assigned):
-
If you select All, the item's price will be visible and available for purchase to everyone who can access the Event profile.
-
If you select Assigned, the item's price will be visible and available for purchase only to the users/event applicants to whom you assign this event. Only prices that have “Assigned” selected in the “Visible to” field can be chosen as item prices for the Assignments
-
-
Active switch-on button - items that are chosen as inactive are not displayed to the applicant at the event and cannot be purchased.
-
Name
-
Amount - value in the currency of your tenant country
-
Valid From/Valid to - take into account that if you define this field, the price will only be active in this time interval
-
Min. number of recipients
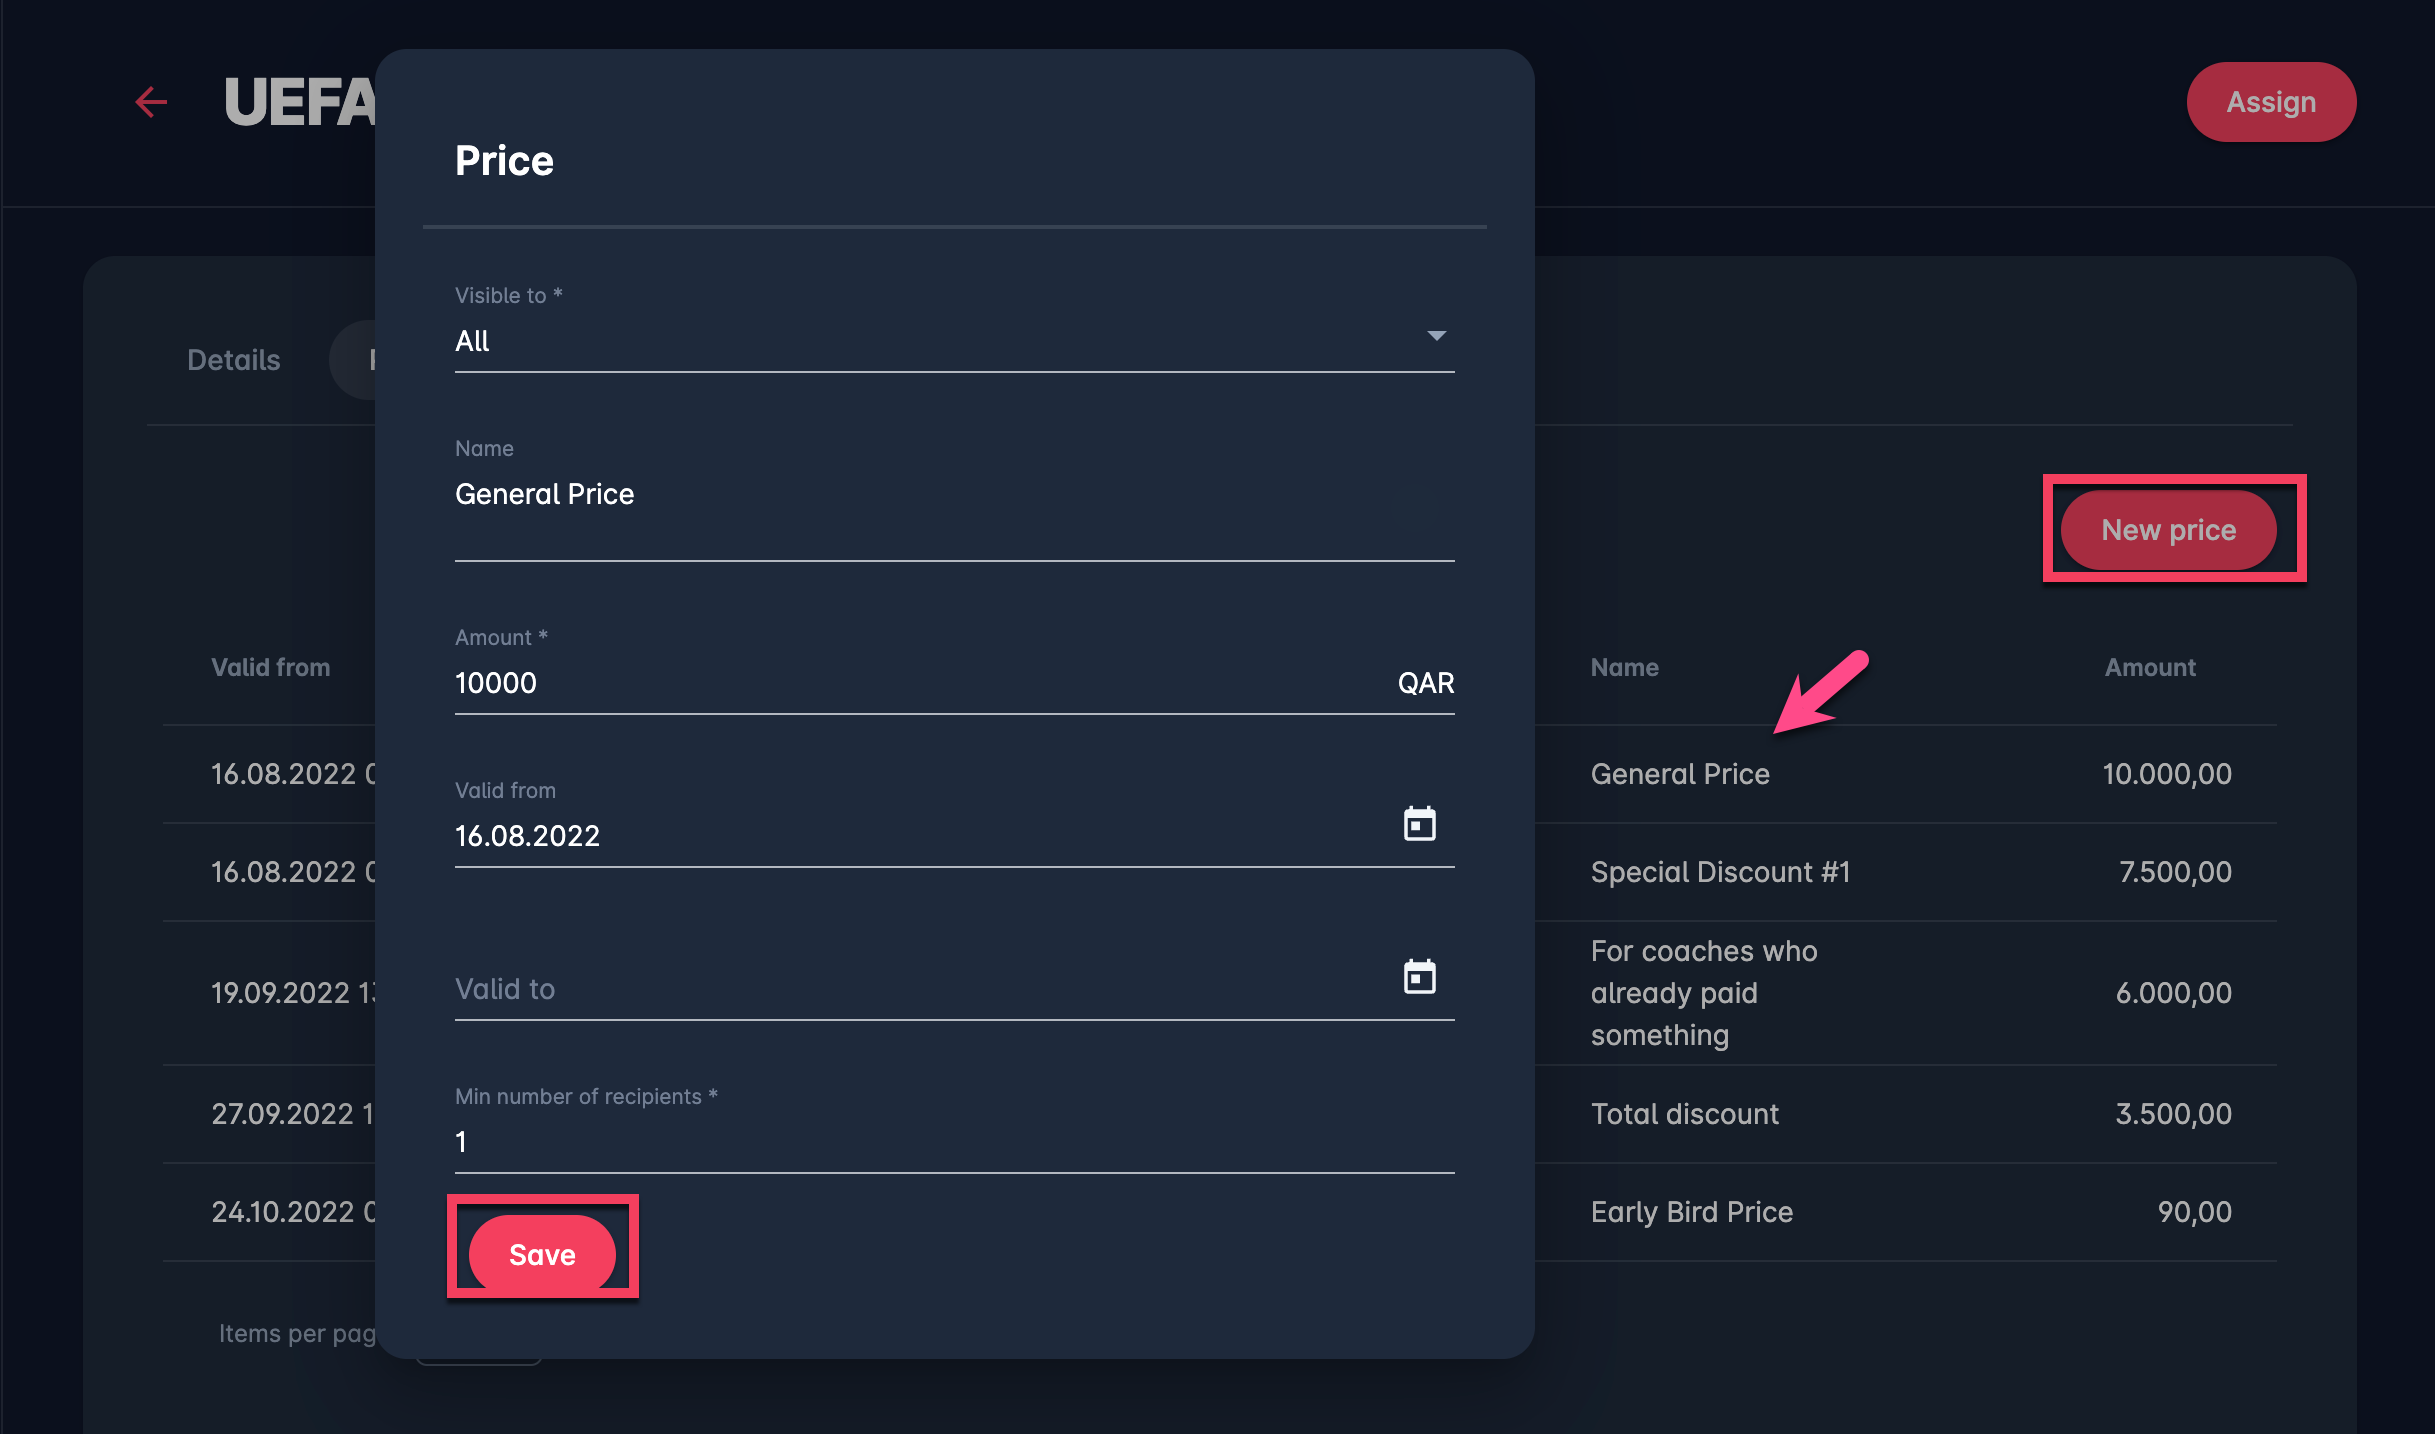
Click a price in the list to edit an existing price, or click the New Price button to create a new price for the item. Both actions open a Price pop-up form with fields to enter the data mentioned above.
Once you have entered all the changes, press the Save button.
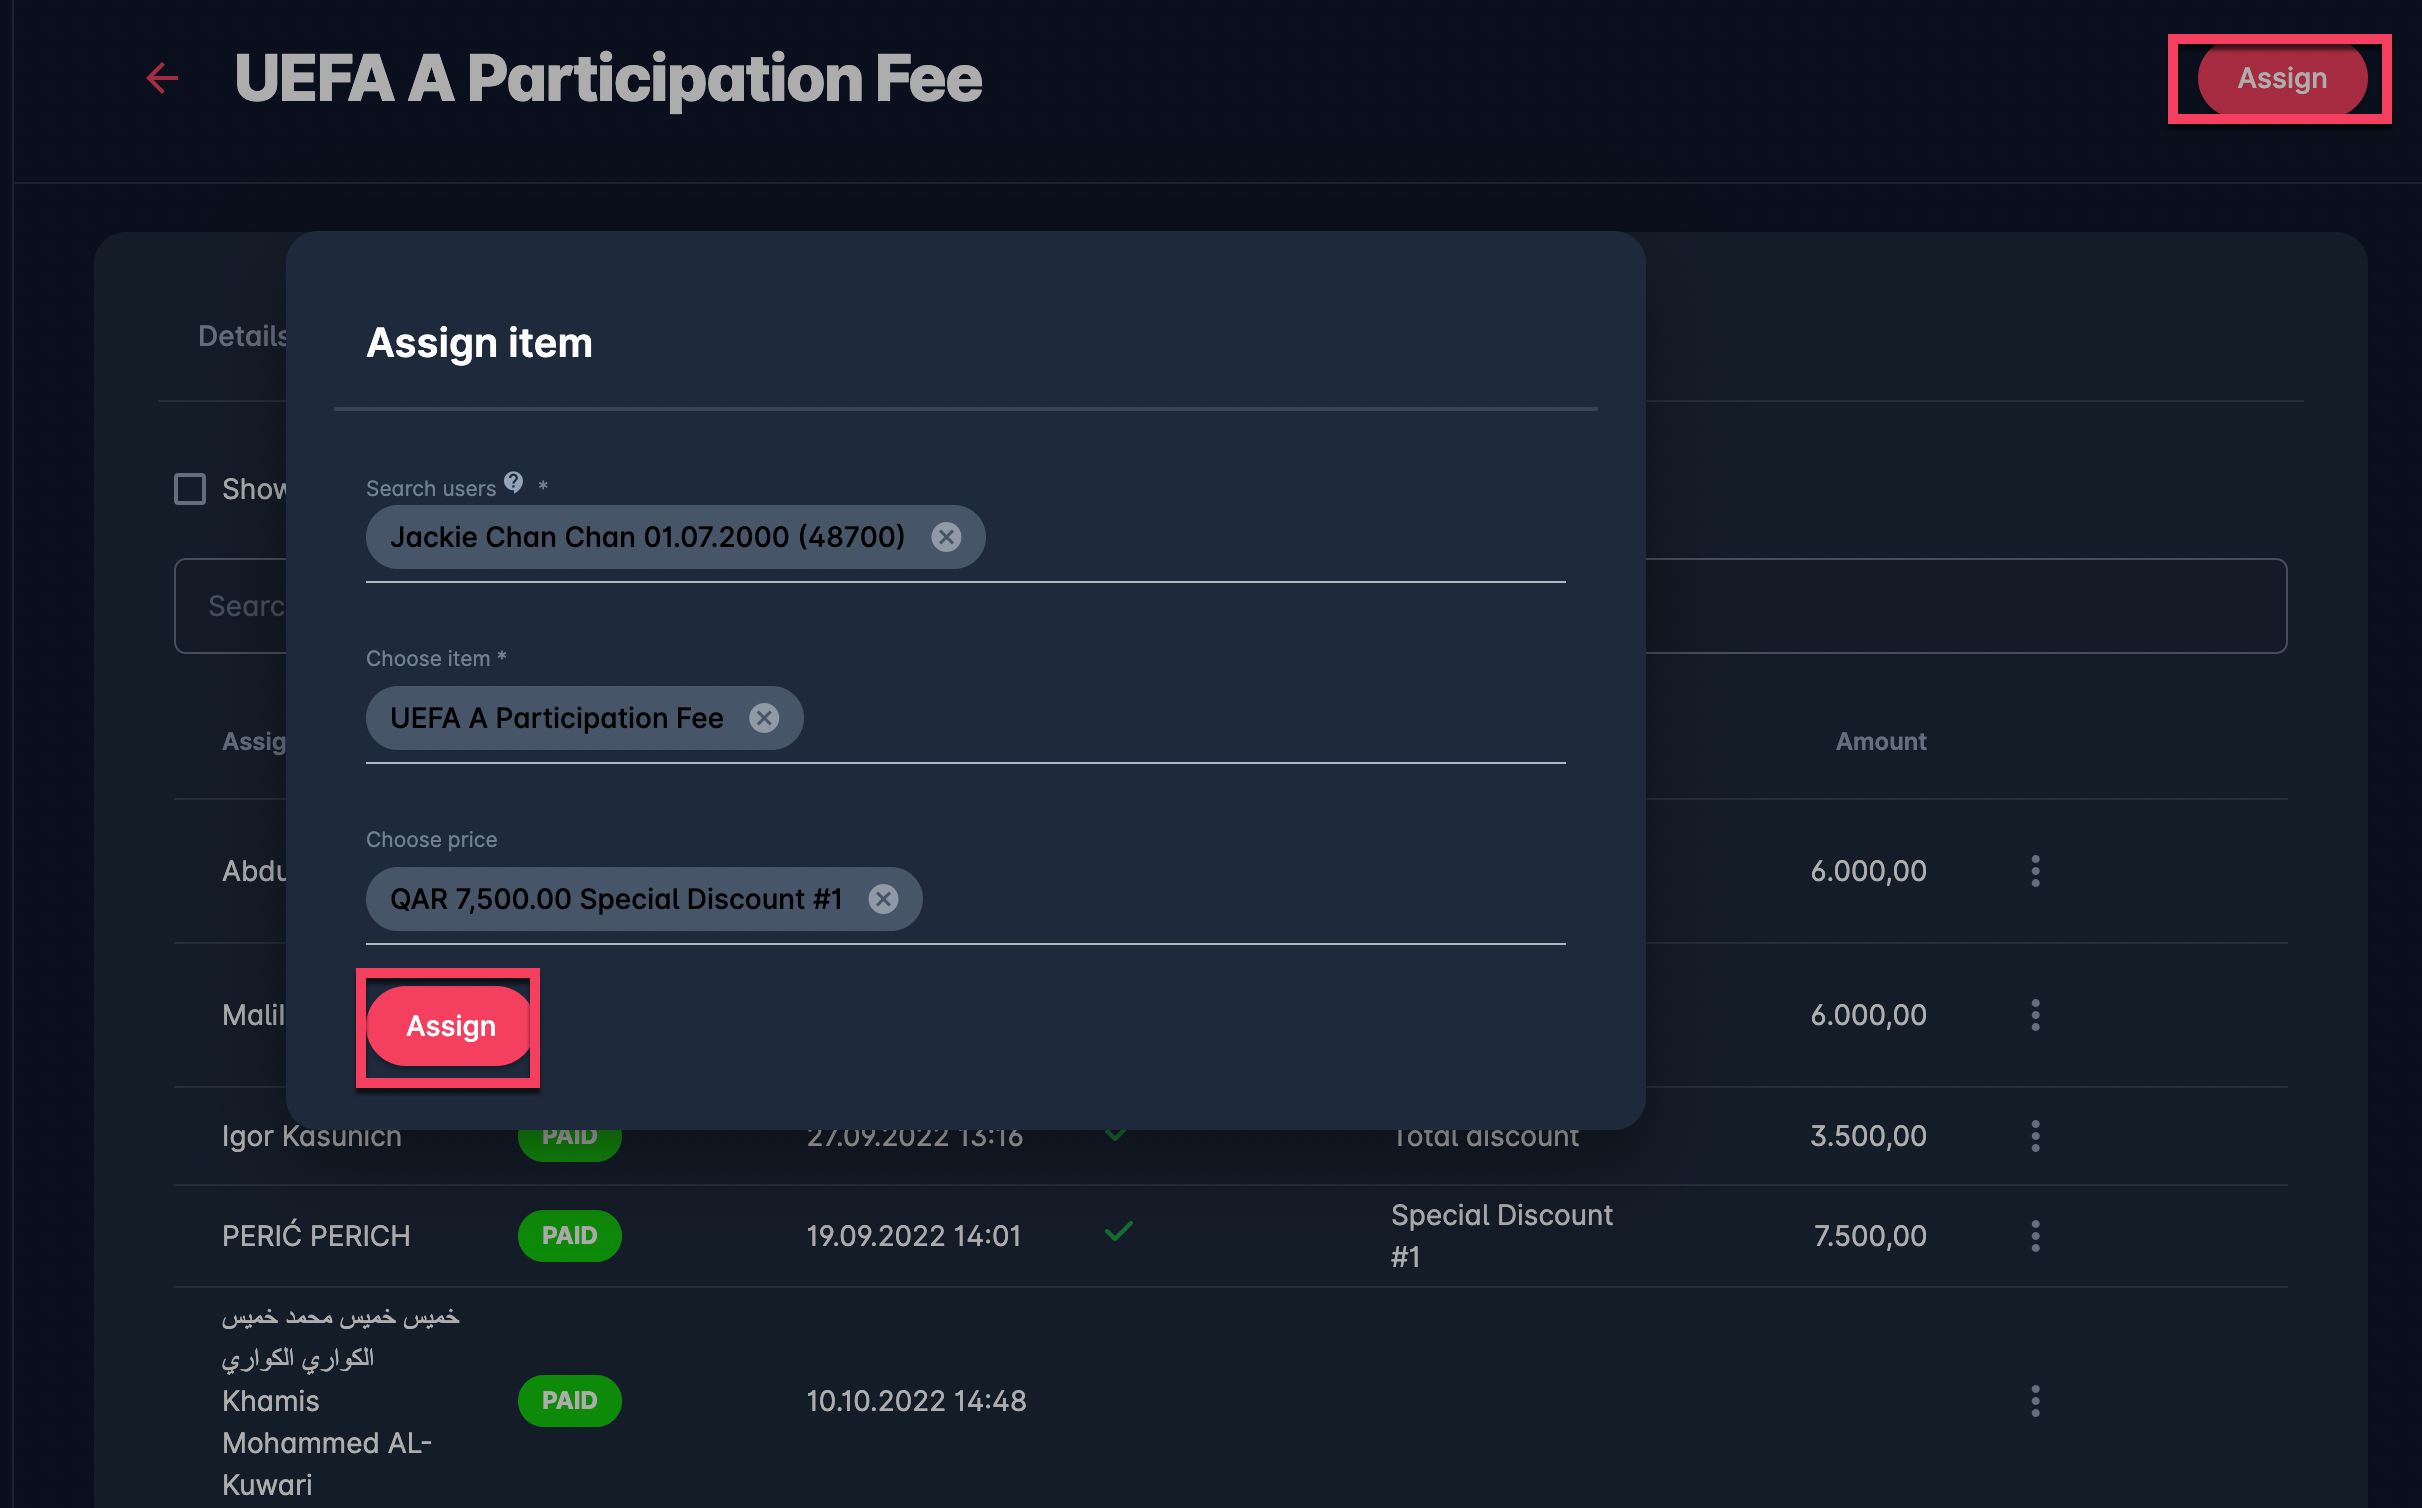
Assignments Tab
On the Assignments tab, you can review the payment status, edit the assigned price, and create new assignments for the event items. You can use this feature to assign an Item, with or without a price, to a specific User.
Click on the assignments from the list to edit an existing assignment, or click the Assign button to assign the event item to the user. Both actions open a Price pop-up form with the entries to fill in the following data fields:
-
User - choose a user from the COMET system to which the item needs to be assigned
-
Item - select an item that needs to be assigned
-
Price - select the price from the drop-down. Please note that this drop-down contains the prices defined on the pricing tab. This field is optional; items without a price can be assigned to event applicants.
Once you have entered all the changes, press the Save button. Once the item is assigned, the Seminar Participant will be able to see the Assigned Price on the Event page.
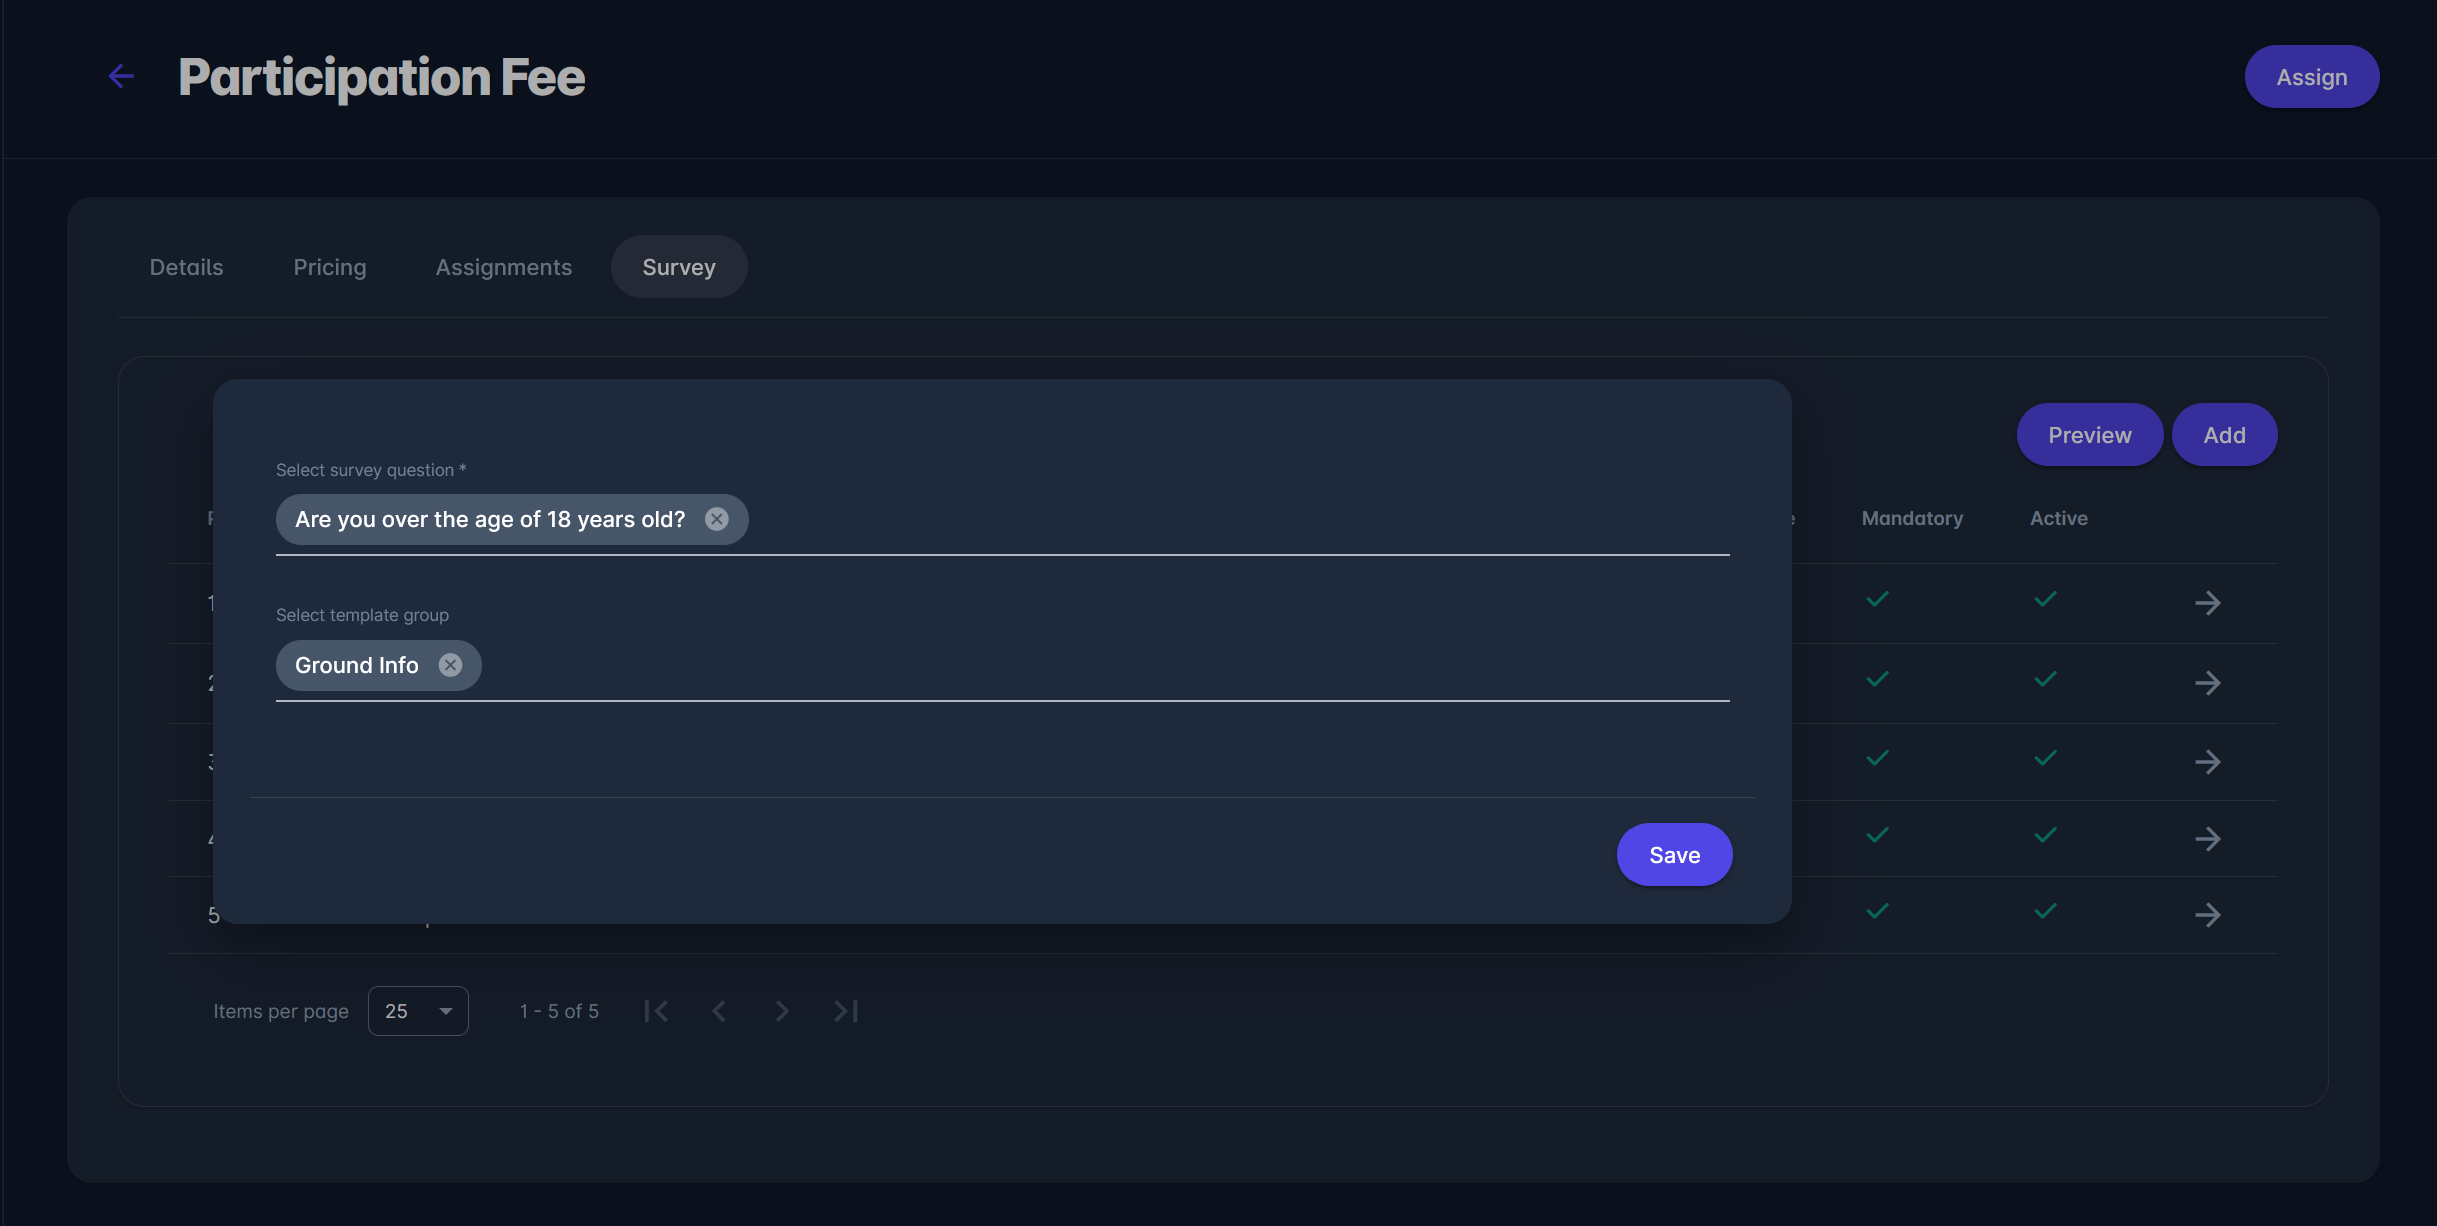
Survey Tab
On the Survey tab, you can review the Item survey questions or add a new survey question. This feature is used when applicants need to complete a specific survey form (i.e., answer the questions/provide specific info) before purchasing an item.
Click the Add button to add a new Question to the item survey, or click on the arrow next to the question from the list in the second panel to edit an .
Both actions open a question form with the entries to fill/edit the following data fields:
-
Survey question - needs to be selected from the system. Please consider that in the Payment module
-
Position - define the position of the question in the survey form by entering the number input
-
- select the template group if the group is defined in the Payment module
-
Mandatory Switch - switch on this button if the question is needed to submit the form
-
Active/Inactive Switch - inactive questions won’t be displayed on the item survey from
Once you have entered all the changes, press the Save button.