Association Merchants are a standard feature of the platform and are used for association-level payment scenarios.
A Club Merchant is a merchant profile used at the club level and is available only with the COMET Play extension enabled. Club Managers/Referents can define their club's Merchant Settings and configure payment options to collect payments electronically.
Configuring both association and club merchants follows the same workflow. Below is an example showing the setup of a Club Merchant.
Creating a Merchant
Step 1: Open Merchant Settings
-
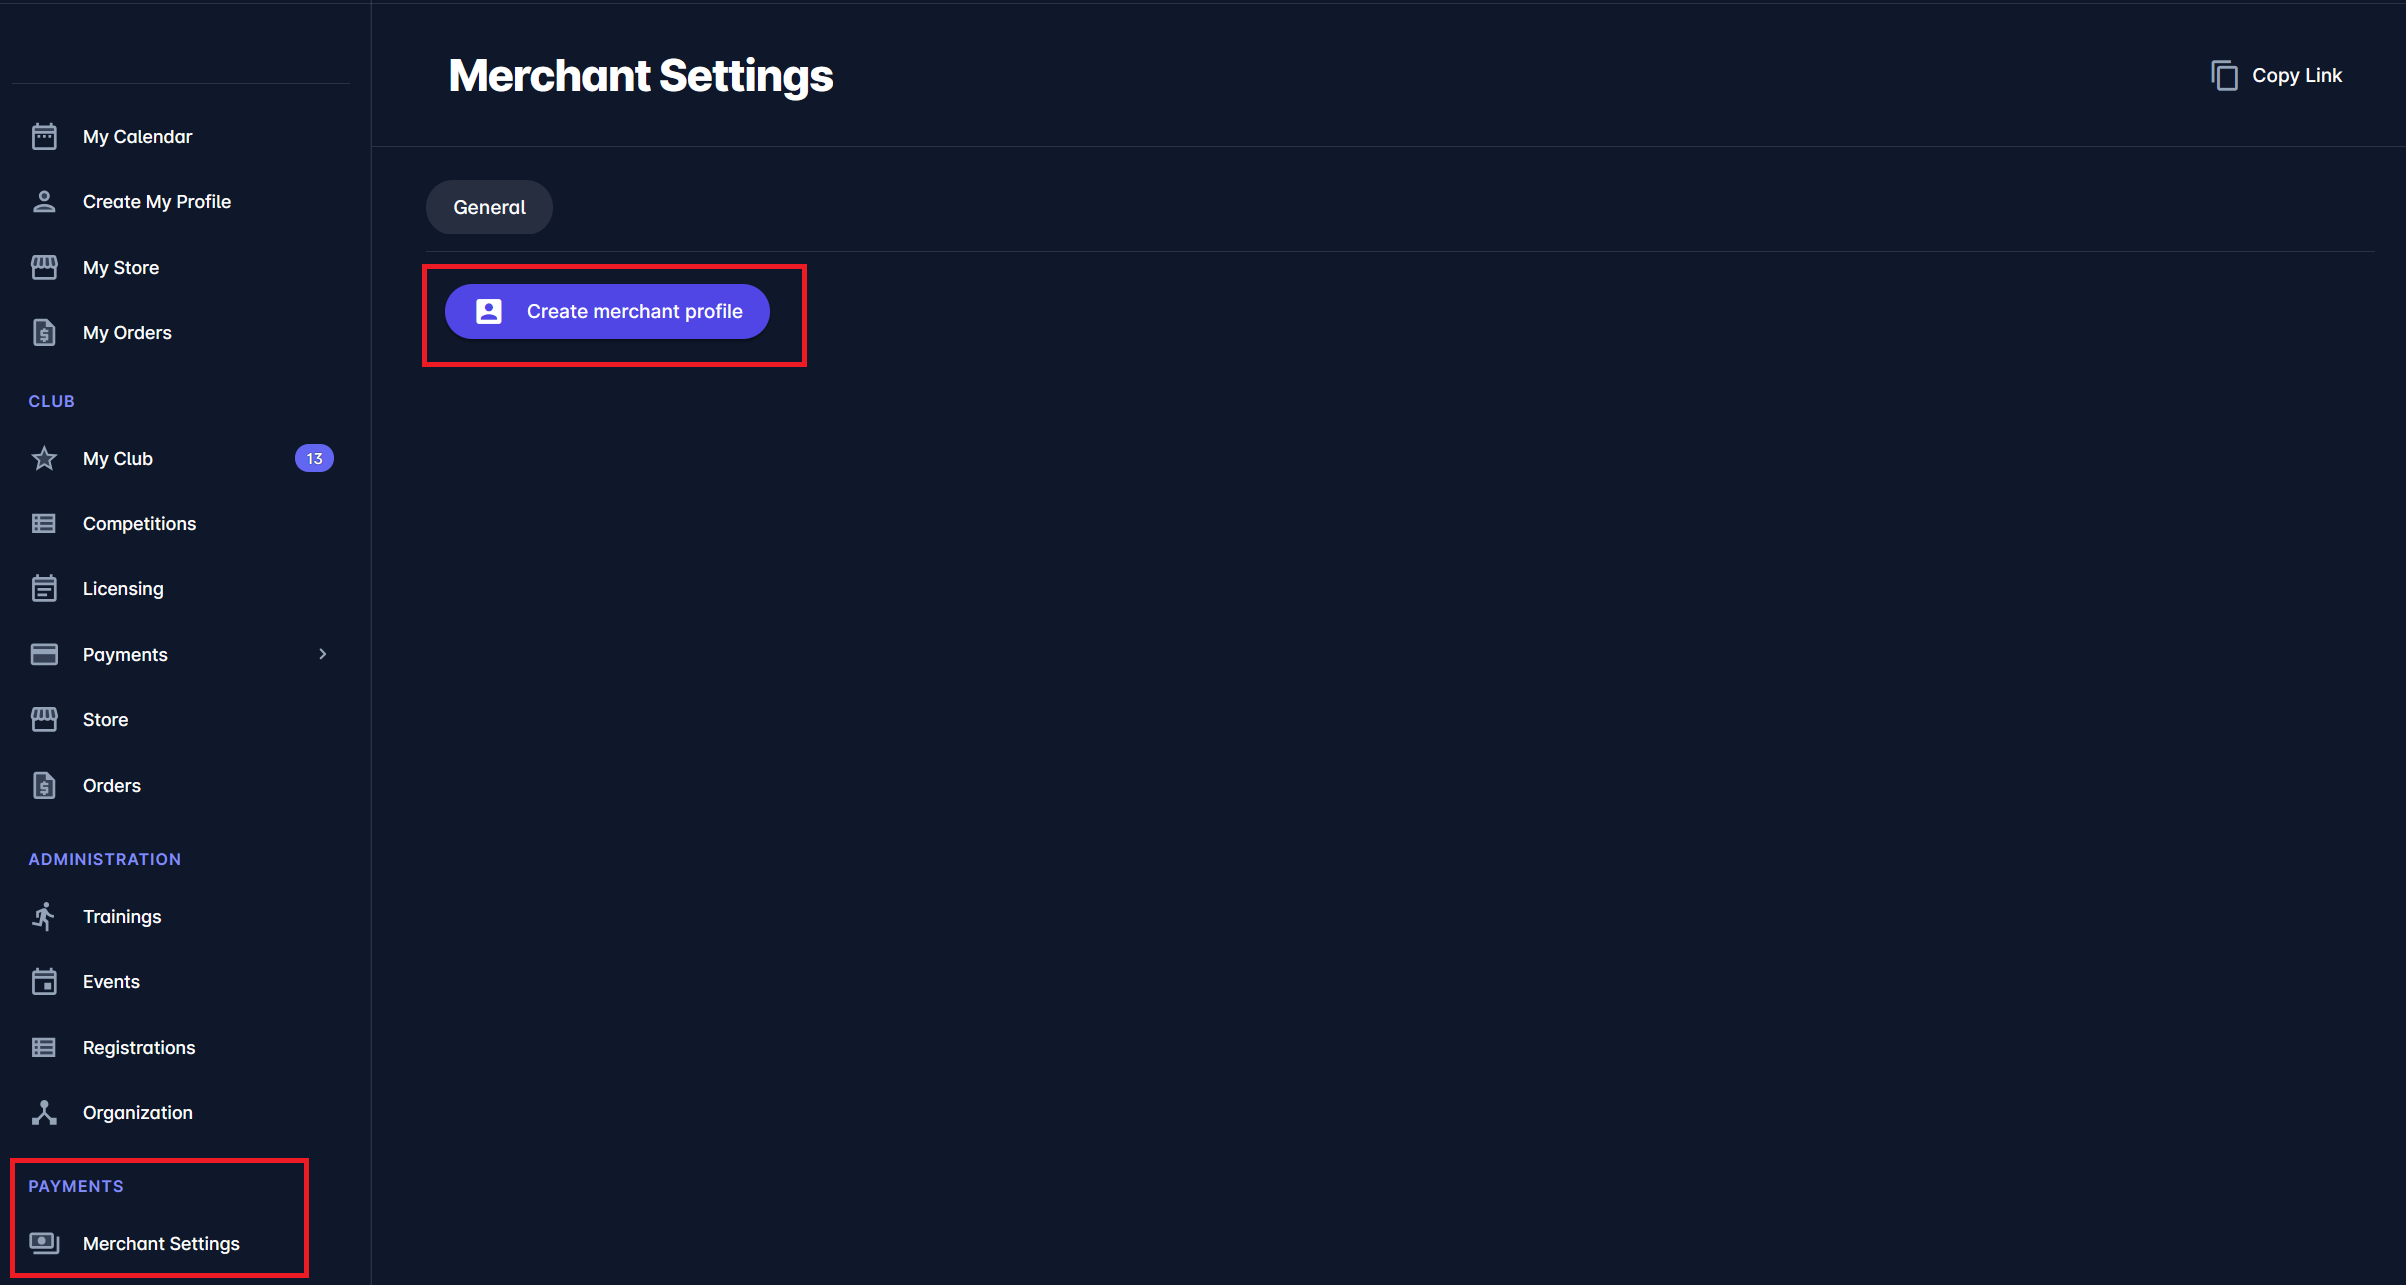
In the main navigation menu, go to Payments.
-
Select Merchant Settings.
-
The Merchant Settings page will open.
If no Club Merchant exists yet, an empty state will be shown with the Create merchant profile button.
Step 2: Create a Merchant Profile
-
Click Create merchant profile.
-
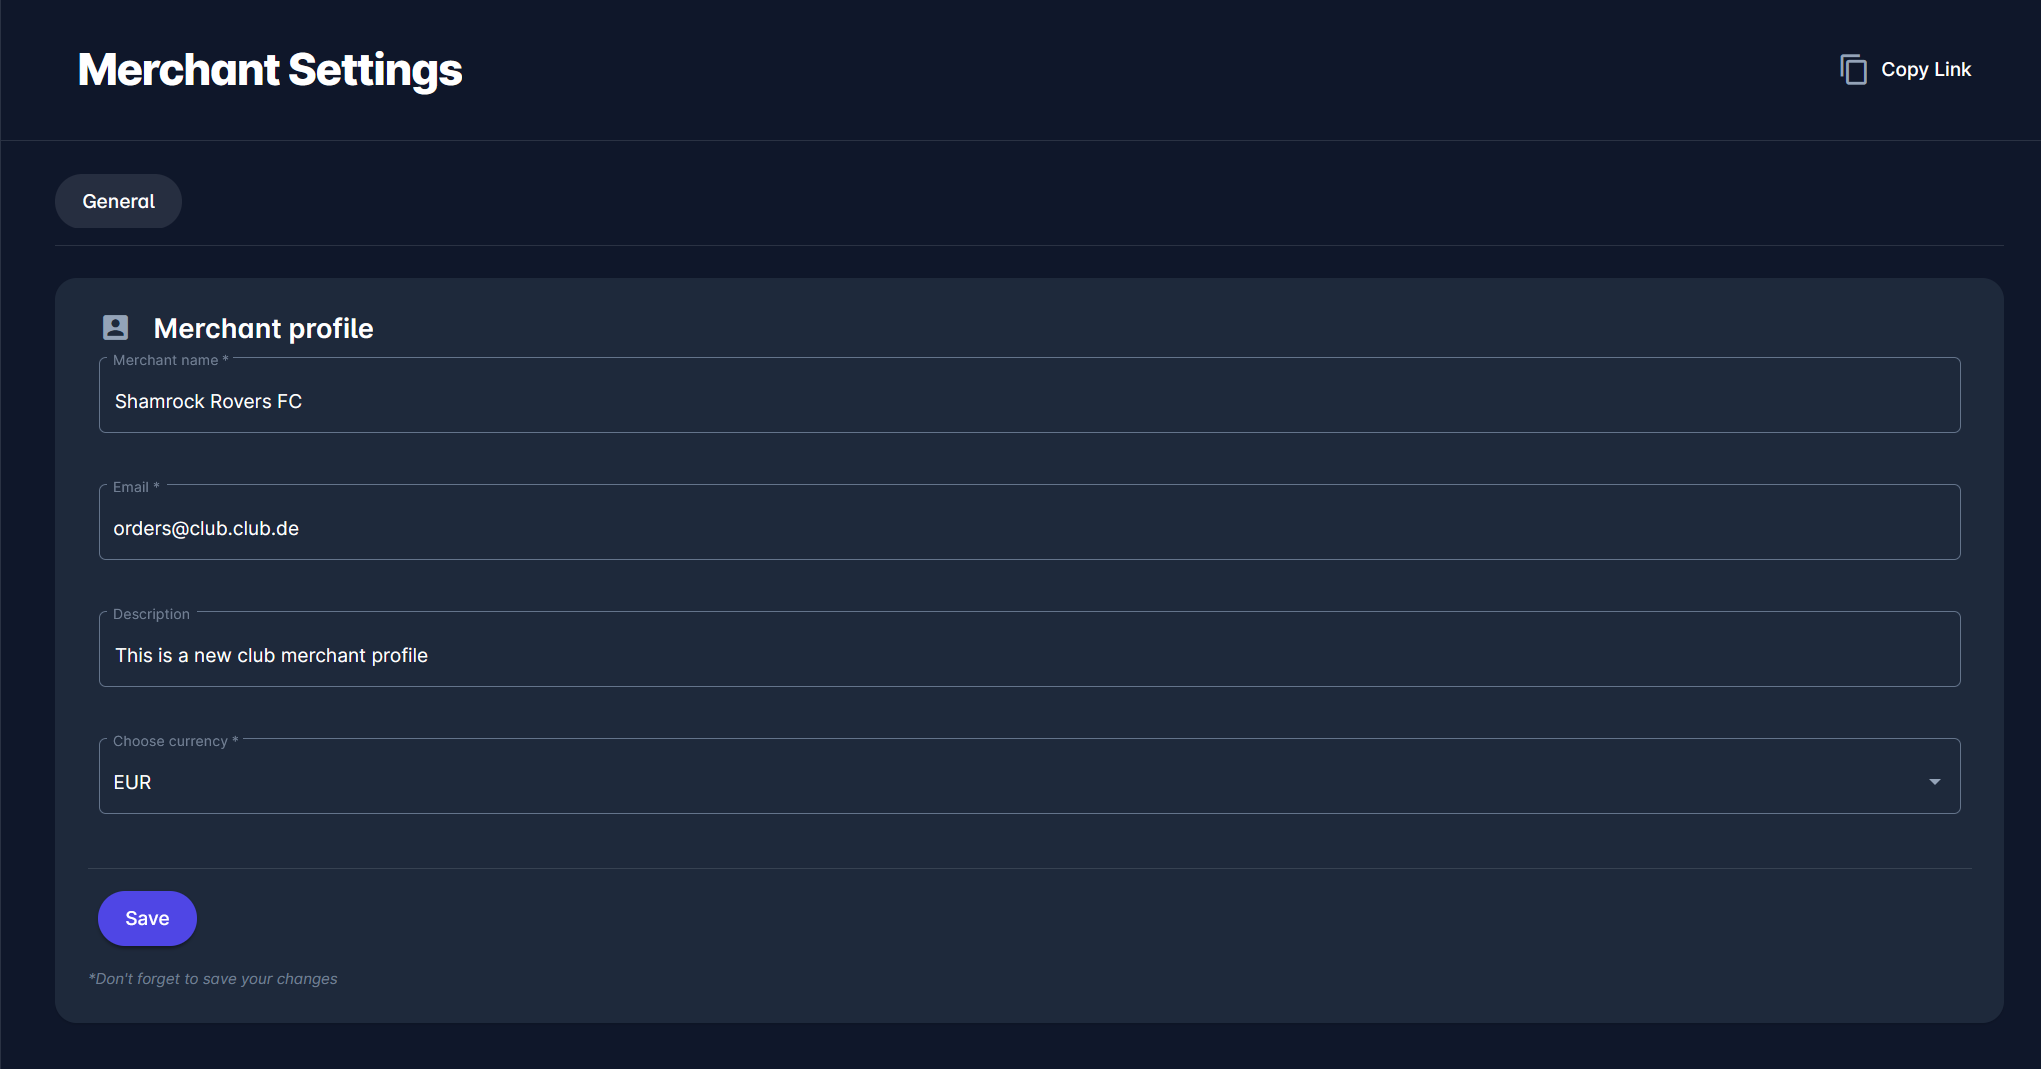
The Merchant profile form will be displayed.
Fill in the following fields:
-
Merchant name - Enter the official club name.
-
Email - Enter the email address used for order-related communication.
-
Description - Add a short description of the merchant profile.
-
Choose currency - Select the currency used for all transactions from the drop-down (e.g., EUR).
-
Click Save.
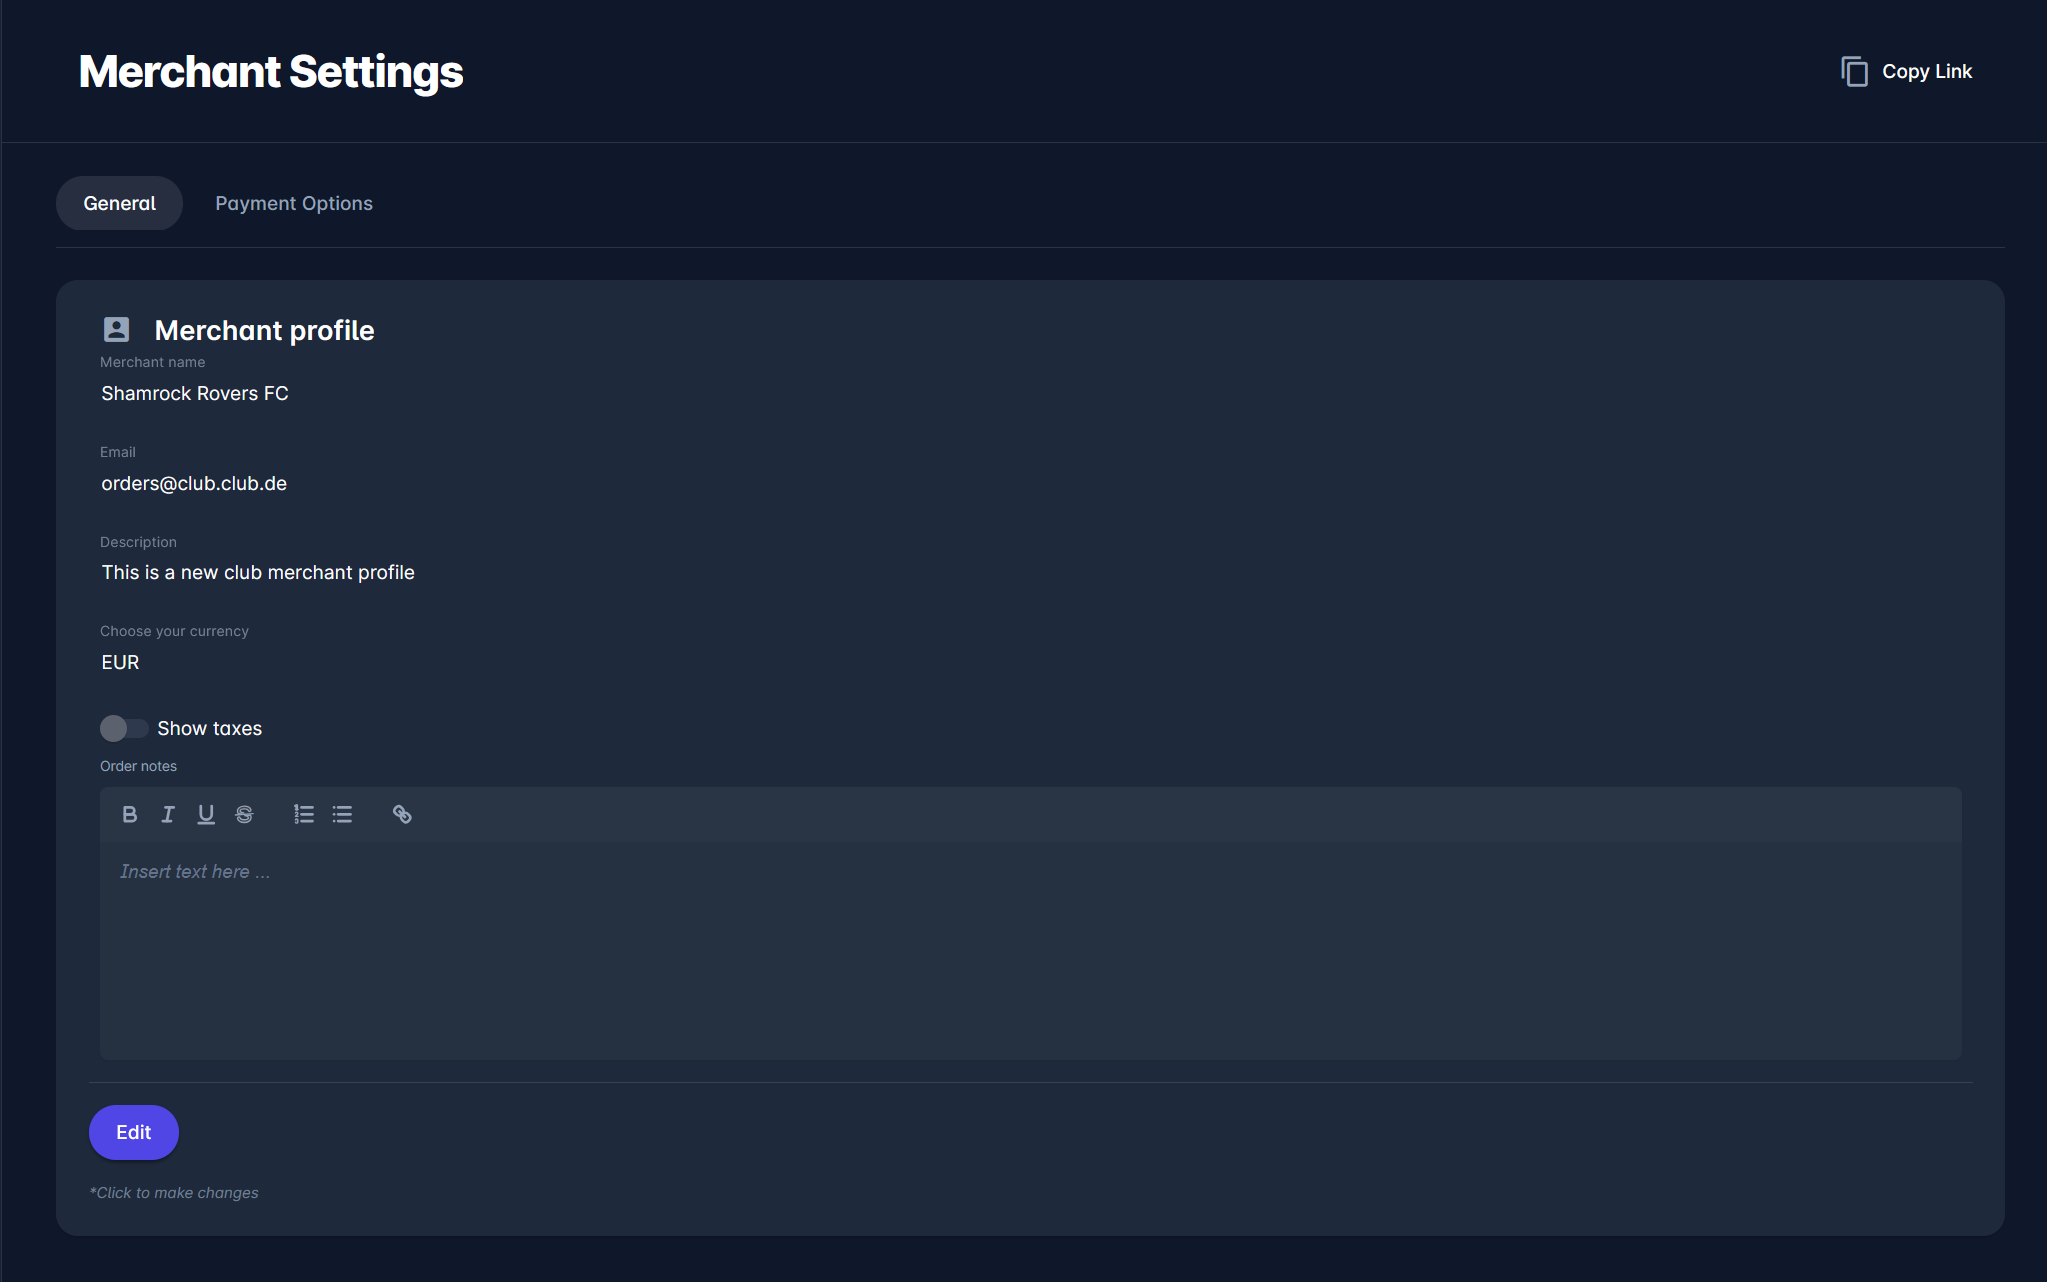
You can also enable the switch to Show taxes while in Edit mode, including adding additional notes in the dedicated textbox.
Payment Options
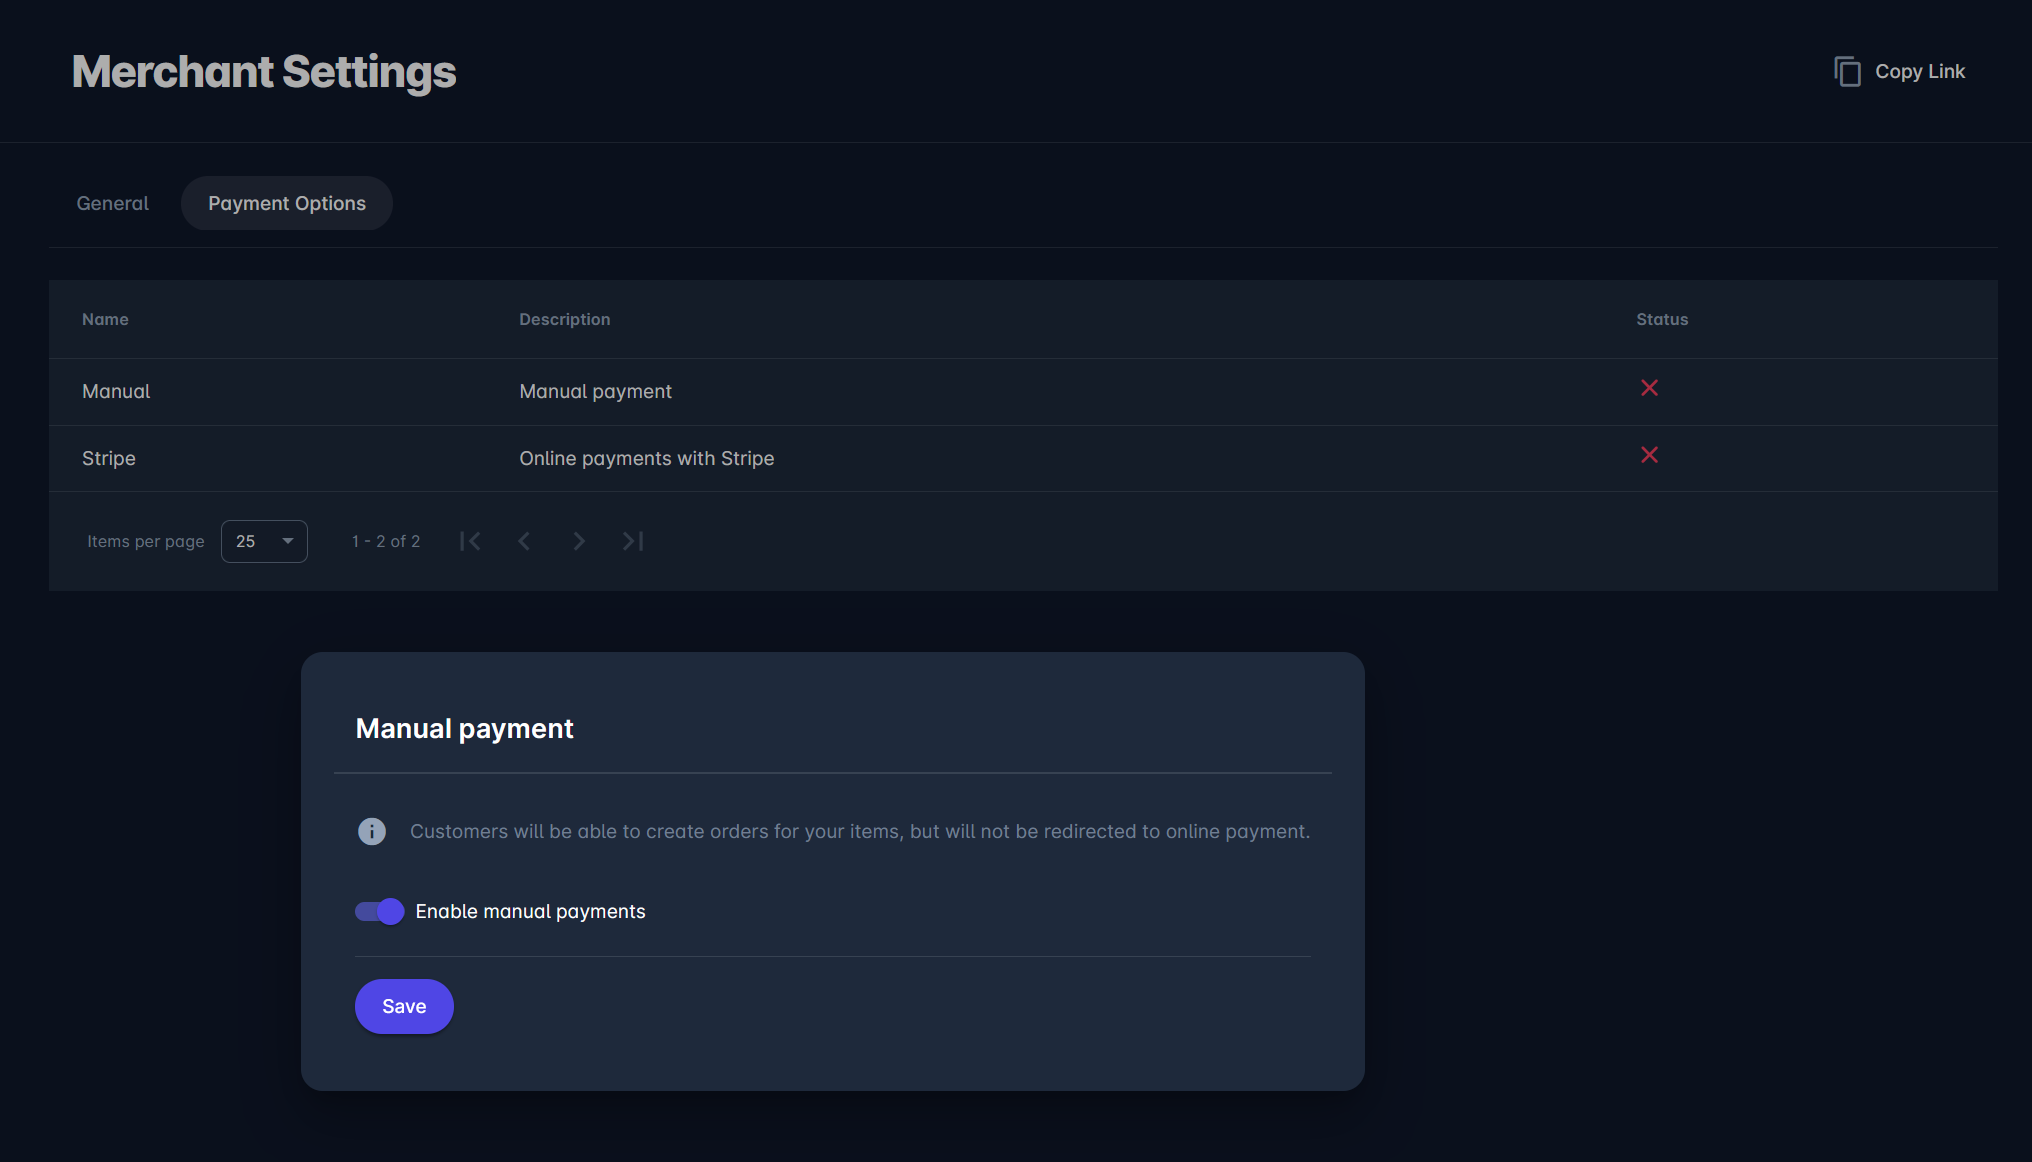
After creating the merchant profile, open the Payment Options tab.
The Payment Options menu displays the list of configured payment options for your tenant. In most scenarios, these options are:
-
Manual Payment - Customers can create orders for your items without making an online payment. In this scenario, admins will need to enter/confirm the payment manually.
-
Payment Gateway (e.g., QuickPay) - Customers will be redirected to an online payment gateway
-
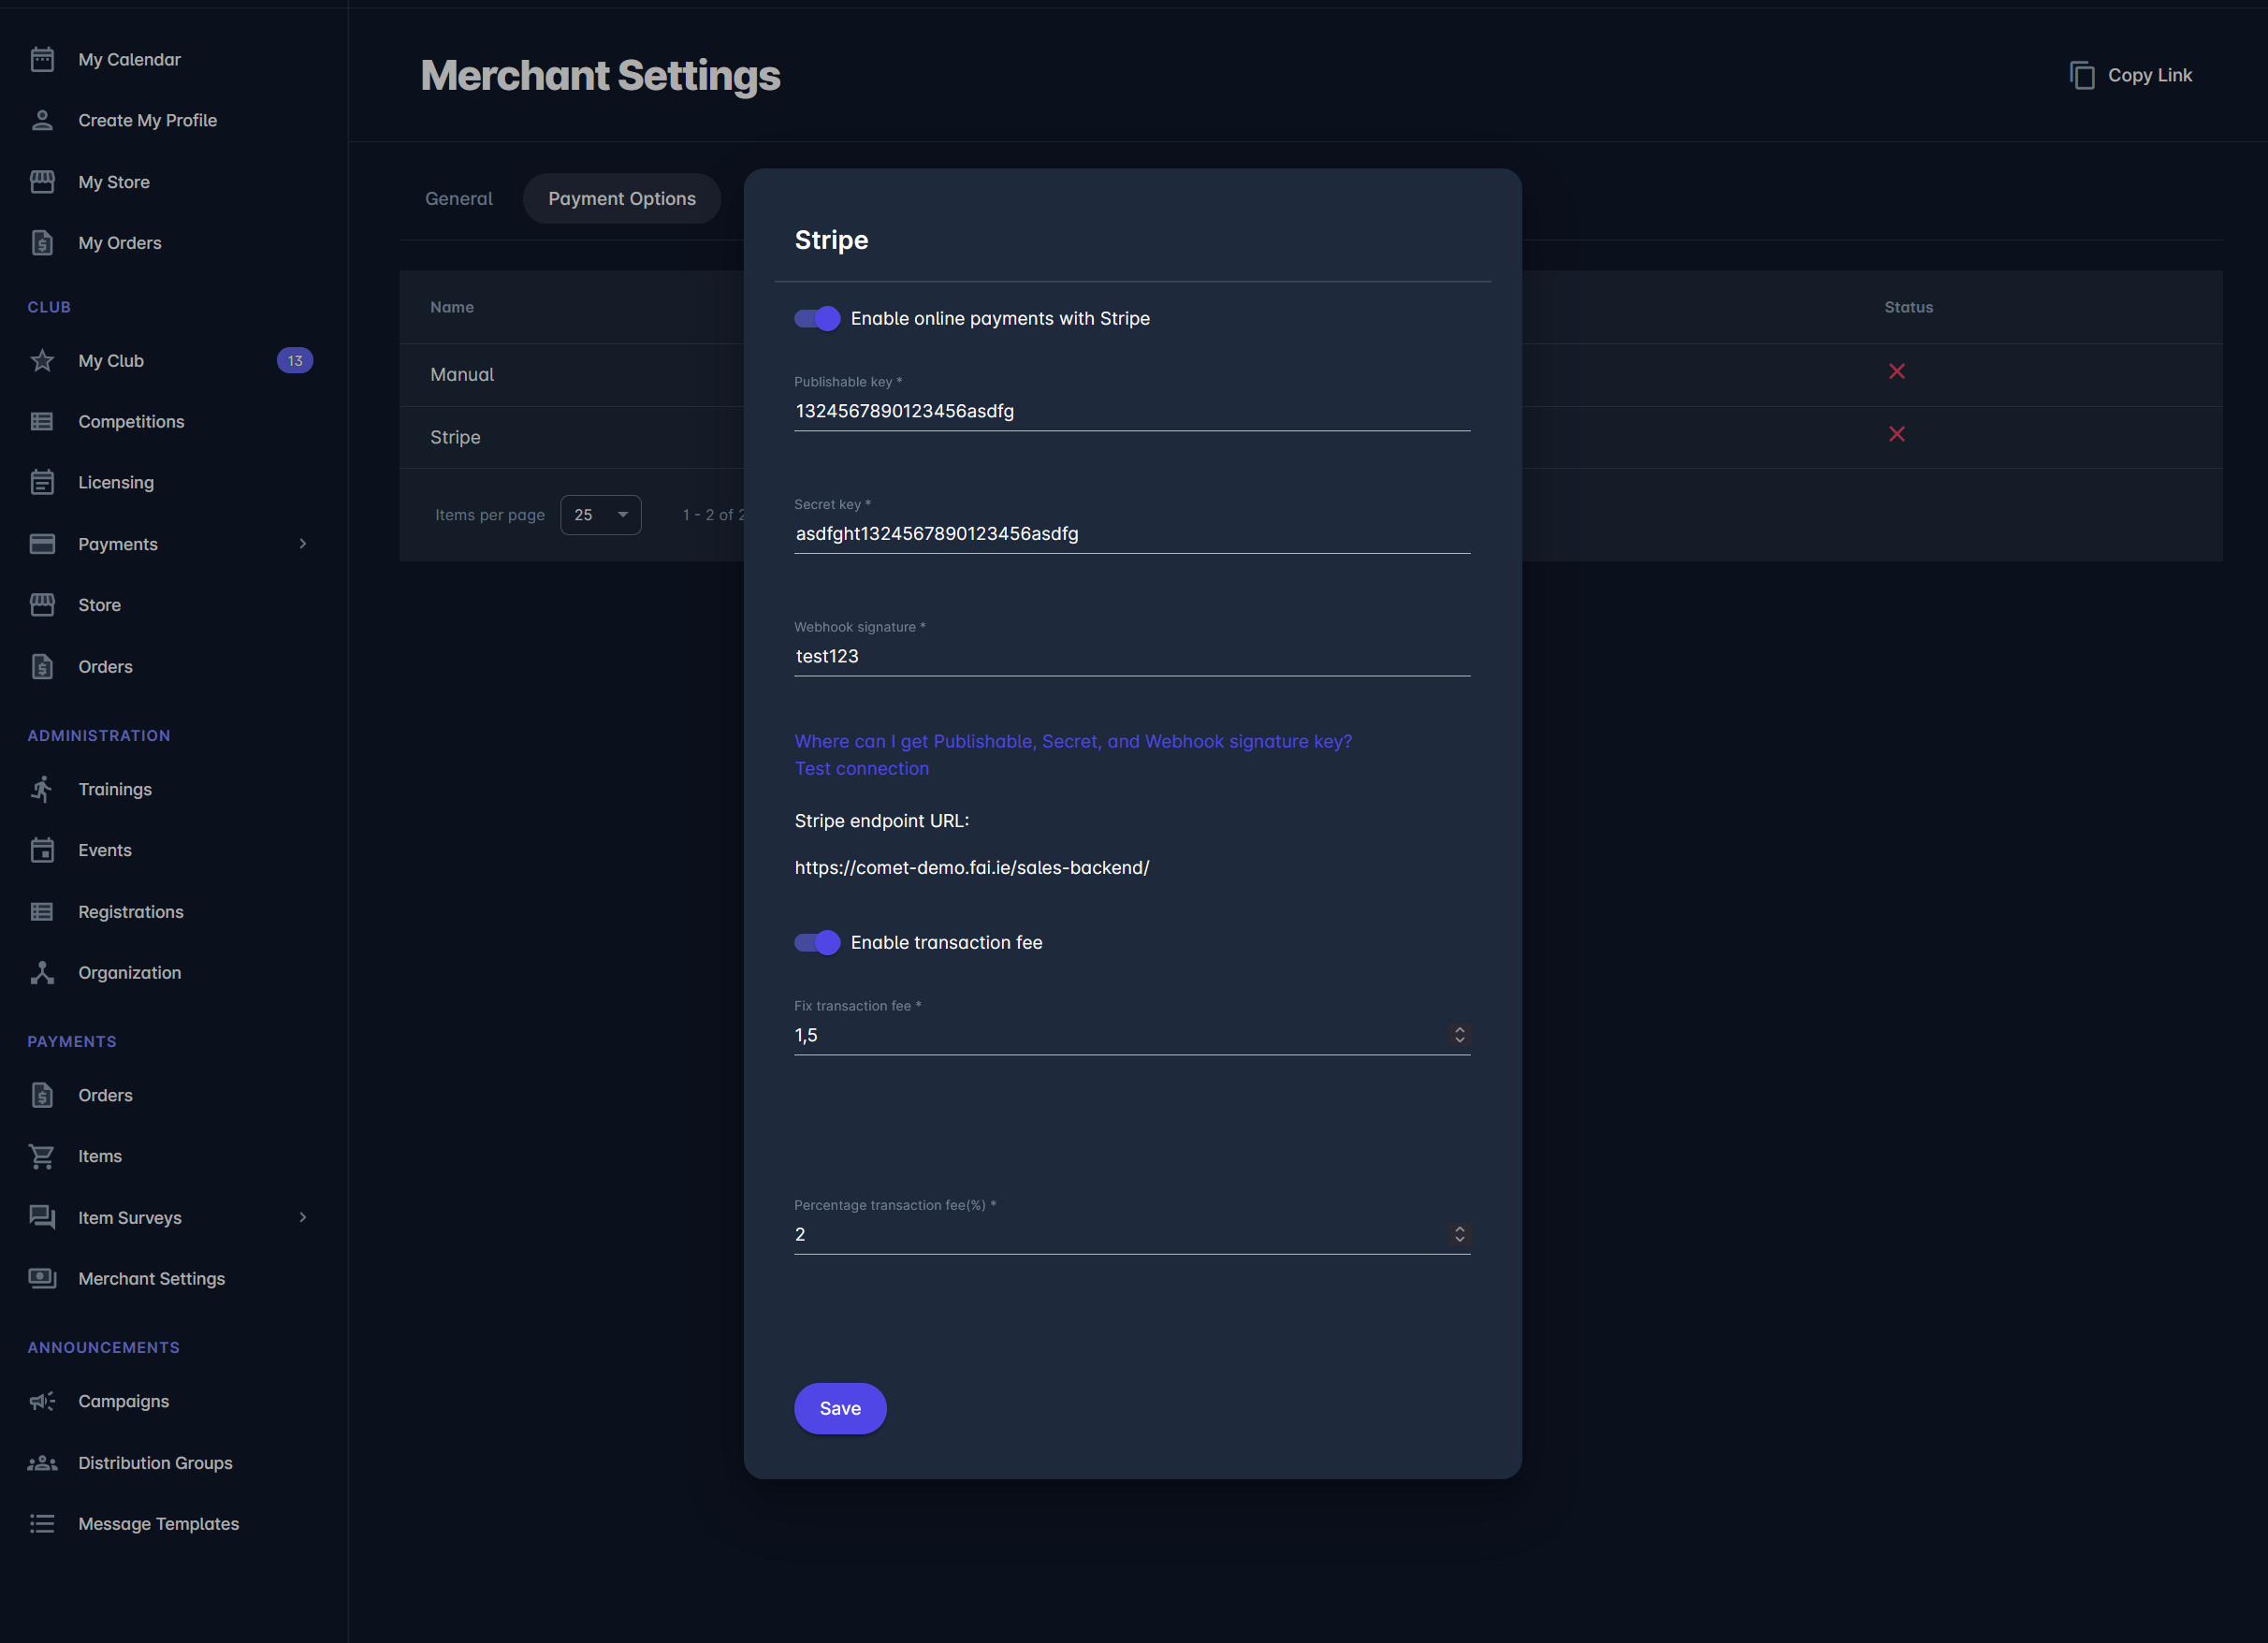
Stripe - Customers conduct online payments in the app without being redirected
To learn more about setting up other payment options (Stripe or Payplay), please see the following articles: Setup Stripe & Setup Paypal.
Clicking an option in the list opens a payment-type pop-up dialog.
Clicking an option in the list opens a payment-type pop-up dialog.
-
From the dialog window, you can administer the payment options of each payment type
-
Switching on/off the Enable payments switch enables or disables the payment type to be displayed as the payment option on the cart checkout for all items
-
In the key fields, you can enter the value from the payment gateway console
-
Switching on the Enable transaction fee switch allows you to enter the transaction fee (expressed in percentage or in a fixed amount) on the Payment Option from the list
-
-
Once you have entered all the changes, click the 💾 Save button
To learn how to set up one of the following payment options, see the following articles: Setup Stripe and Setup Paypal.