Your COMET Payments Module can be integrated with Stripe in a quick, easy setup, letting you start trading straight away. Stripe's payment interface is a gateway solution that accepts payments in multiple currencies and supports all major credit and debit cards.
To integrate Stripe payments with COMET, you need several keys obtained from the Stripe Merchant dashboard.
Before proceeding with the following instructions, make sure you have an active and valid Stripe Merchant Profile, i.e., that the Stripe Merchant creation process is complete.
Three Stripe keys are required for complete integration:
Please note that all three keys are accessible from the same page, i.e., the home screen of your Stripe account.
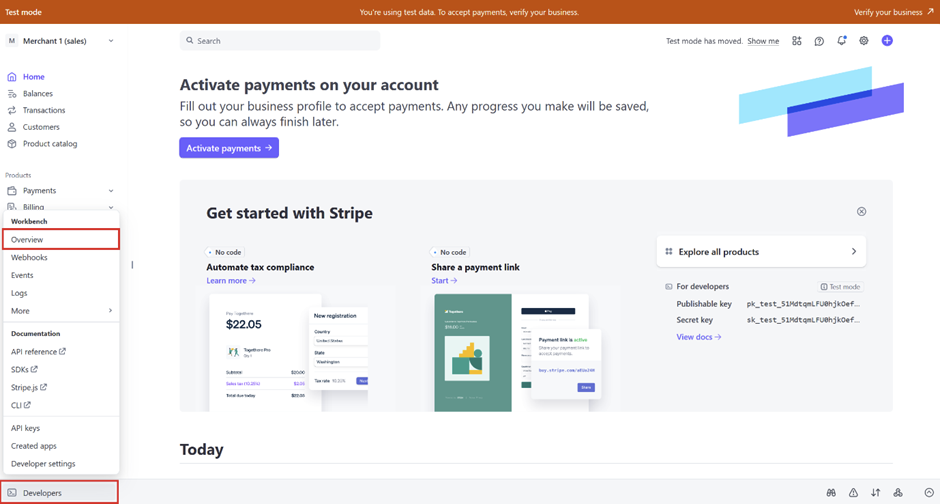
To integrate Stripe with COMET, open your Stripe dashboard → select the Developers menu tab, then the Overview item.
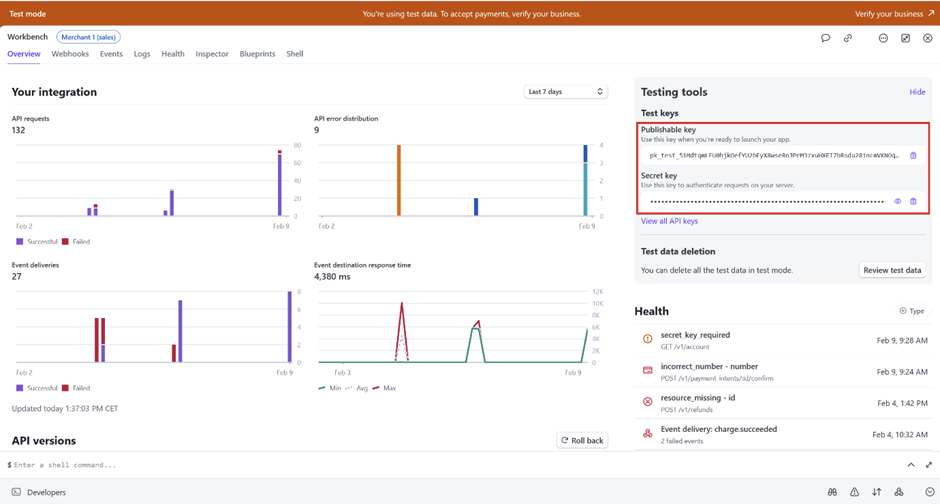
The Publishable Key and The Secret Key
-
The Publishable Key will be displayed.
-
Secret Key will be displayed
-
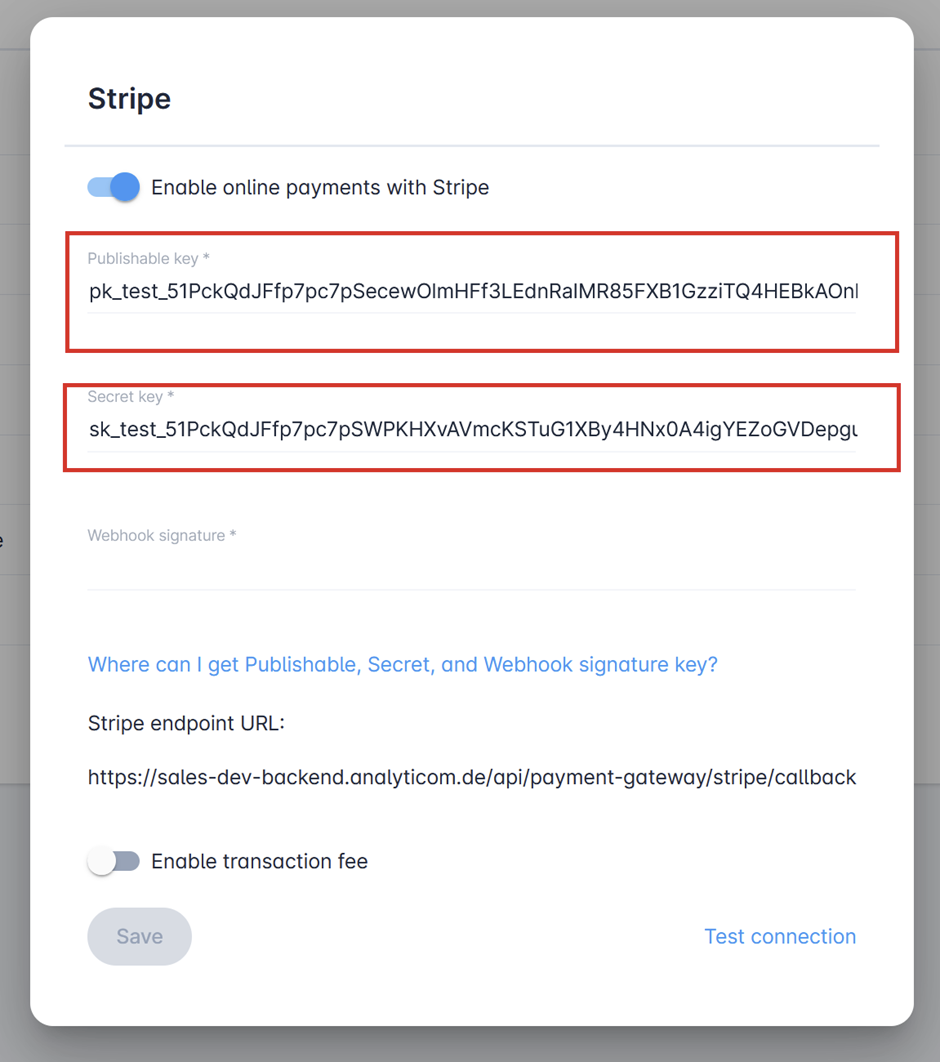
Copy and paste the Publishable Key into the appropriate input field on the COMET Stripe integration form.
-
Copy and paste the Secret Key into the appropriate input field on the COMET Stripe integration form.
-
There is also a possibility to reveal the Secret Key
Webhook Signature Key
-
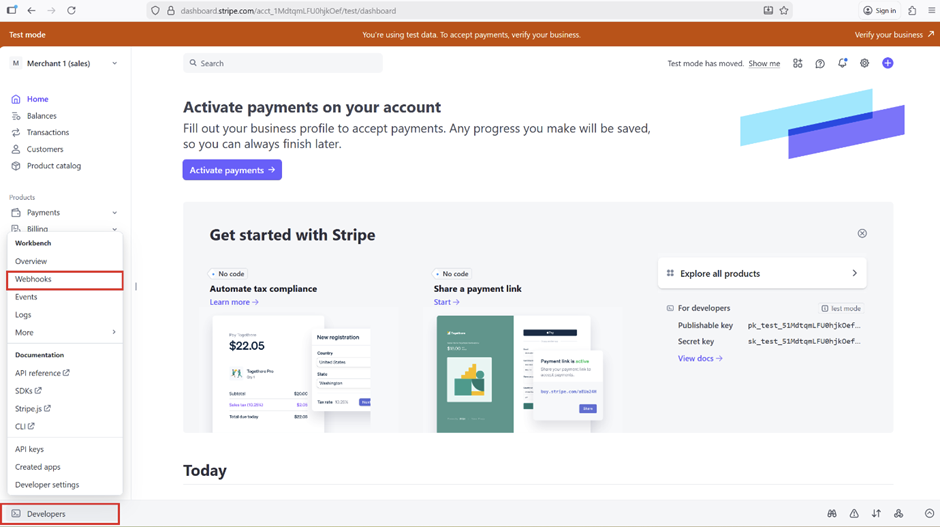
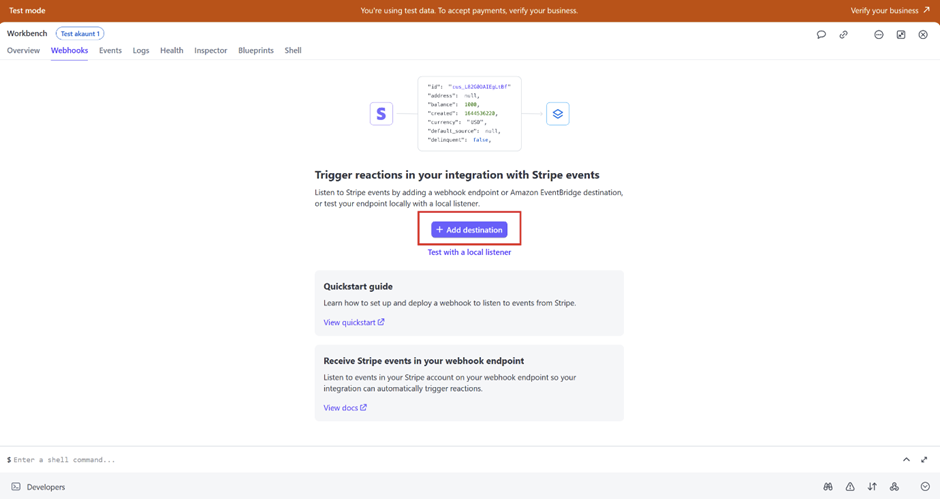
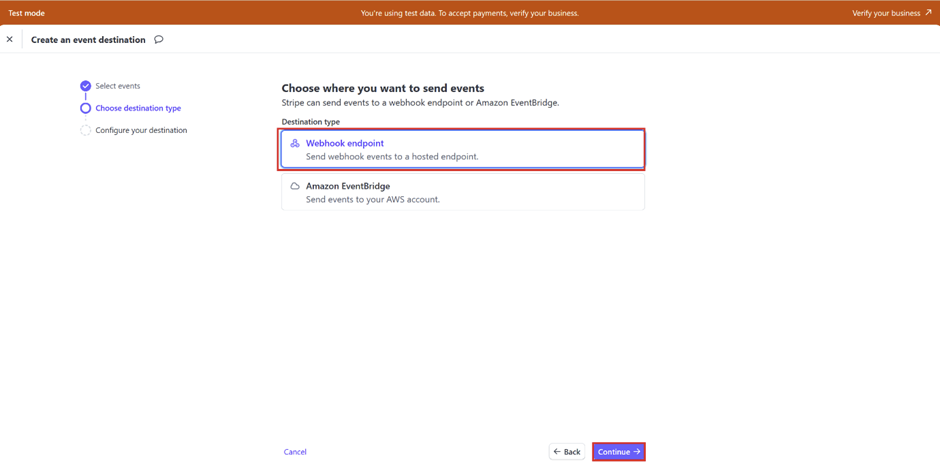
Once you have pasted the Publishable Key and the Secret Key, select the Webhooks submenu from the Developers menu (highlighted in the figure below)
-
The Webhooks Page will be displayed.
-
Hit the Add destination button.
-
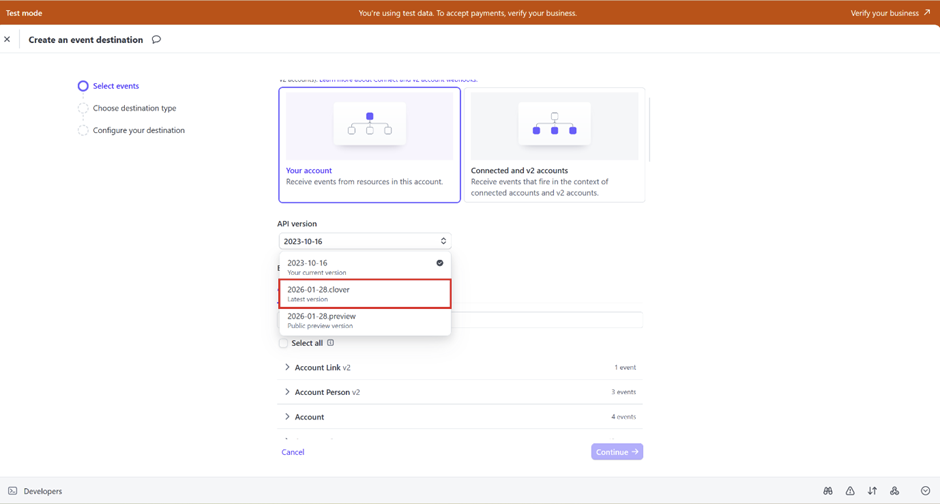
In the API version dropdown, select the latest version
-
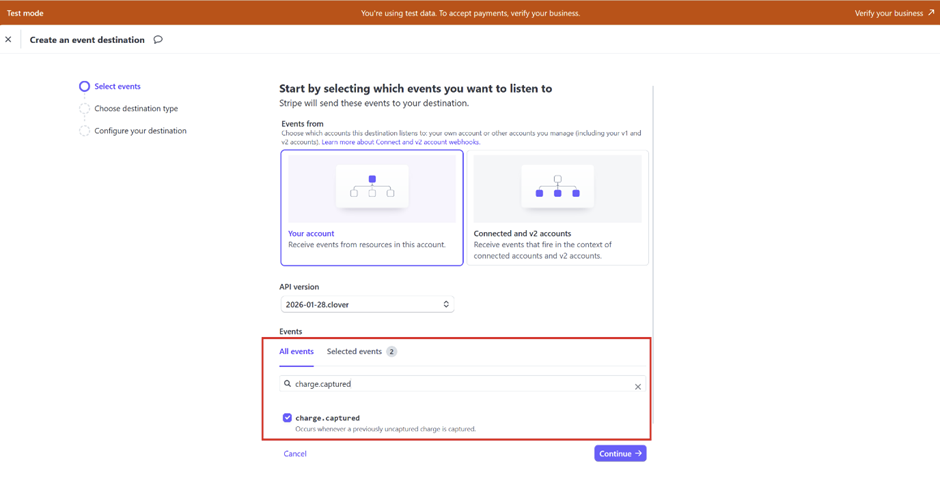
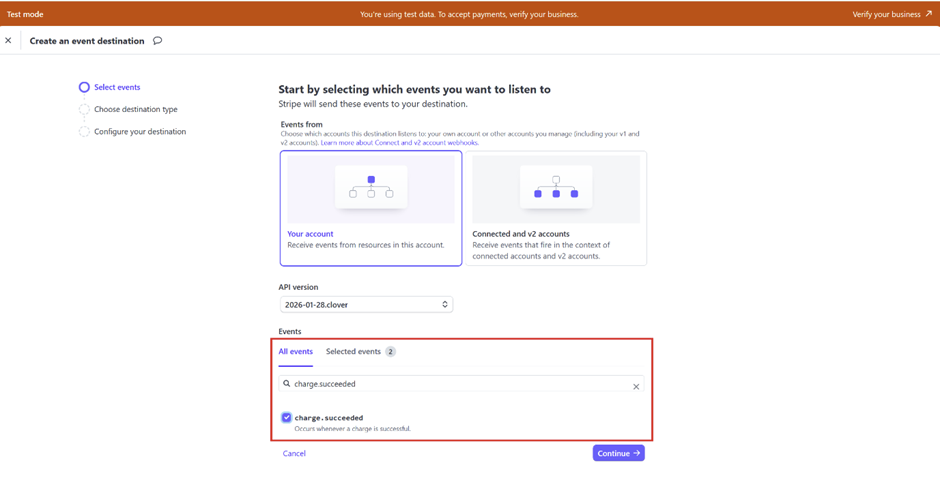
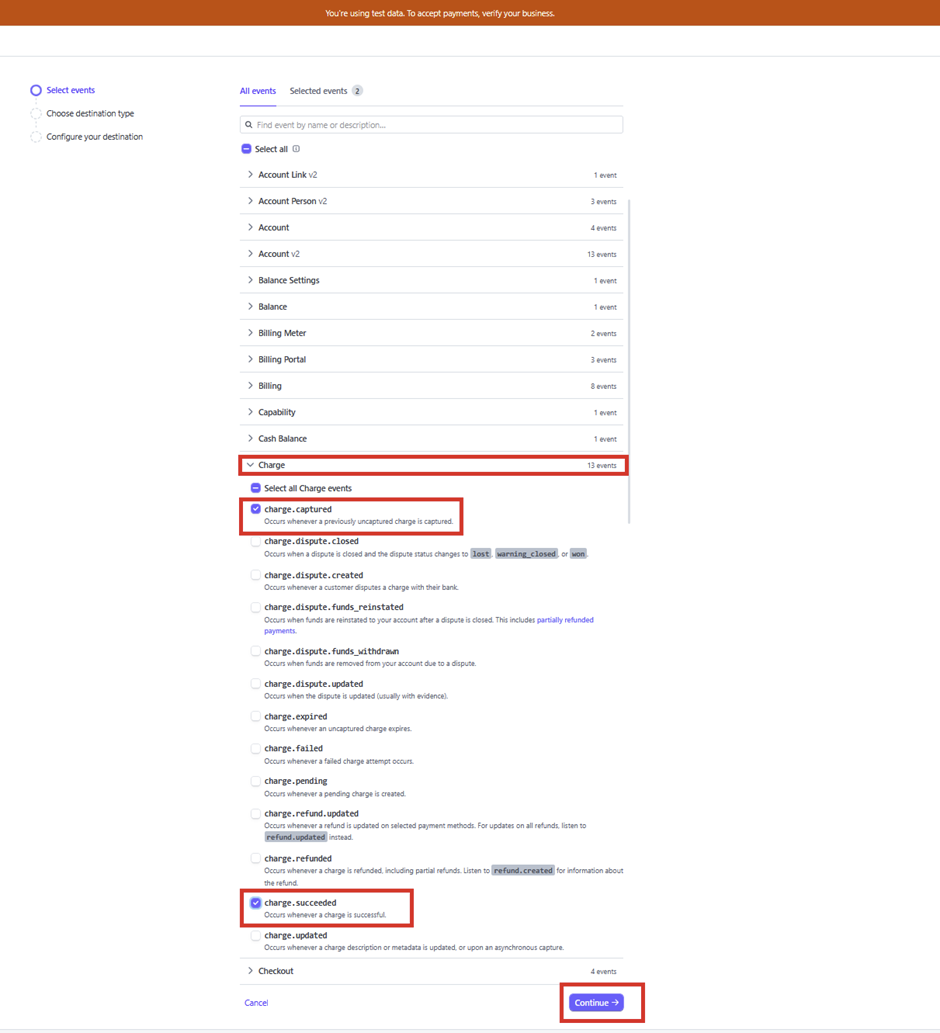
Select ‘charge.captured’ and ‘charge.succeeded' events from the list of available events, either by entering values in the search box and ticking the box.
-
Or by expanding the Charge menu from the All Events list
-
And click the Continue button
COMET Sales module supports only these two event types.
-
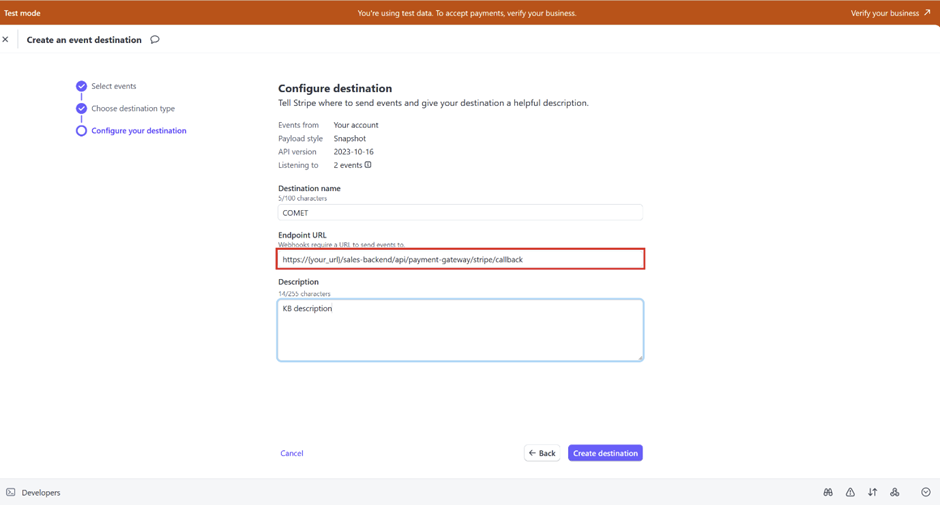
The next step is to add a COMET endpoint on which events are sent
-
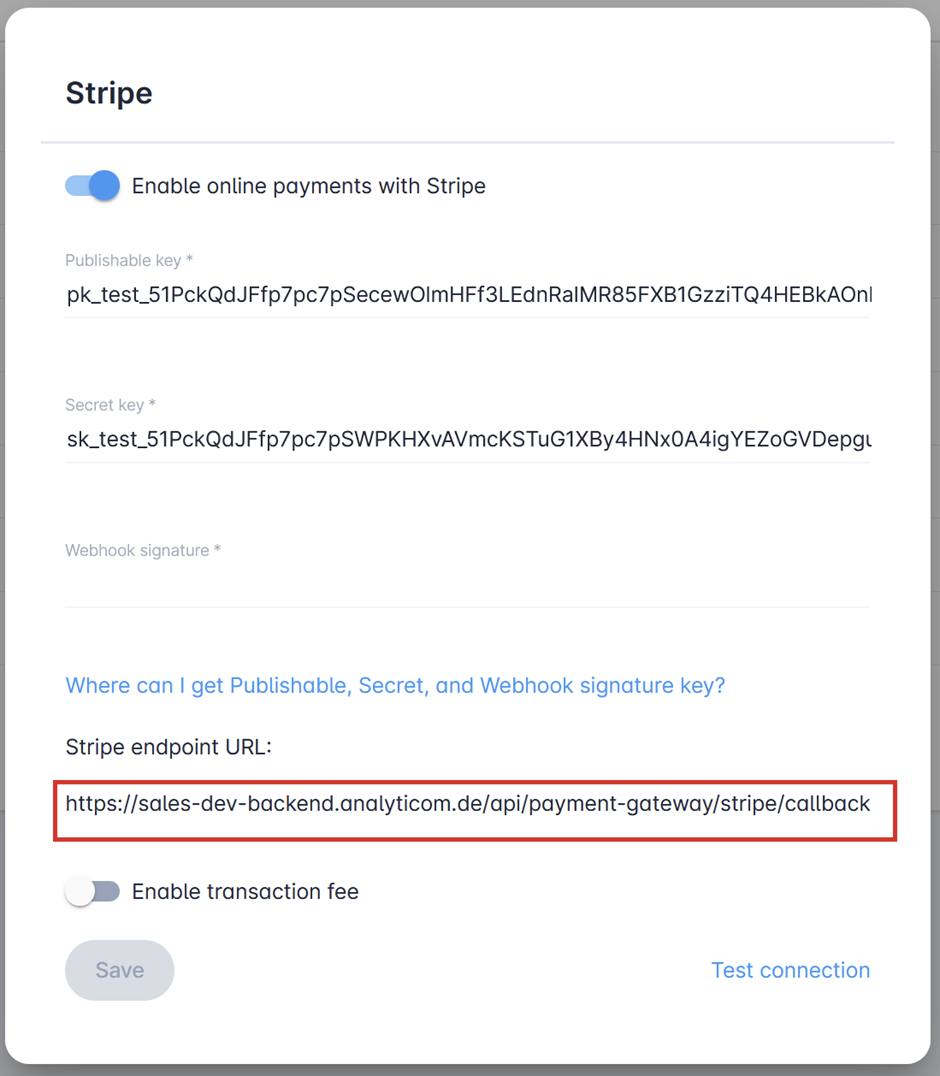
Copy the value from the COMET Stripe settings and paste it into the Endpoint URL field
-
Click on the Create destination button
-
You will be redirected to the webhook details page
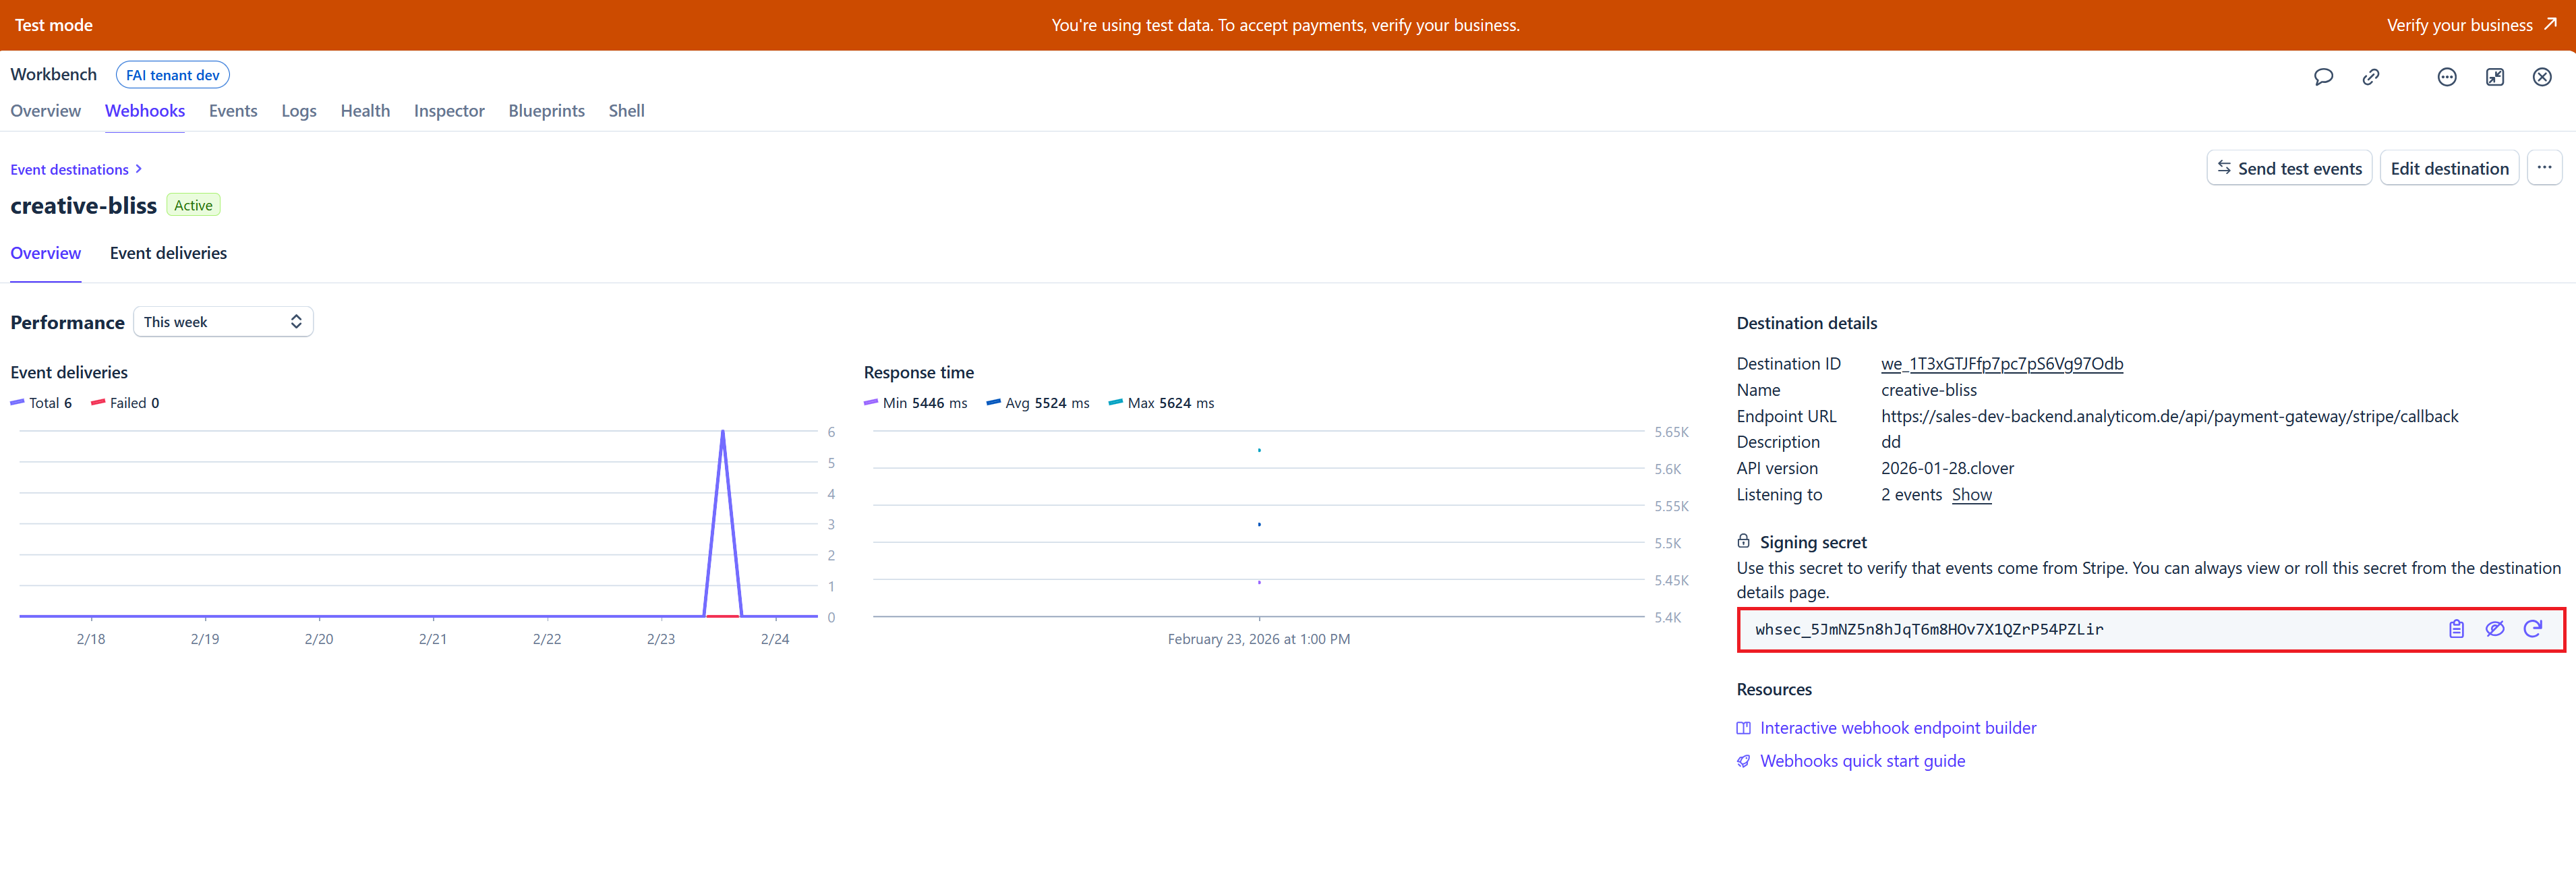
-
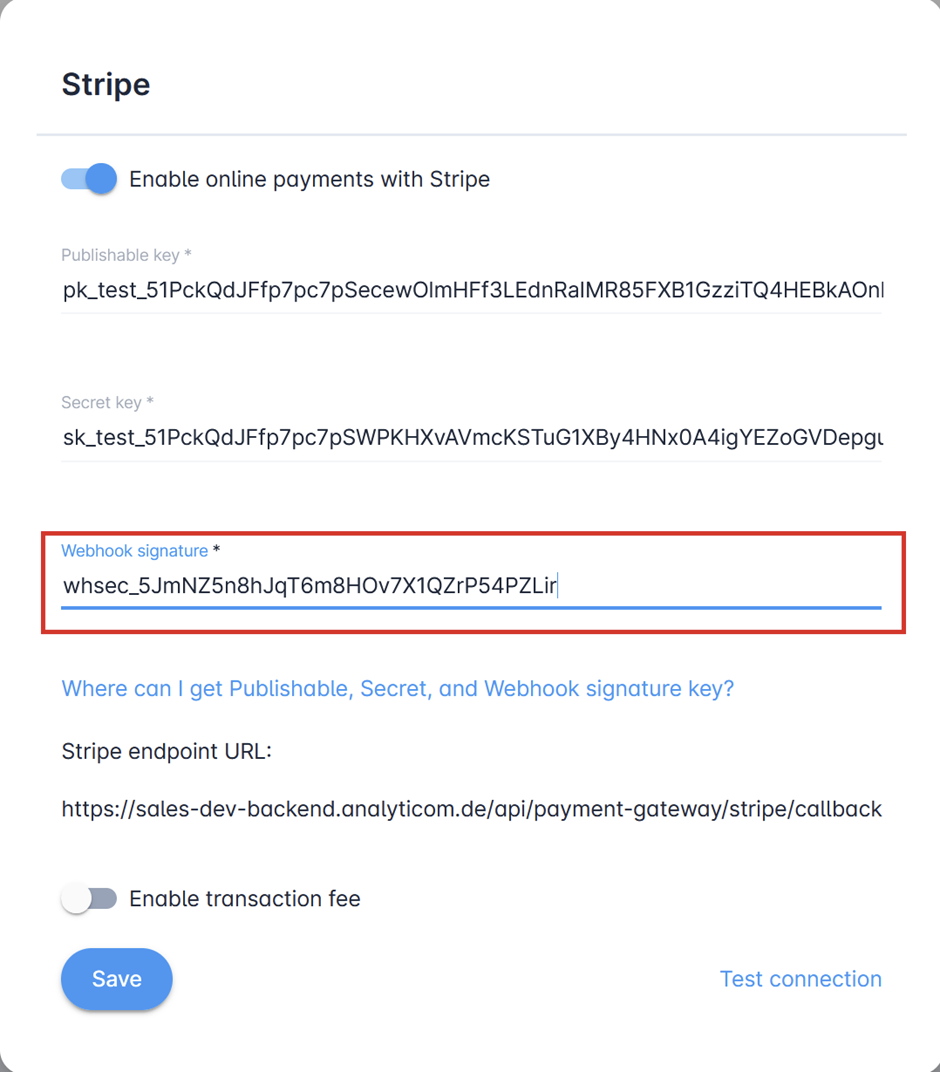
On the webhook details page, you will find Signing secret, which you should copy to the Webhook signature field of the Stripe setup dialog in COMET
You’ve now created the necessary webhook.
Setup
Once you enter all mandatory fields (Publishable Key, Secret Key, and Webhook signature), the Save button will be enabled.
-
You can test your connection by pressing the Test connection button. If the Publishable Key and Secret Key are entered correctly, you will see Connection successful! Popup dialog
Please note that we can only verify the validity of the Publishable and Secret keys you’ve entered. We cannot verify your Webhook signature, so double-check that you’ve copied and pasted the value correctly.
If you have successfully tested the connection, you can now save your settings by clicking the Save button.
Upon completion, you will be greeted with a ‘Connection successful!’ message if the information entered was valid.