Sending out Invitations to Join
As a Workspace Admin, you can invite Members to join your Workspace. If the Invitation is accepted, the invited Person will complete their profile and became a new member of your workspace.
You are able:
administer the invitations via the Invitations menu
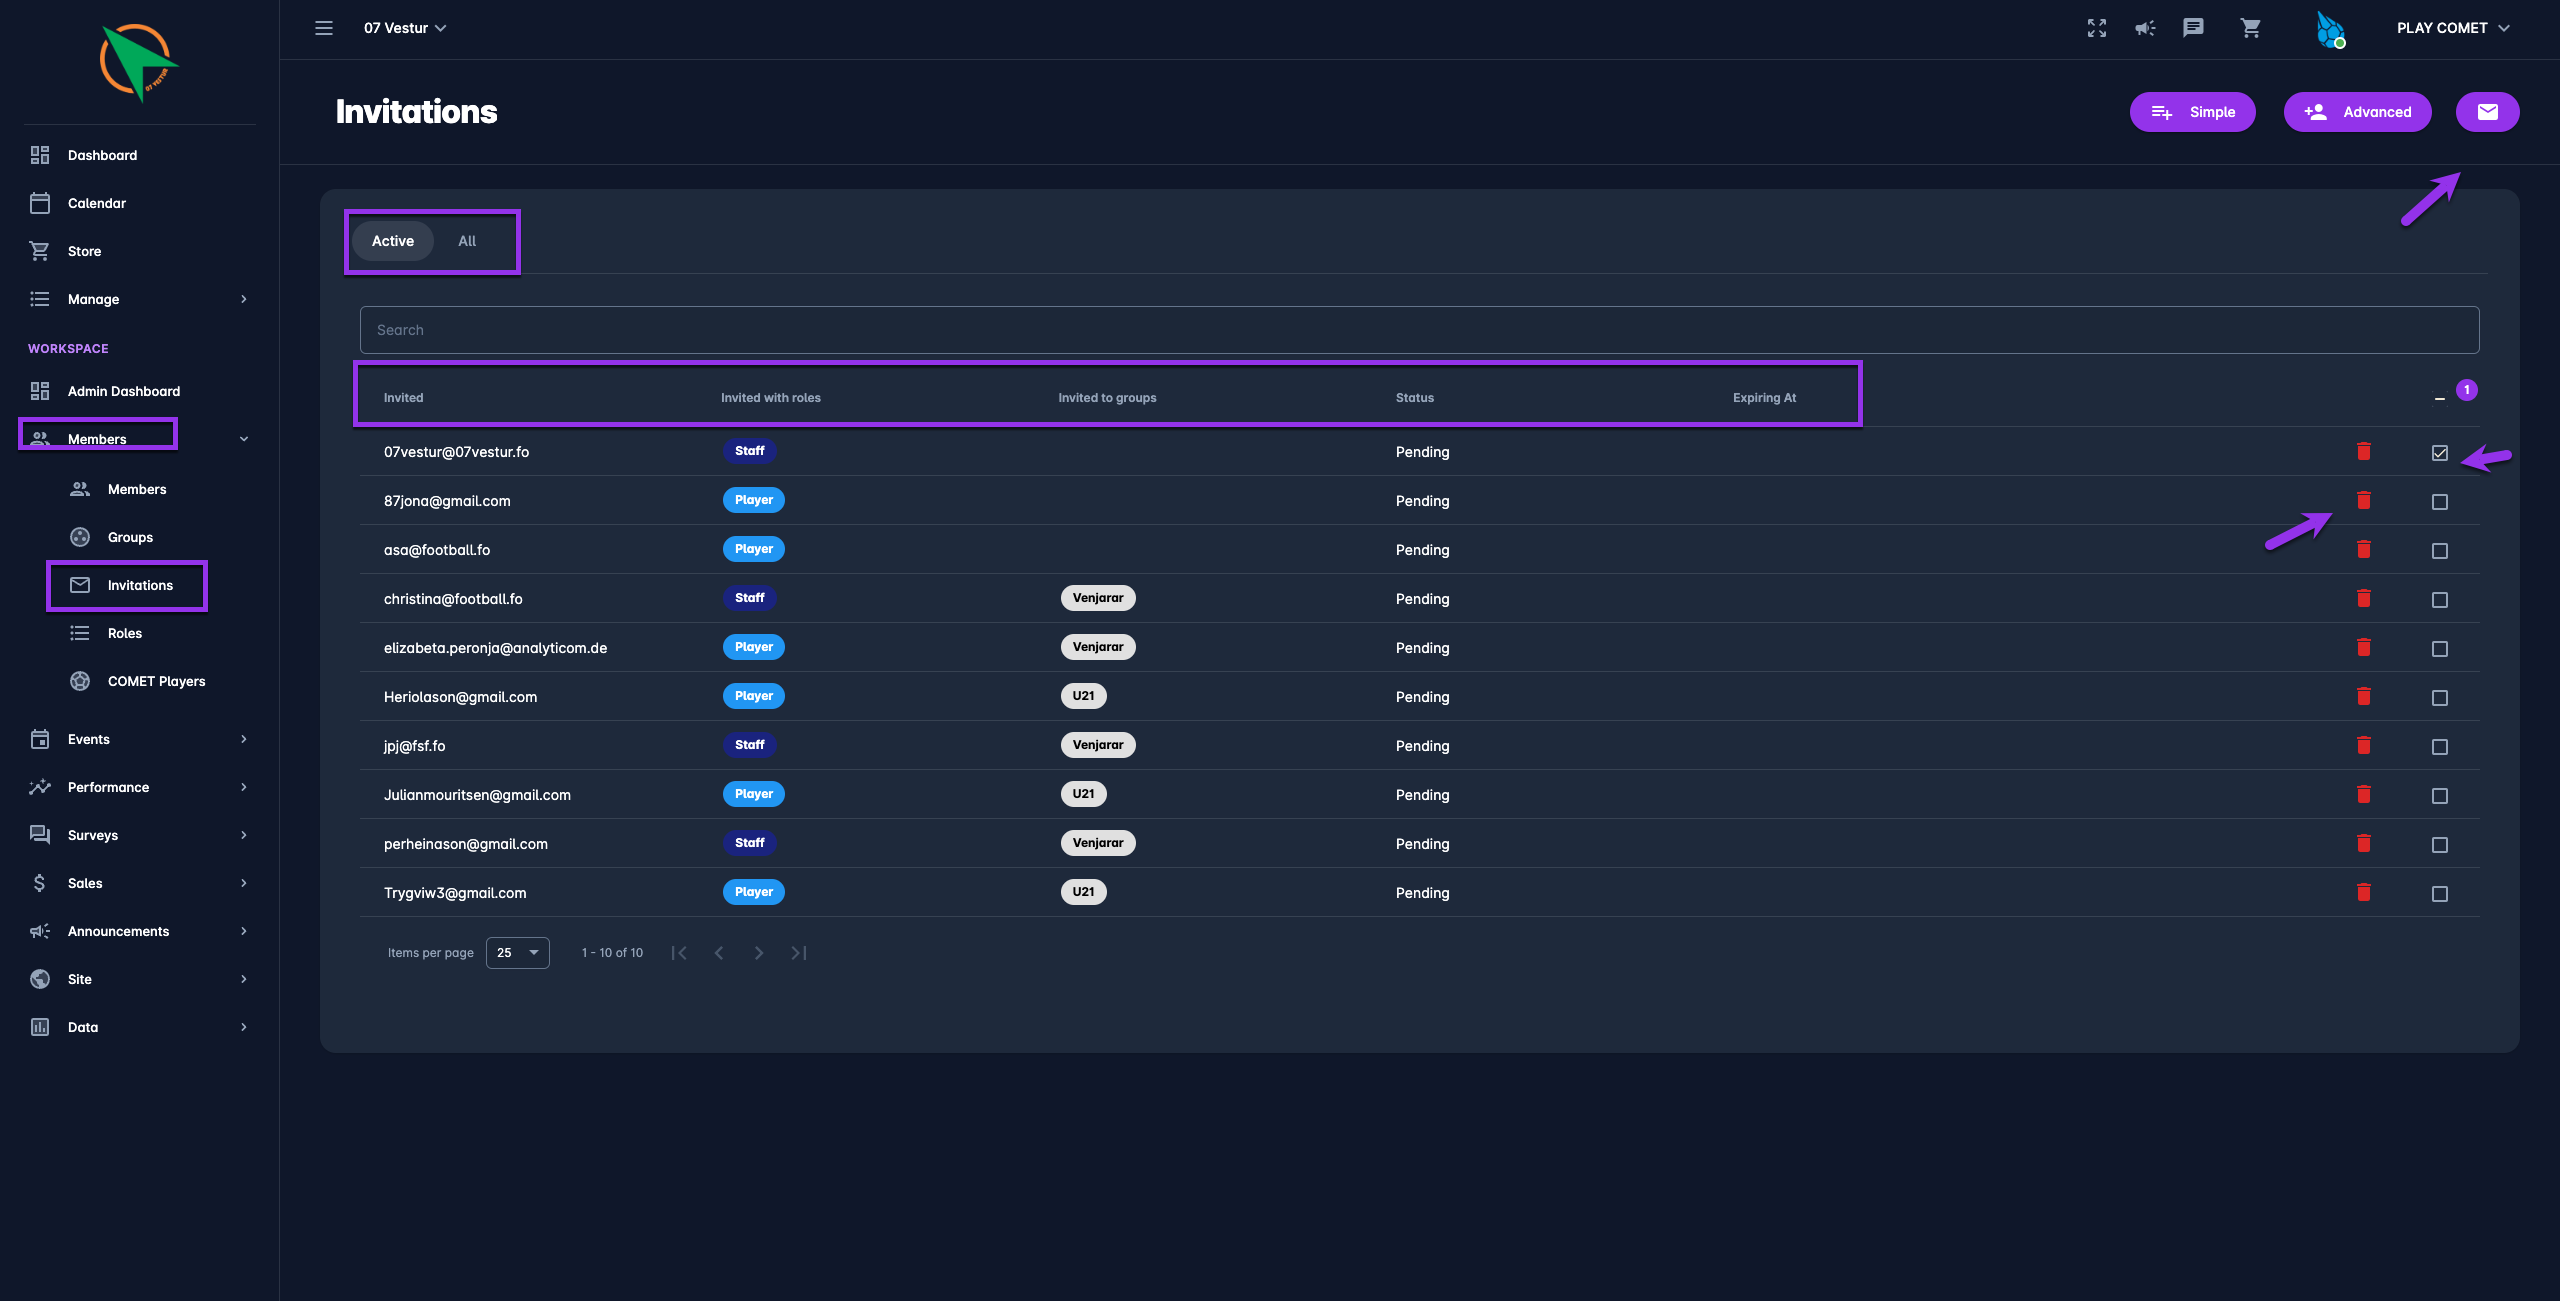
Invitations Menu
On the left nav-bar select 🫂 Members → Invitations
This opens the Invitations menu which contains the list of invitations sent from your workspace. The menu consists of the following tabs:
Active - lists the invitations in status PENDING
All - lists the invitations in all statuses: PENDING, ACCEPTED, REJECTED, and EXPIRED
Each list consists of the following details:
Invited person - indicates the e-mail of a person that was invited
Invited with roles - indicates the roles that are assigned to the invited person
Invited to groups - indicates the groups that are assigned to the invited person
Status - indicates the status of the invitation (PENDING, ACCEPTED, REJECTED, and EXPIRED)
Expiring at - indicates the date of the invitation expiry; after that date, the invitation is no longer valid
The search box (use the search box to search the invitation that are entered in the system)
💡 In the Invitations menu, you can see the response status of the invitation that you have created. Please note that invitations with the status PENDING are listed in the Active tab of the Invitations menu. Invitations that have the EXPIRED, ACCEPTED, and REJECTED status are visible only in the All tab of the Invitations menu and can be resent
💡 In case you need to resend the invitation (if the member requests, if it has expired, if it was rejected accidentally, etc.):
tick the box next to the invitation or tick the top box to select all invitations
Click on the Envelope icon button in the top right corner of the Invitations menu
💡In case you need to delete the invitation (if the member requests, if it has expired, if it was rejected accidentally, etc.):
Click on the Bin icon button next to the invitation
You can choose between two types of invitations: Simple and Advanced or you can invite the members by Join Link.
Simple Invitations
Simple Invitations allow you to invite up to 15 members at once by entering only the assigned role(s) of future members and the e-mail addresses the invitations will be sent to. Besides these two data fields, Simple Invitation From contains other optional fields: assigned groups, expiration date*, and message of the invitation.

To create a Simple invitation:
Click on the Simple button in the top right corner of the Invitations menu
Fill out Simple Invitation From:
e-mail addresses separated with comma signs
COMET Play roles
assigned groups (optional field)
expiration date* (optional field)
the message of the invitation (optional field)
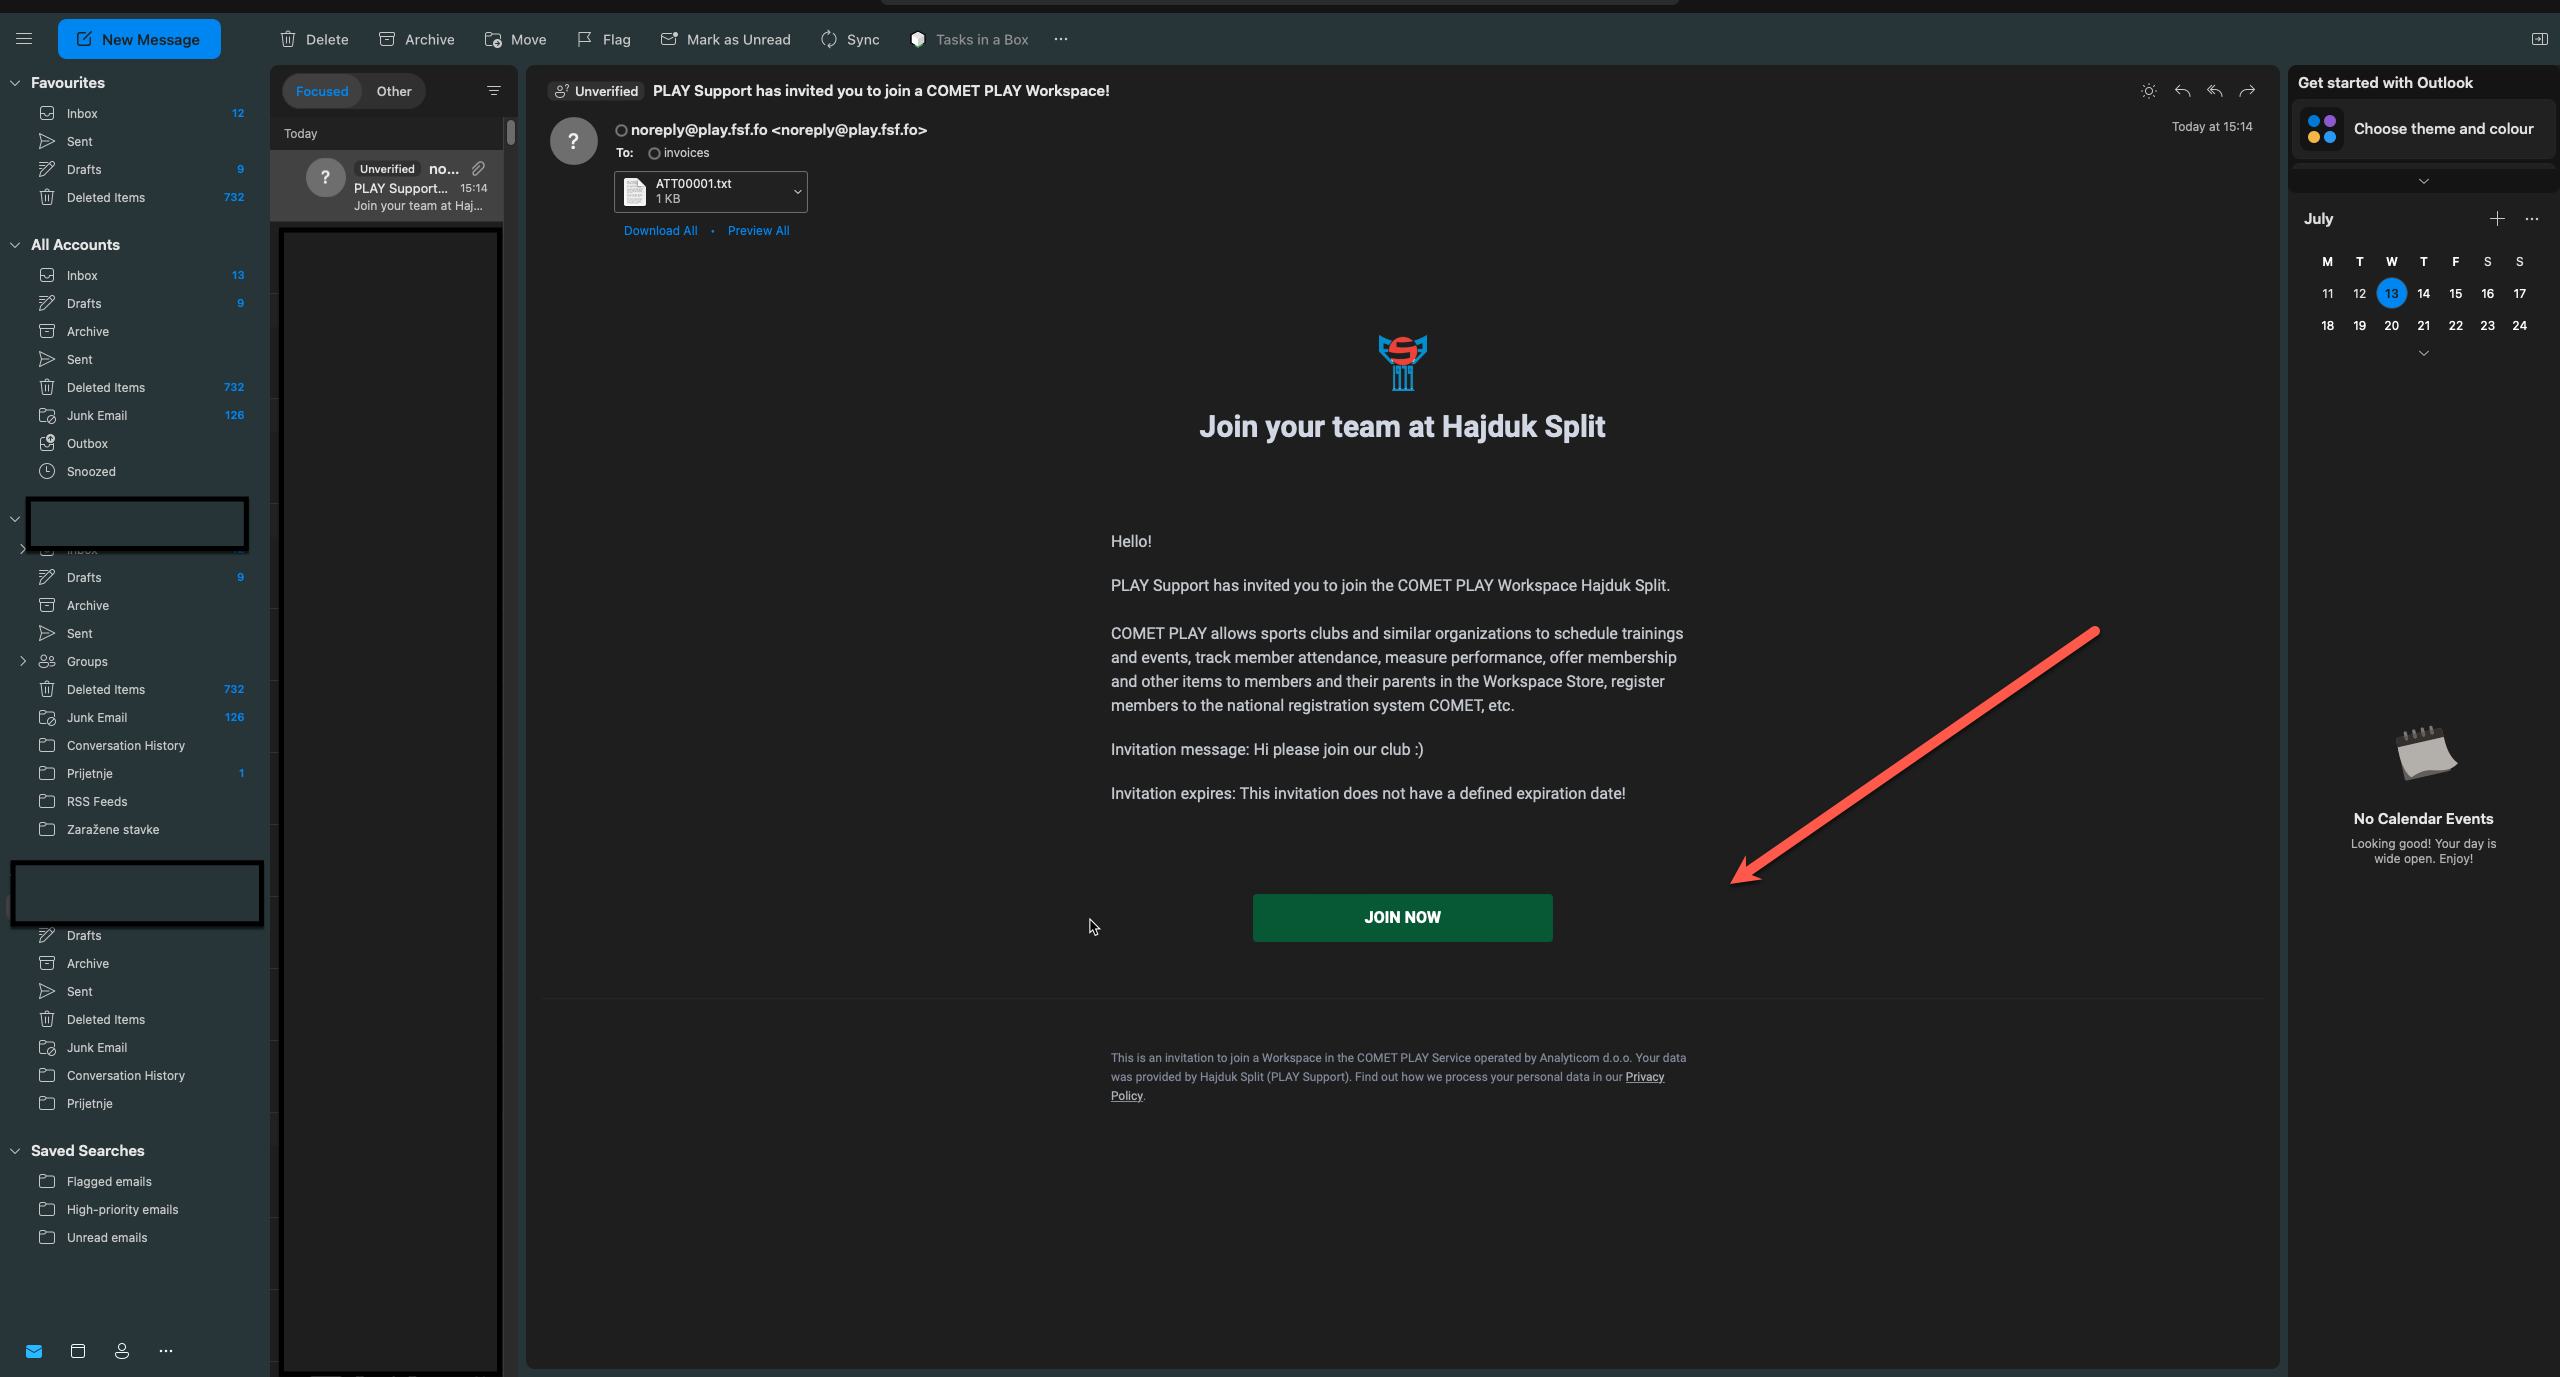
This sends an automatic e-mail with the Join link to your Workspace
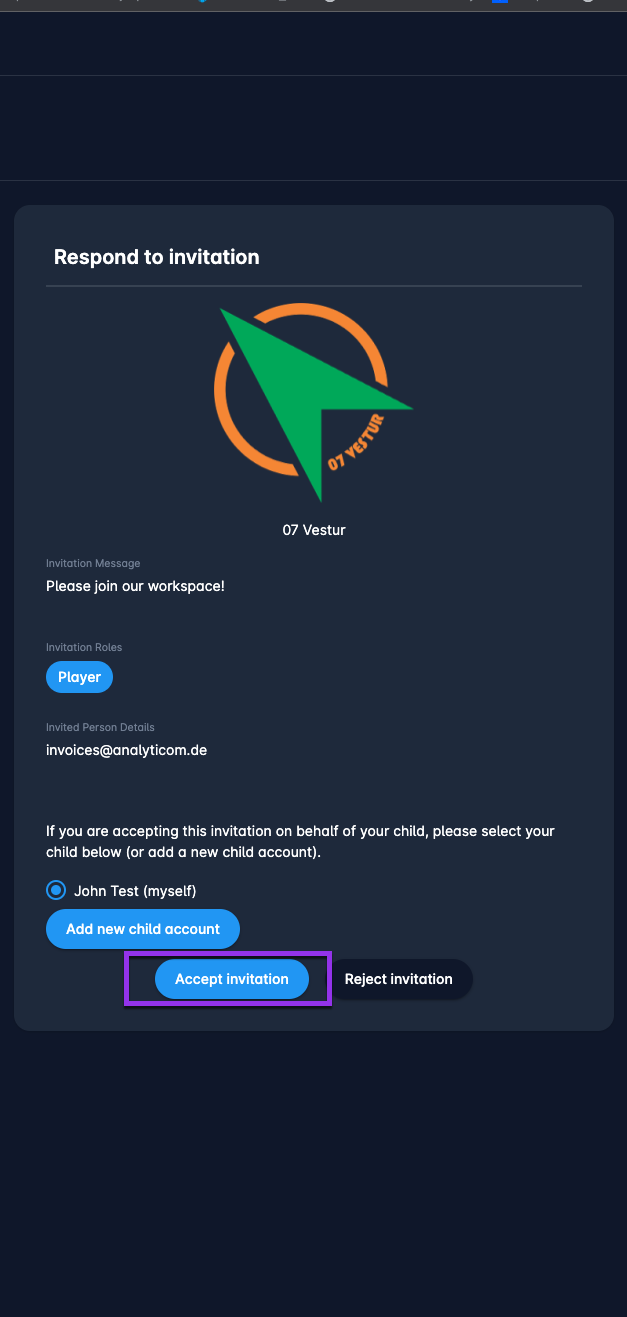
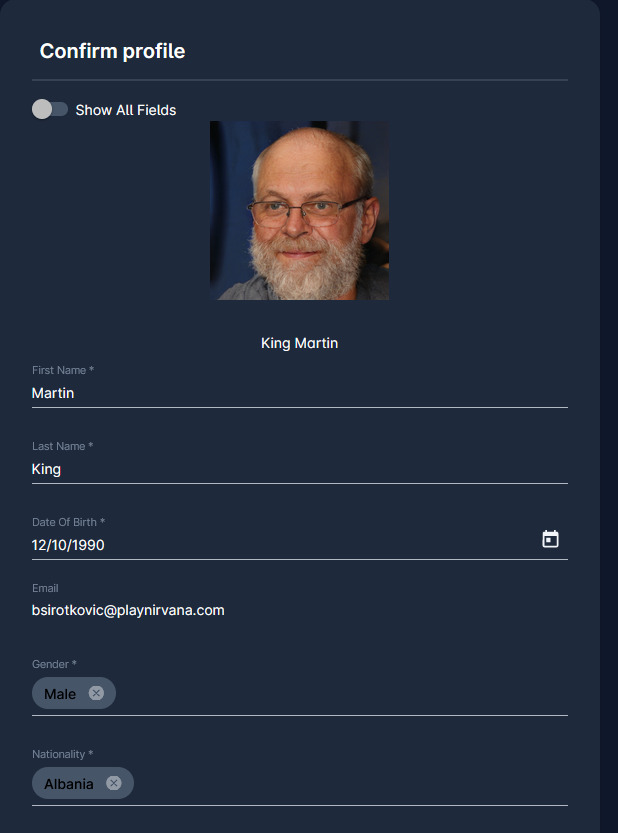
A new member of your Workspace will be asked to enter and confirm personal data based on the Member form configuration you have set.
*After the expiration date the invitation will be listed as inactive and the user won't be able to respond to the invitation.
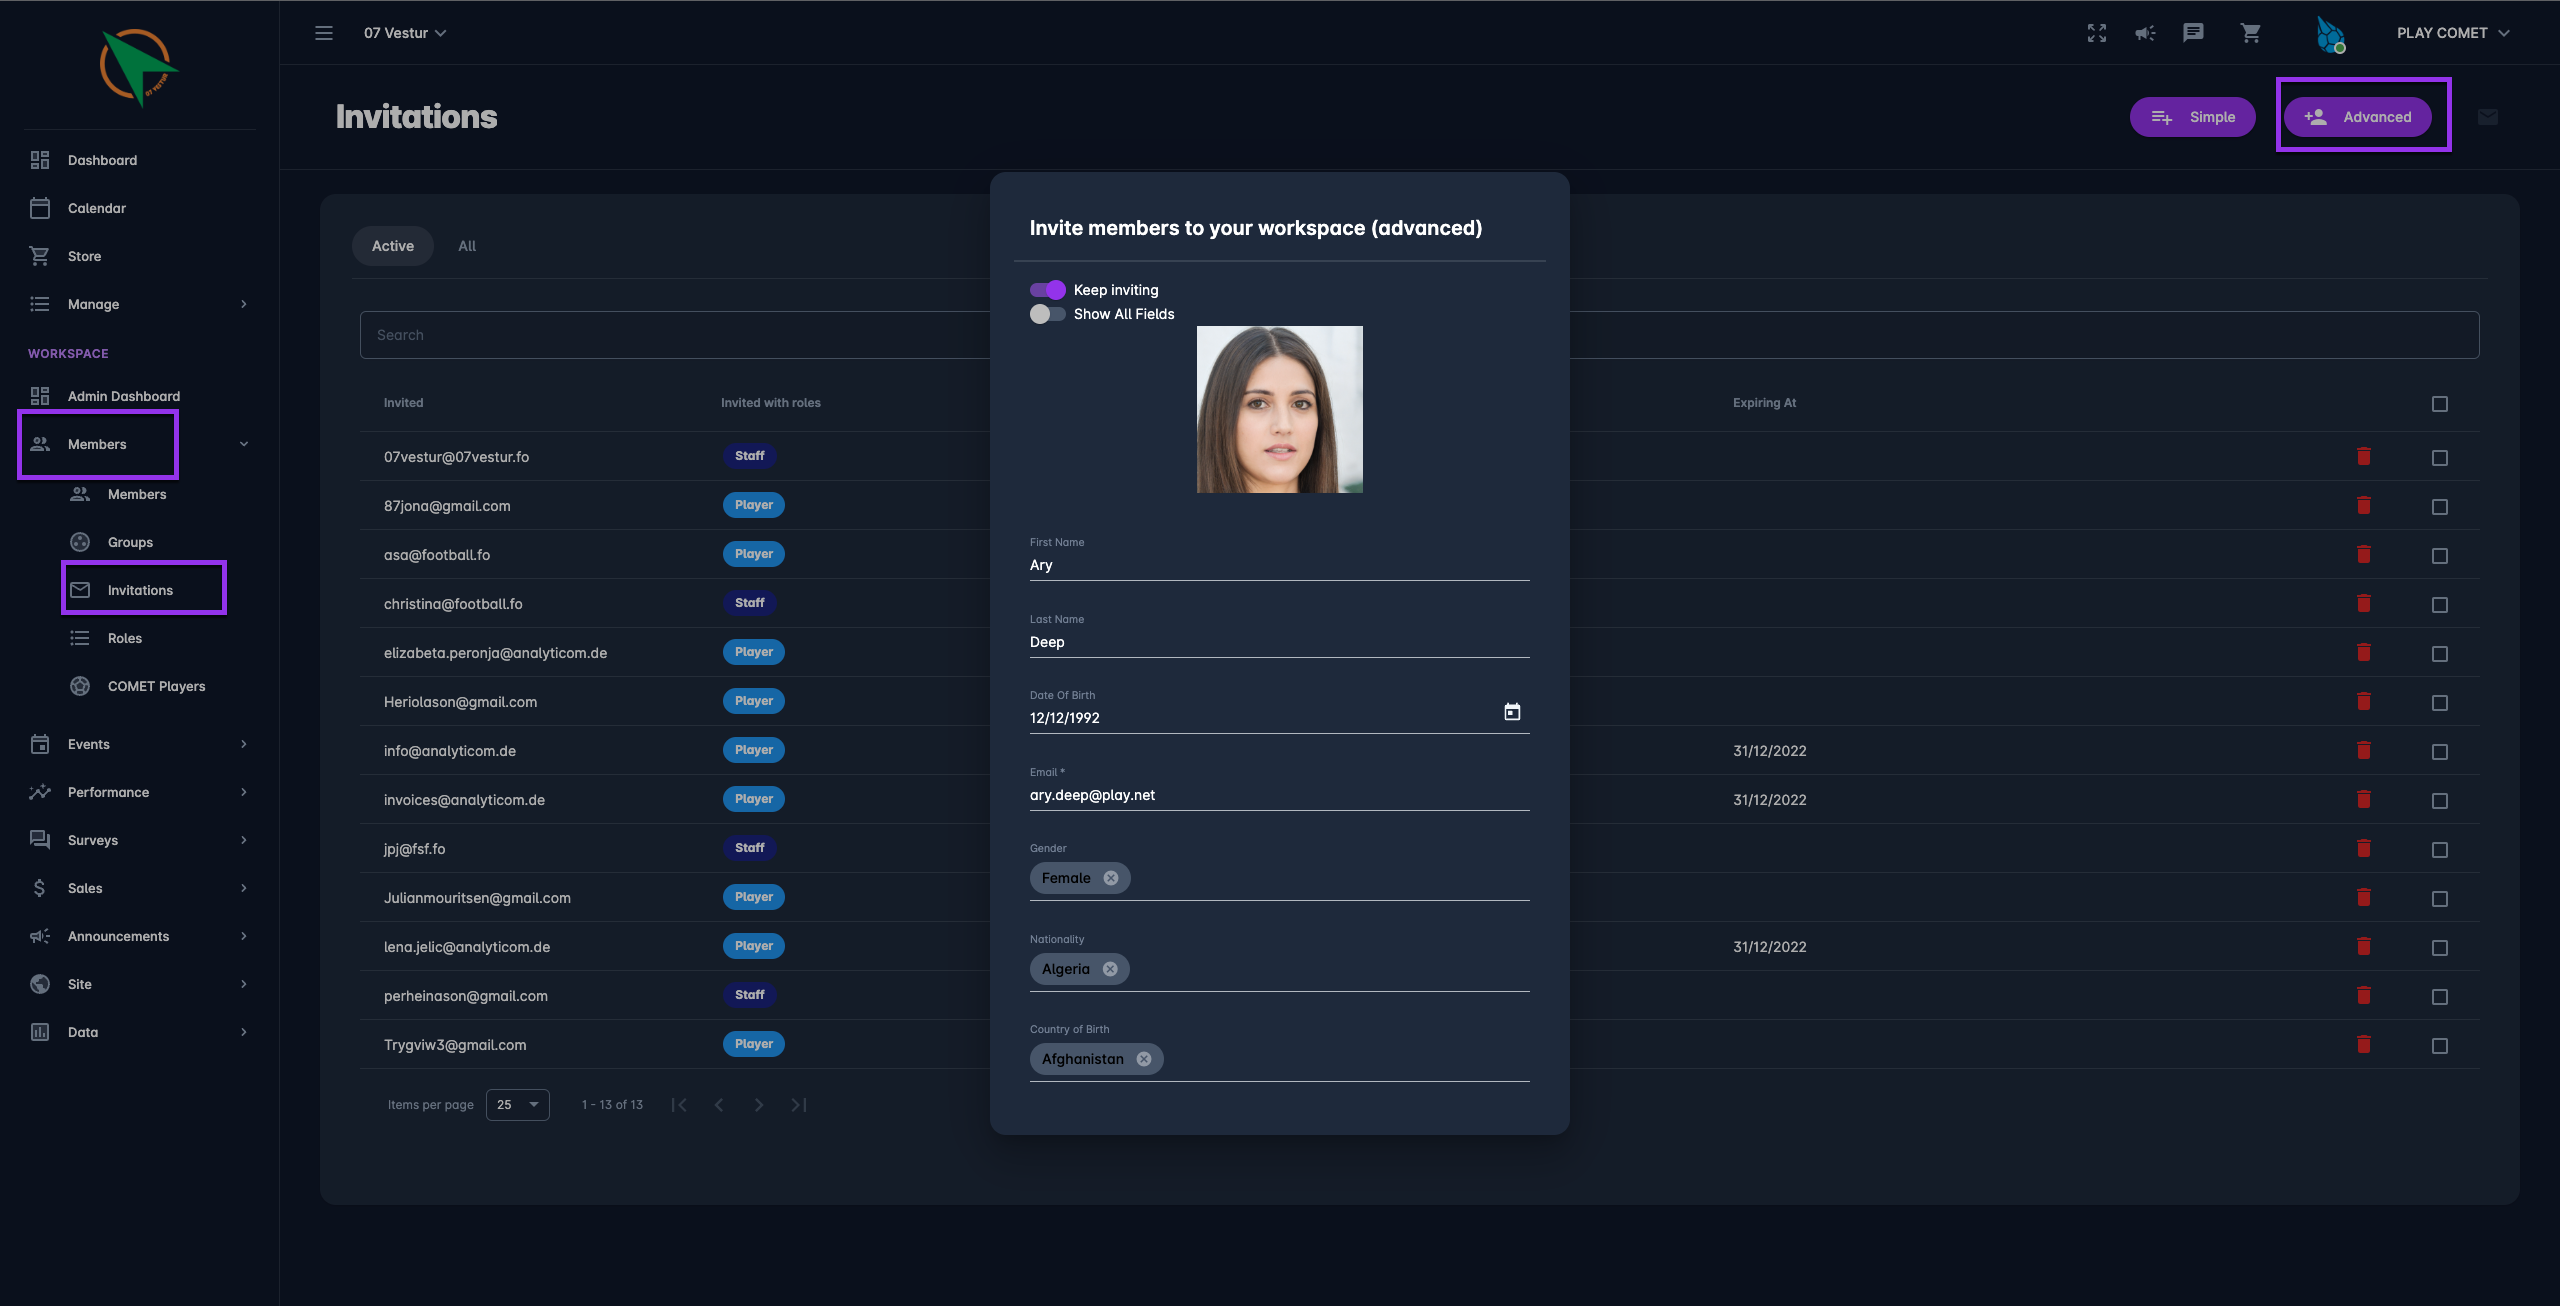
Advanced Invitations
Advanced Invitations allow you to fill in the personal details of a future member of your Workspace. Advanced Invitations resemble the Member Form, they contain all data fields defined by Member Form Configuration: First Name, Last Name, e-mail, Date of birth; Gender, Nationality, Country of birth, Role, Photo that you can set, etc. Besides the personal data fields, there are other data that you can add to the invitation: assigned groups, expiration date*, the message of the invitation.
To create an Advanced invitation:
Click on the Advanced button in the top right corner of the Invitations menu
Fill out Advanced Invitation From:
First name
Last name
Date of birth
e-mail address
Gender
Nationality
Country of birth
COMET Play role
Assigned groups
Set photo
expiration date* (optional field)
the message of the invitation (optional field)
After filling in the details, hit the Send Invitation button.
This sends an automatic e-mail with the Join link to your Workspace
The new member of your Workspace will get the invitation with the prefilled Member form and she/he will be asked to confirm the profile details.
💡 The Keep inviting button speeds up the process of inviting multiple members from the same window
💡 The Show all fields button extends the member form with additional fields to fill in
*After the expiration date the invitation will be listed as inactive and the user won't be able to respond to the invitation.
Inviting members by Join link
Please note that every Public Workspace has a Join link that can be found under the Workspace Settings. You can use the join link as a quick invitation. Just copy it to the clipboard and deliver it to your future member via any communication service that you prefer.