Configuring Workspace Settings
COMET PLAY Admin Users are responsible for adjusting the workspace setting and for the administration of the Workspace.
As a Workspace Admin, you are able to:
To edit your Workspace Settings:
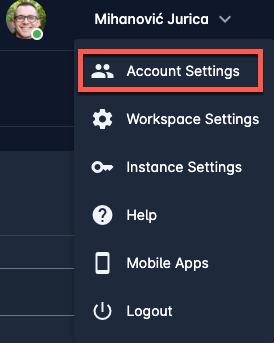
Click your name button in the upper right corner of the COMET Play Toolbar
A Switch button raises a modal to choose between administrative features. Please take into account that his list is defined based on the roles/ permission that you have.
Hit the Workspace Settings button
![]() Please take into account that this button is visible only to the users with the administration Permission level/ Workspace administrators
Please take into account that this button is visible only to the users with the administration Permission level/ Workspace administrators
![]() Please make sure that you have chosen the COMET Play Workspace that you are Admin of on the left side of the upper toolbar, i.e. if the “Viewing all” is selected the Workspace setting button will not be displayed
Please make sure that you have chosen the COMET Play Workspace that you are Admin of on the left side of the upper toolbar, i.e. if the “Viewing all” is selected the Workspace setting button will not be displayed
This opens the Workspace profile
The Workspace Settings consists of four tabs: Workspace info, Members, Integration, and Other
Workspace info tab
The workspace info tab contains general data of the Workspace that can be edited by COMET PLAY Admin:
Workspace name
Alias - it defines your workspace domain URL.
Photo (used as Logo, it can be uploaded or taken, and edited directly on the page)
Code (used for API access) → Hit the copy icon to copy the code
Description
Time zone
Chanel active (switcher) - If Channel is activated then instant messaging can be used, and a a general workspace channel with all members is created
▶️ To edit any of these data simply click the edit button at the bottom of the sheet, enter the necessary changes, and hit the save button.
Visible to the public (switcher)
By enabling the visible to the public option you are allowing any COMET PLAY User to join your Workspace., the workspace will be visible in the Join Workspace menu
By turning on the visible to the public option the Join link will be displayed → Just copy it to the clipboard and deliver it to your future member via any communication service that you prefer.

Members Form tab
As a COMET PLAY Admin User, you are able to configure your Workspace Member Form according to the needs and preferences of your Workspace. Each member joining a COMET PLAY Workspace is required to fill out the Member Form. New Workspace Members will have to fill out their Member Form no matter if she/he is joining a Public Workspace or gets invited to join a Workspace.
▶️ To configure the members form:
Select the Members tab on the Workspace Settings
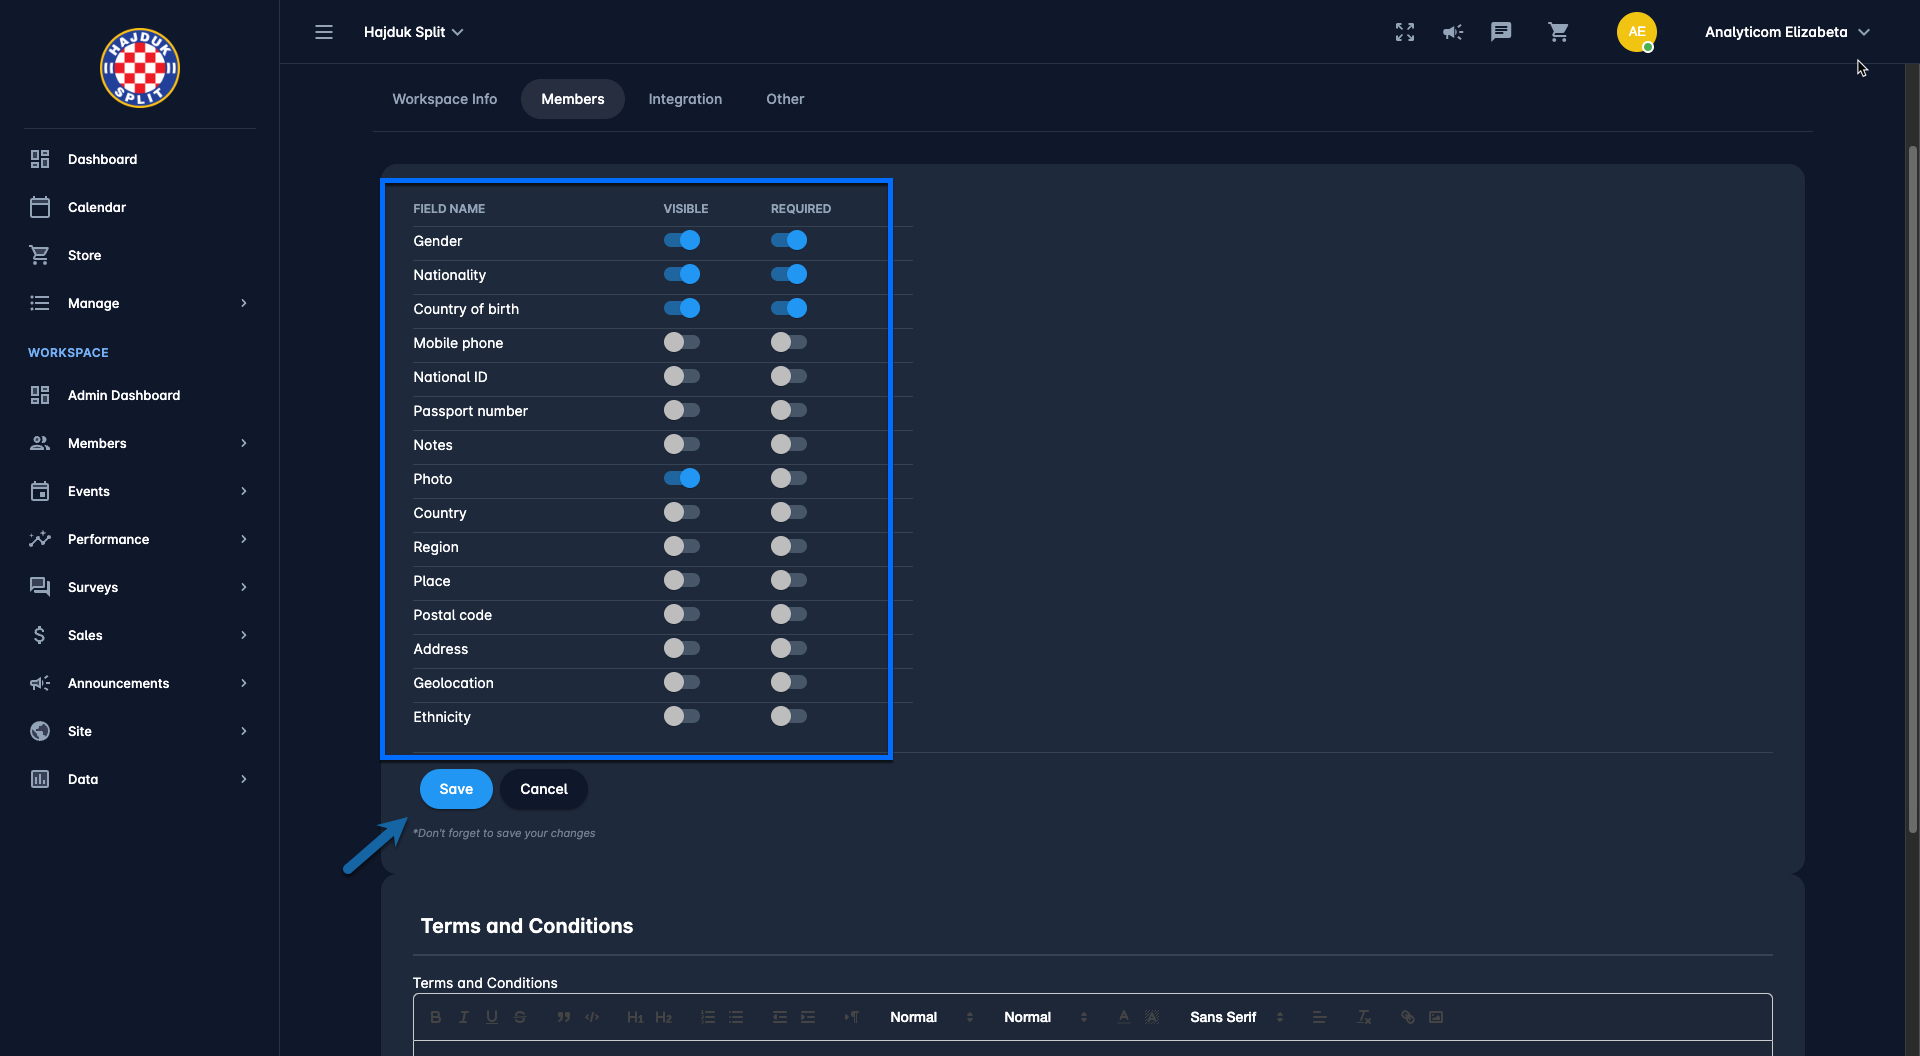
This opens the list of the Member Form data fields
To make specific data fields visible* in the Member form of your Workspace:
Hit the Edit button
Turn the switch button in the Visibile column next to the name of the data field
Hit the 💾 Save button
To make specific data fields required** in the Member form of your Workspace:
Hit the Edit button
Turn the switch button in the Required column next to the name of the data field
Hit the 💾 Save button
On the Terms and Conditions section, you can add the terms and conditions text that needs to be checked by members
*COMET PLAY Users are able to see and fill fields that are not ticked as visible by switching the Show all fields option on their member form.
**COMET PLAY Users will not be able to proceed with the registration without entering the data in the fields which are set as required.
Important: Please take into account that there a mandatory data fields (first name, last name, date of birth, and email) of the Member Form, and, therefore, you are not able to make them invisible or non-required.
Integration tab
A COMET PLAY Workspace can be connected to a Club (Organisation) in the COMET System of a national association. For more instructions on COMET integration please click on the following link: Managing Integration with COMET
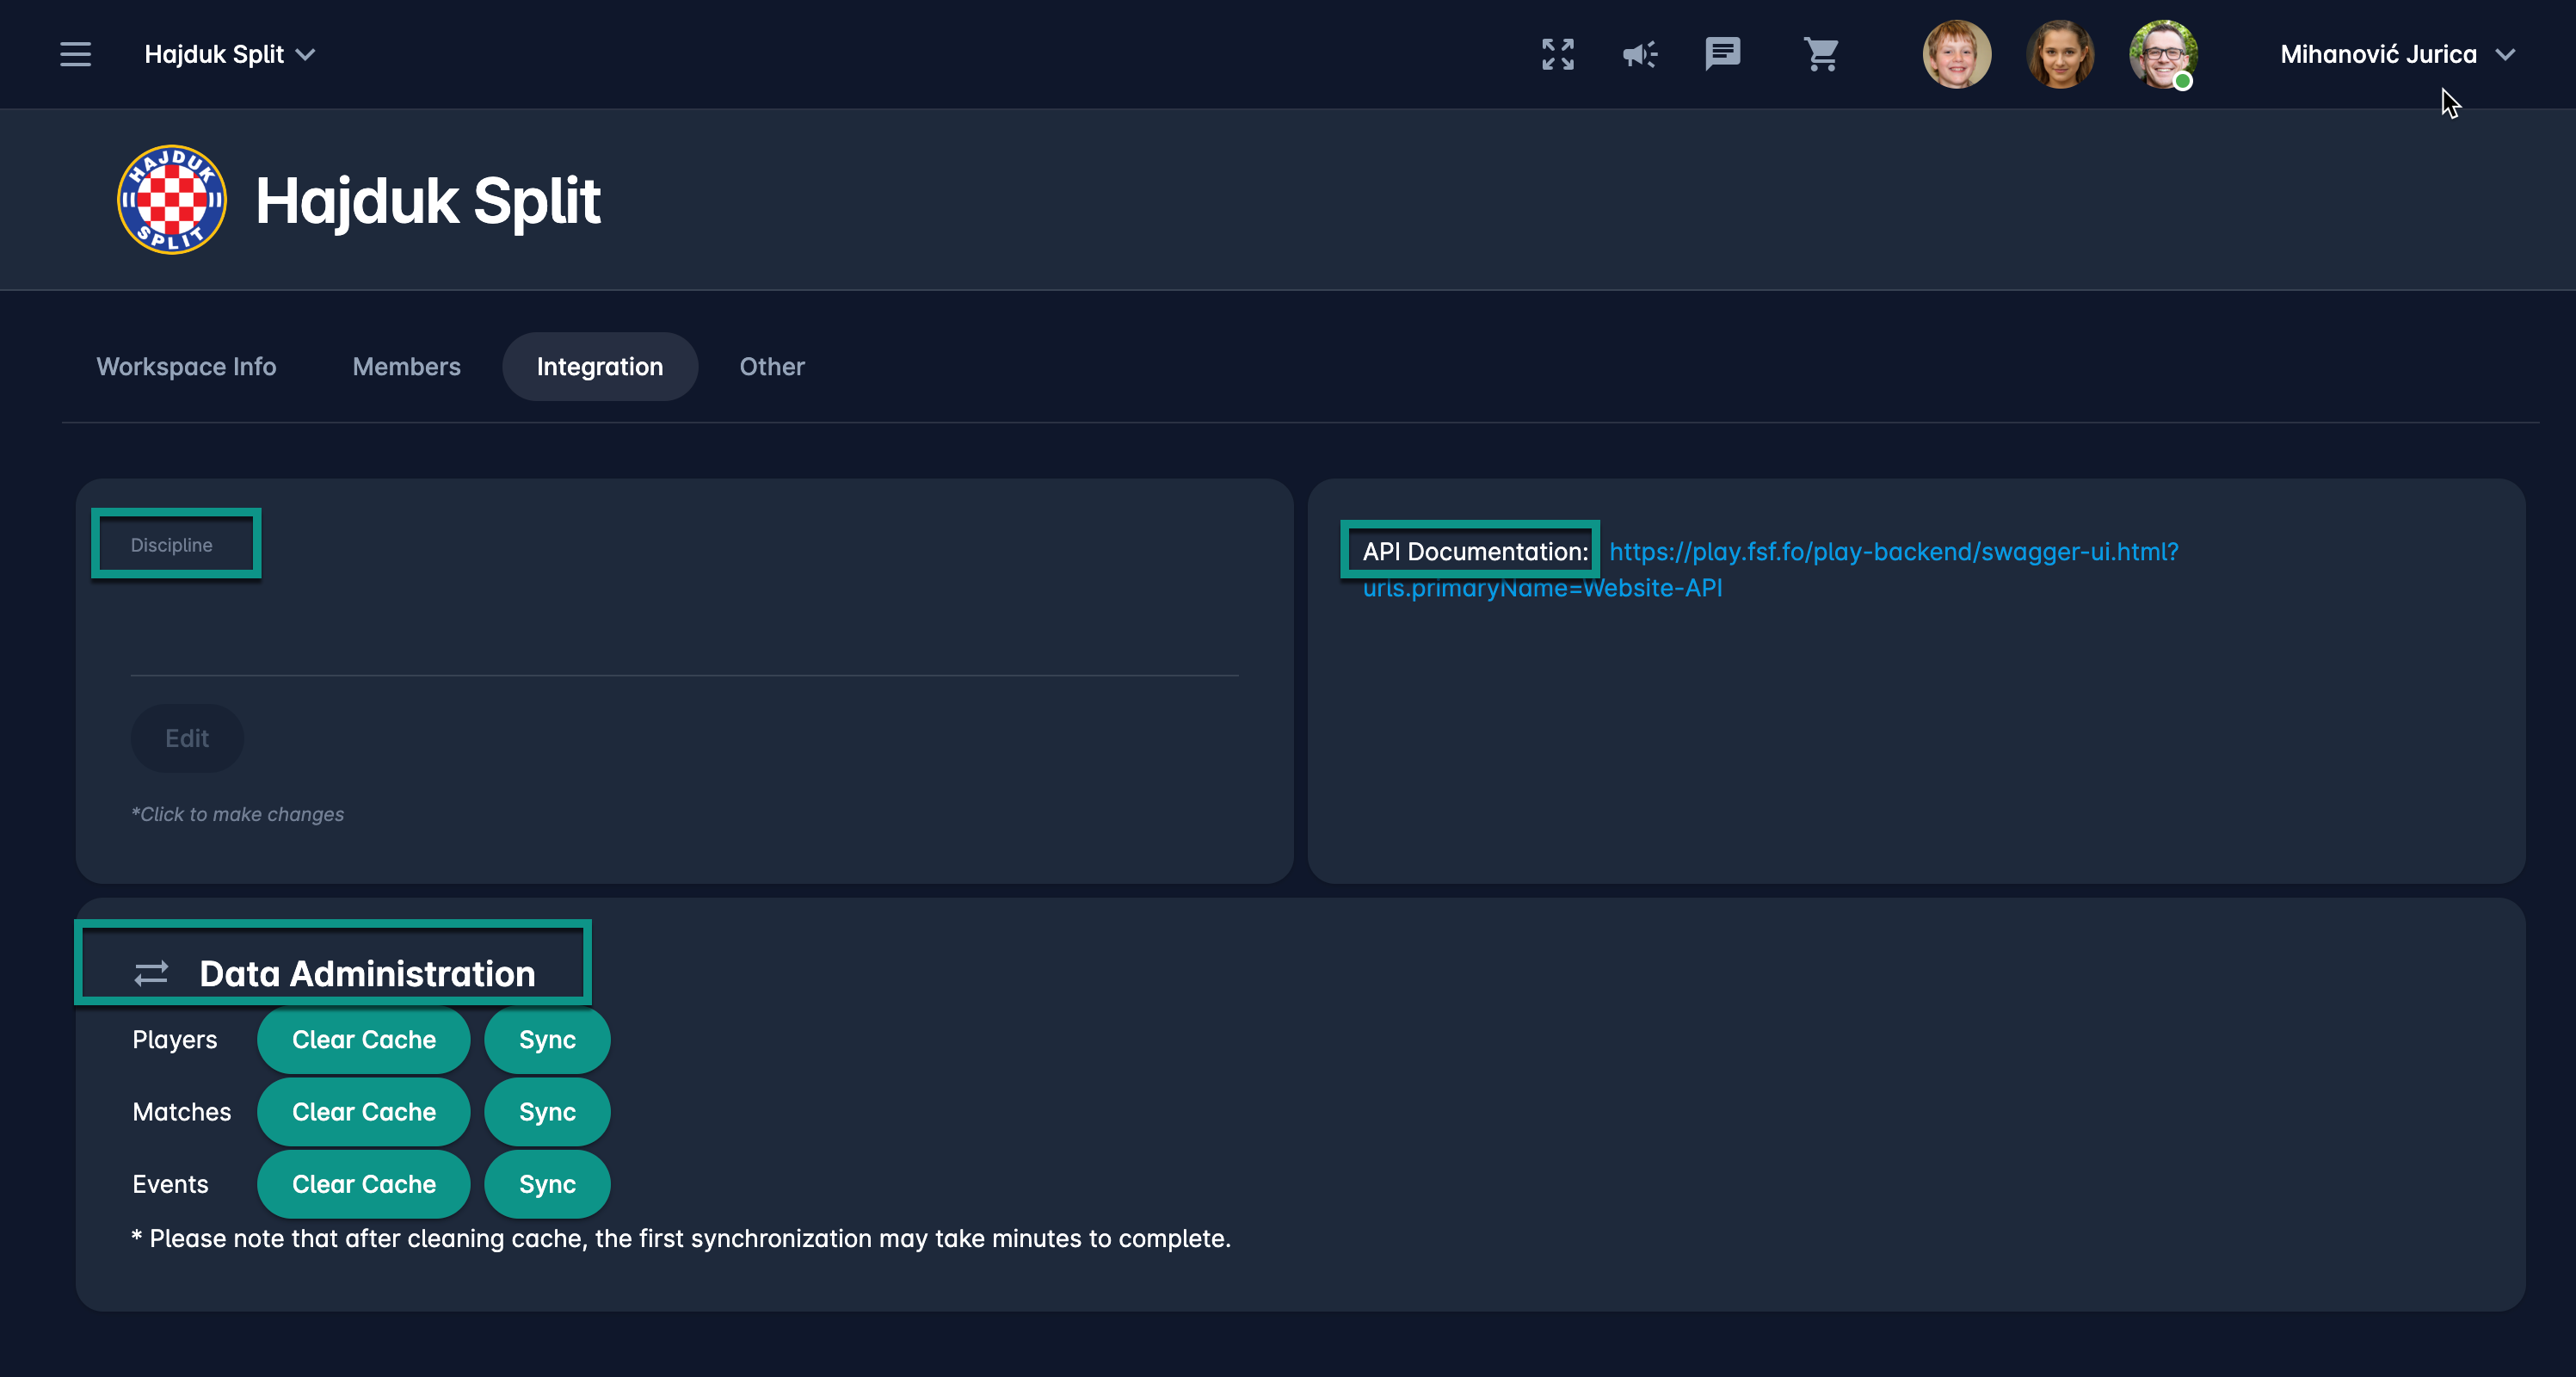
The Integration tab consists of the following sections:
Discipline - defined when the Workspace is created
API Documentation - used for API integration to 3rd party systems.
Data Administration Section
Data Administration Section
COMET Play is synced with your Club in COMET System on daily bases. However, in the case you urgently need to “force” a sync, e.g. a certain player or event was added to the COMET system after the period of the last automatic sync and you need it urgently in COMET Play. From this console, you can conduct a manual sync.
To force sync manually:
Select the Integration tab on the Workspace Settings
Access the Data Administration Section
Hit the Sync button next to the entity that needs to be updated from the COMET System
💡 Please take into account that a click on the Sync button triggers the update of the entities after the last daily automatic sync.
In case you doubt there are some historical data missing → first hit the Clear Cache button to update the lastUpdated time and then hit the Sync button to trigger the update of the data from very beginning (not from the last update time).
Other tab
On the Other tab of the Workspace settings, COMET PLAY Admin User are able to delete the workspace and conduct other actions that are not listed in the previous three tabs.
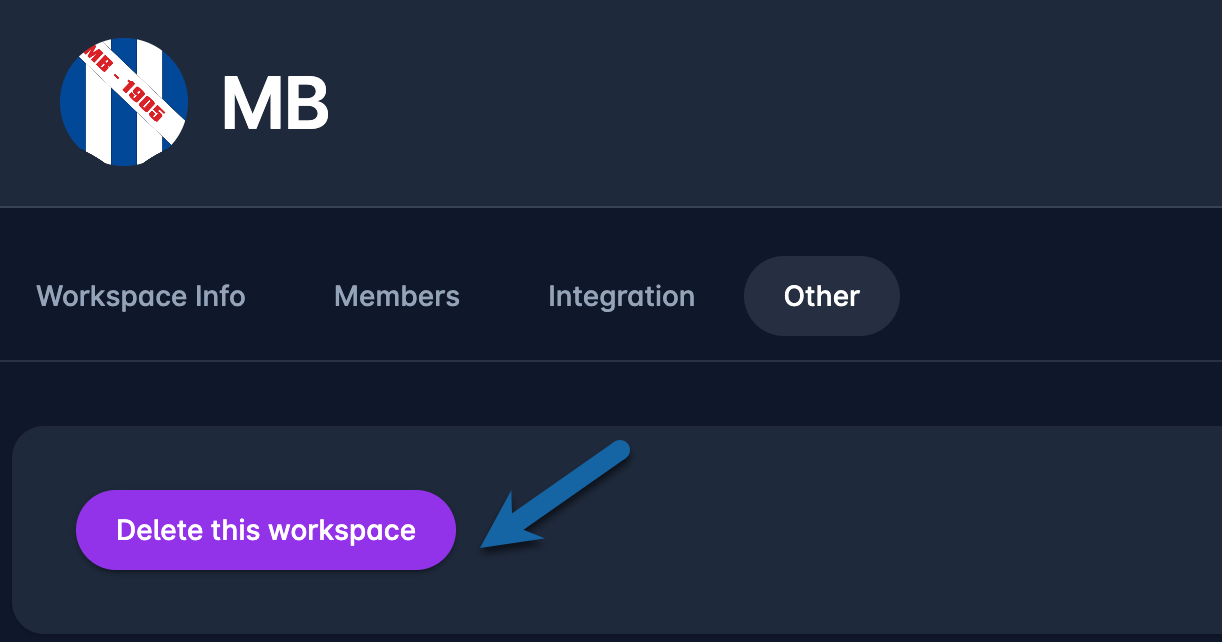
To delete the Workspace:
Select the Other tab on the Workspace Settings
Hit the Delete this workspace button