Each individual user can manage their own Account Settings and Preferences. To Manage your Account Settings:
-
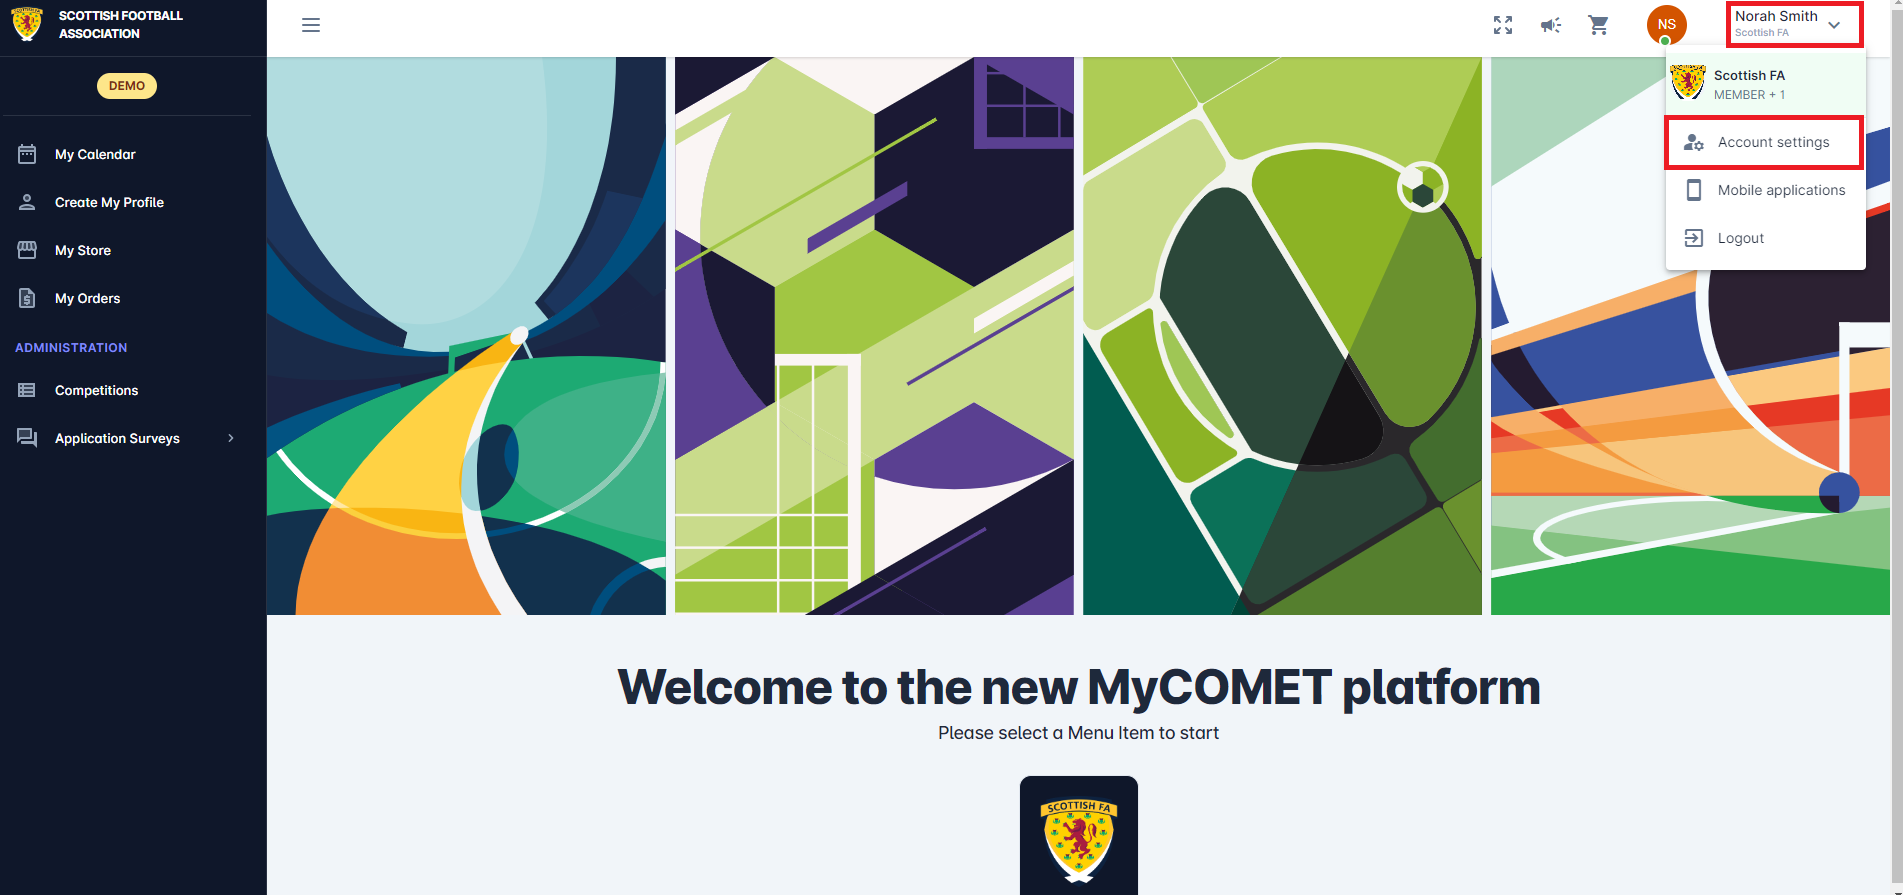
Click your name button in the upper right corner, in order to open the User Menu
-
Hit the Account Settings button
-
The Accounts Setting menu is displayed, the menu consists of the following tabs:
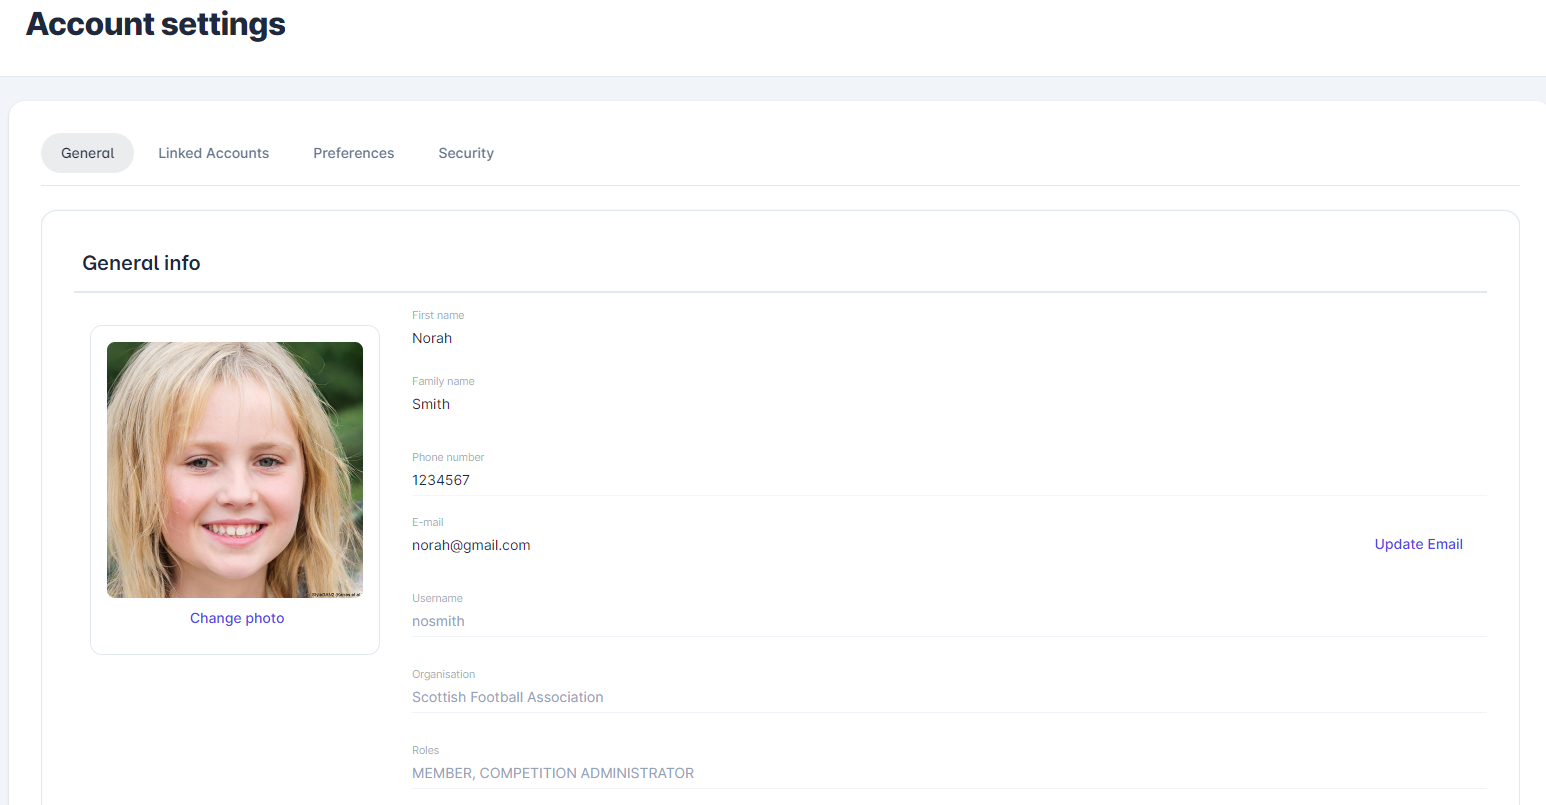
General Tab
The General Tab contains General info: name, family name, phone number, email address, username, organization, assigned roles, and user photo. All data in this tab (except username, organization, and roles that are predefined by your user profile) can be edited:
-
Enter the necessary changes
-
Hit the Save button to save your changes
-
To change the photo:
-
Hit the Change photo button
-
Select the source of your photo (camera or browse from your gallery, documents)
-
Hit the Save button
-
-
Use the Update Email button in case you need to change the email that is linked to your account → 📧 You will get the verification link to your email to proceed with the email update.
Linked Accounts
Create child accounts and seamlessly link existing accounts, whether they are designated as your child or parent account. These functionalities aim to enhance the family experience on our platform, allowing parents to manage all their child accounts from their own parent account.
Click the link to read more about Linking Accounts.
Preferences Tab
The Preferences Tab contains settings to adjust your UI preferences: region and timezone, language, and theme settings:
Notifications
In the Notifications section, you can manage whether or not you wish to receive notifications about announcements and informational match updates, giving you complete control over the types of updates you receive. Informational Match Updates notifications can be enabled or disabled individually in Account Settings by each user, such as a Referee or Lineup Manager. By default, this option is enabled, so all match stakeholders - excluding admins and managers - will initially receive notifications such as Both Lineups Confirmed and Match Played.
Region and Timezone
Please note that the selected region determines the format of the time, date, number, and amount entries. The region chosen determines whether the time is displayed in AM/PM or 24-hour format, as well as whether dots, slashes, or other characters are used to separate the entered dates.
-
Change the Region and timezone, and hit the 💾 Save button
-
In the Example field, you will be able to see the format in which time, date, numbers, and amounts will be shown
Language
-
Change the system language and hit the Save button
To personalize your User Interface:
-
Use this tab to define the theme and schema of MyCOMET according to your preferences:
-
Select the theme color
-
Select the Schema (Schema/ Dark/ Light)
-
Select the Layout (Classic, Classy)
-
Once the option is selected, changes are applied automatically
-
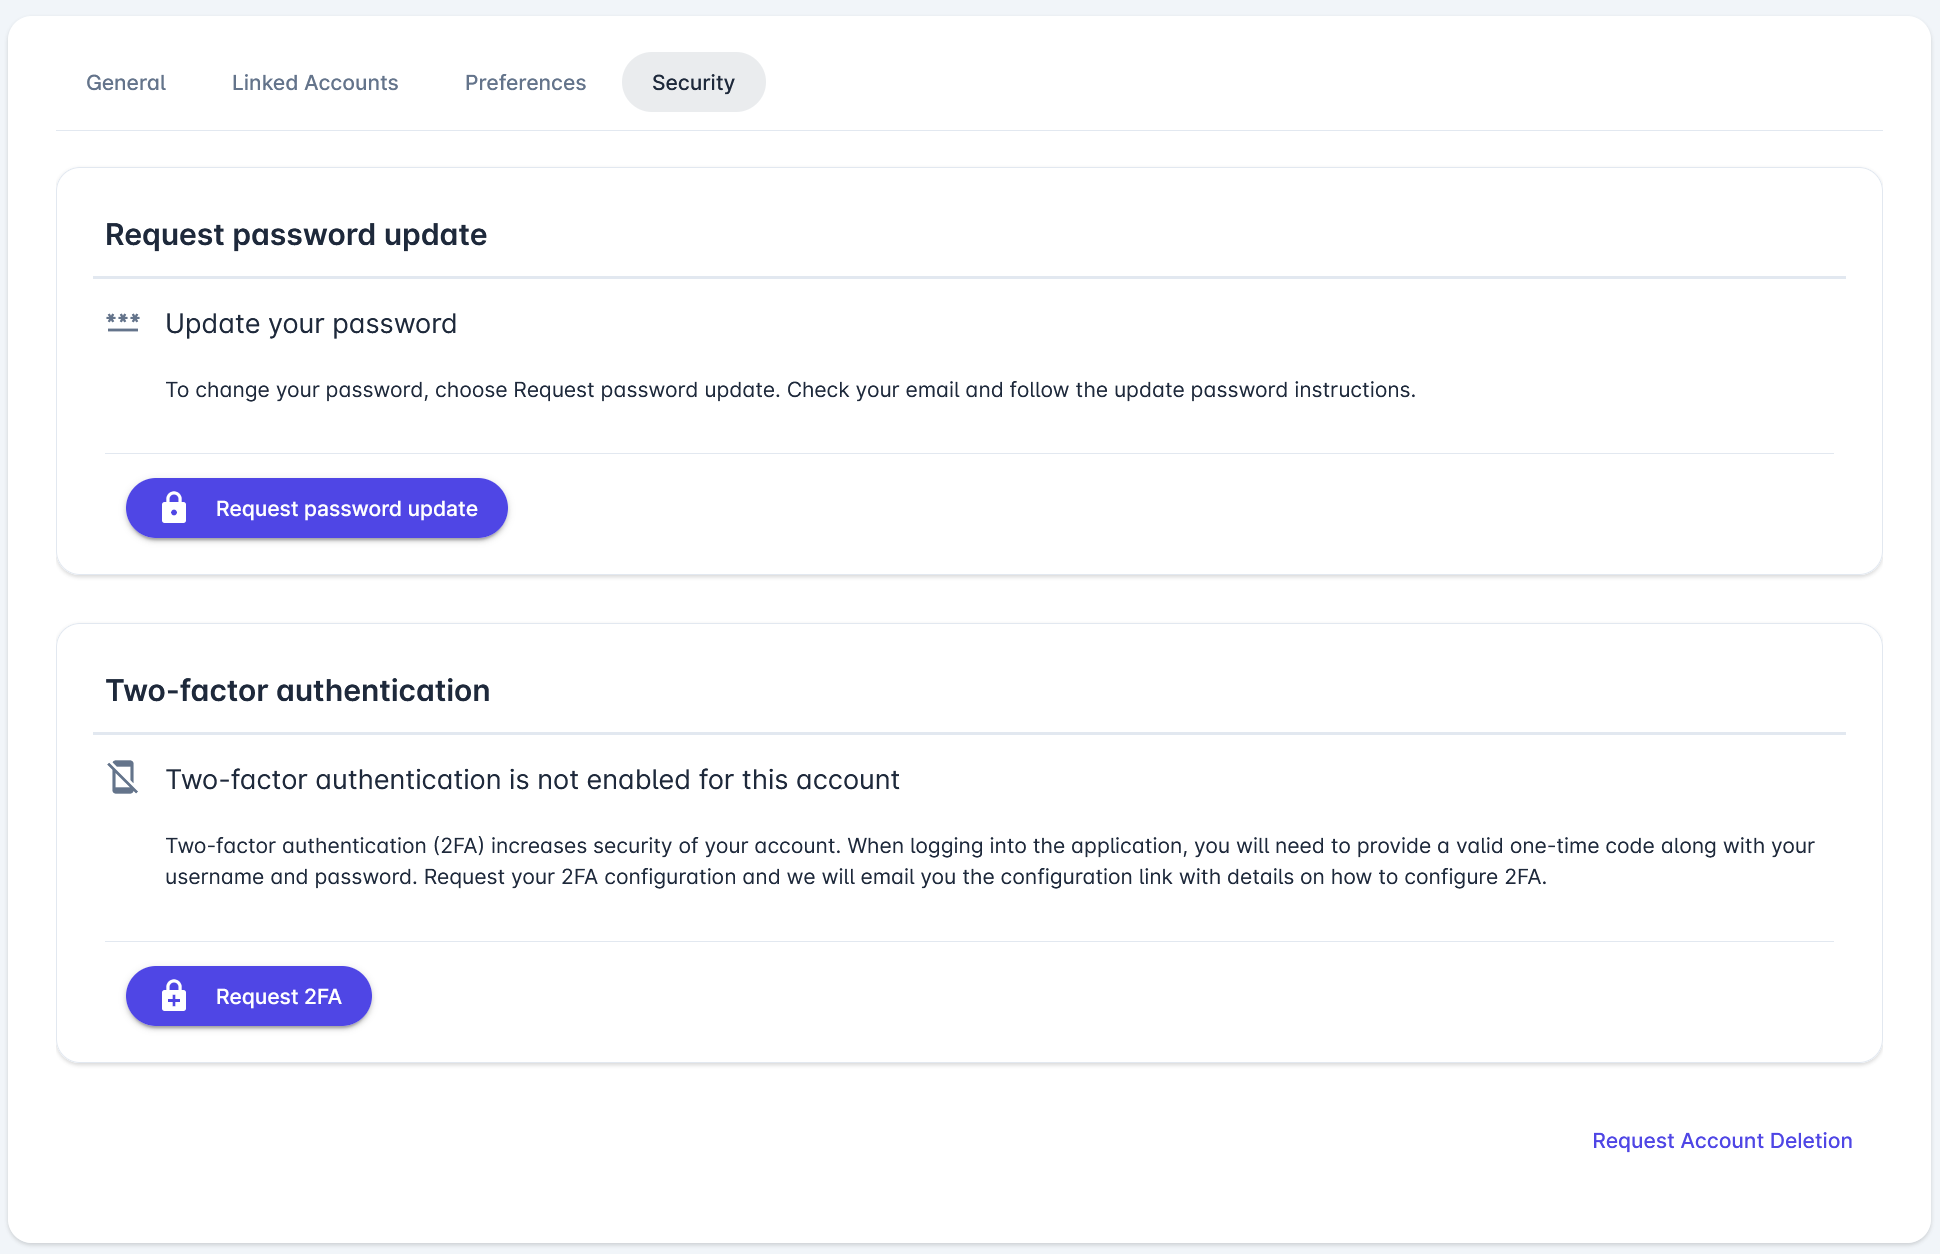
Security Tab
The Security Tab provides the possibility to control security features:
Request password update → Hit the 🔒 Request password update button to receive the password update instruction and link to your e-mail.
Request Account Deletion →
Two-Factor Authentication → the following options will be presented depending on the 2FA status of your account, and whether 2FA is mandatory.
-
Request 2FA: If you do not have 2FA configured, click the 🔒 Request 2FA button to receive the configuration link with details on how to set up 2FA.
-
Click Resend 2FA if you have requested the link (but not yet configured 2FA) and wish to receive the configuration link again in your email.
If 2FA is mandatory in your organization, Request 2FA is not necessary, as you will be required to configure 2FA on your next login, unless you have already done so.
-
Disable: If you already have 2FA configured, the Disable button removes 2FA, allowing you to log in without it, unless 2FA is mandatory in your organization. This feature is commonly used when you have a new device and want to set up 2FA.
If 2FA is mandatory in your organization, even if you disable your 2FA configuration, you will be forced to configure 2FA again on your next login.
Configure 2FA for your Account
Two-factor authentication enhances the security of your account and minimizes the risk of unauthorized access to the system using your credentials, such as through password theft or hacking. You can access the 2FA Configuration page in one of the two following ways:
-
Follow the link in the e-mail received after you have clicked the Request 2FA button
-
If 2FA is mandatory in your organization, just log in with your credentials
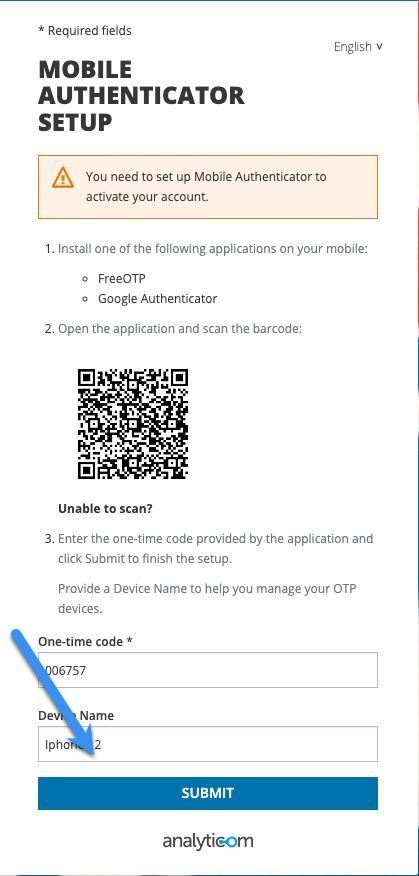
Now, you need to set up the Mobile Authenticator to activate your account
#1 Install one of the following applications on your mobile device:
-
FreeOTP
-
Google Authenticator
-
Microsoft Authenticator
#2 Open the installed application on your device, and scan the barcode presented on the configuration screen.
#3 Enter the one-time code provided by the application and click SUBMIT to finish the setup.
From now on, you will be able to log in to the platform by providing a one-time valid code (OTP) along with your username and password. Check out a step-by-step guide on how to log in with 2FA after it's been set up.
If you changed devices and now want to configure 2FA on your new device, then:
-
Press the Disable button in the Account Settings Security Tab (see instructions under the Security Tab heading on this site), and
-
Repeat the configuration procedure with your new device
Request Account Deletion
You can request deletion of your COMET account from the Security section of your account settings.
To request deletion of your account:
-
Open your Account settings.
-
Go to the Security tab.
-
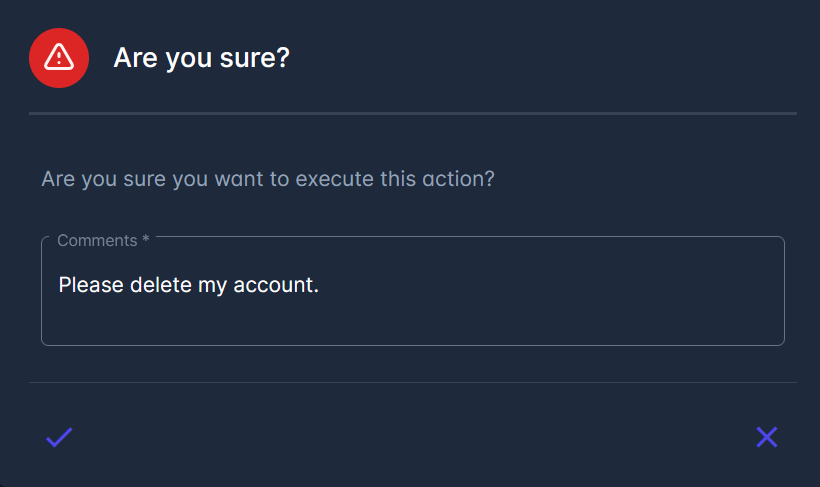
Click Request Account Deletion.
After clicking the button, a confirmation dialog will appear. Enter a mandatory comment (for example: Please delete my account) and confirm the request.
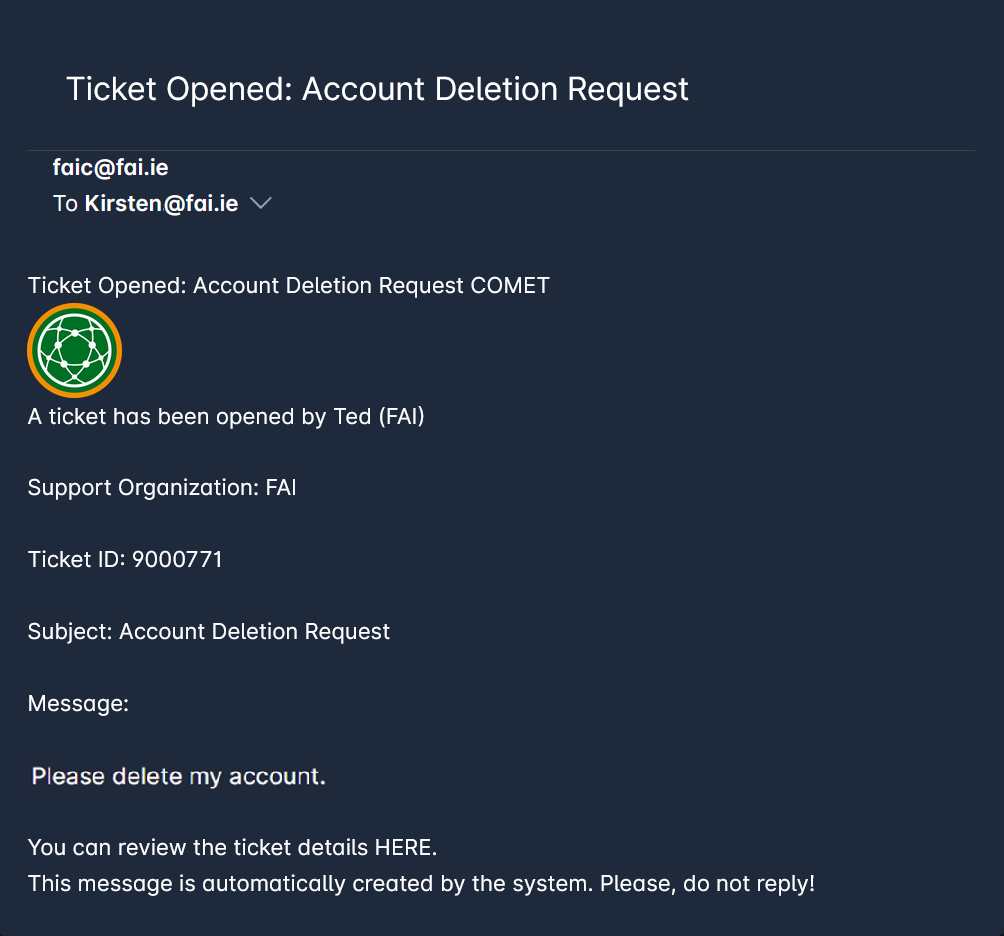
Once the request is confirmed, a notification appears with details about it. Moreover, a support ticket is automatically created and sent to the Association's support team.

In addition to receiving a pop-up notification, the user requesting deletion and all relevant users of the associations will be notified via email (the standard email for a new ticket being opened).
The Association's support will review the request and process the account deletion. Either as a user reporter or a user responsible for resolving the tickets, you can track the request through the created support ticket.
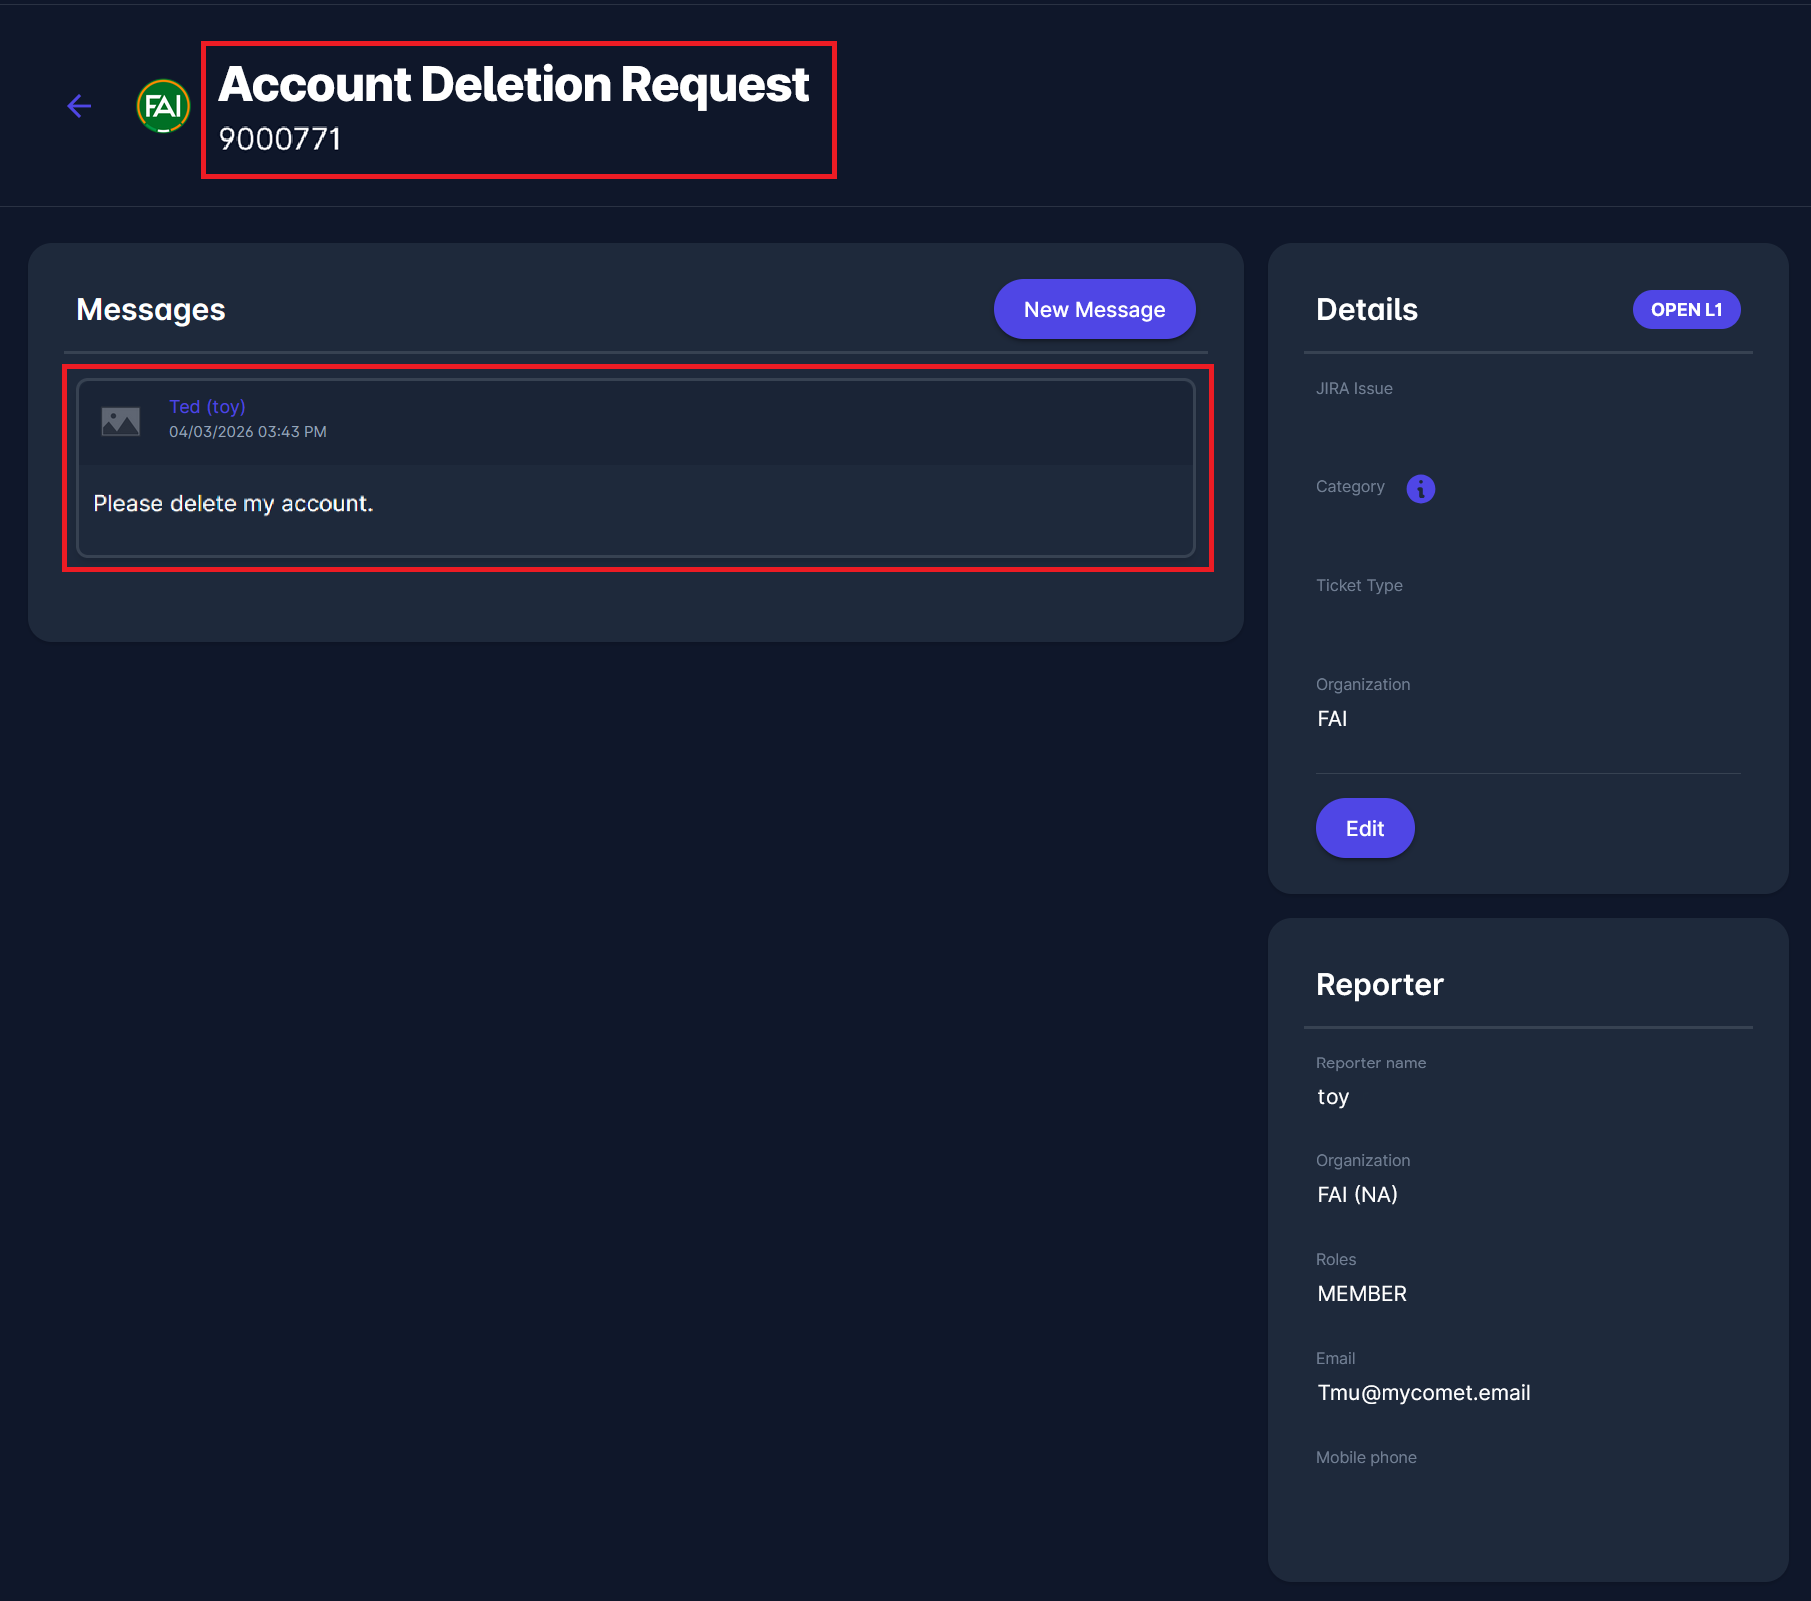
Account deletion requests will create tickets with the subject "Account Deletion Request.” The user's confirmation message will be presented as the message body.
The user can submit a request for an account deletion only if there is no already active request/ticket for account deletion.