In this article, you'll learn how to create and send a regular email campaign in COMET. Before you start, make sure you have created at least one distribution group.
To start the creation of the campaign:
-
Access COMET Announcements → Campaigns menu
-
Hit the Add button at the top right corner to create a New Campaign
-
This will open a new campaign pop-up window
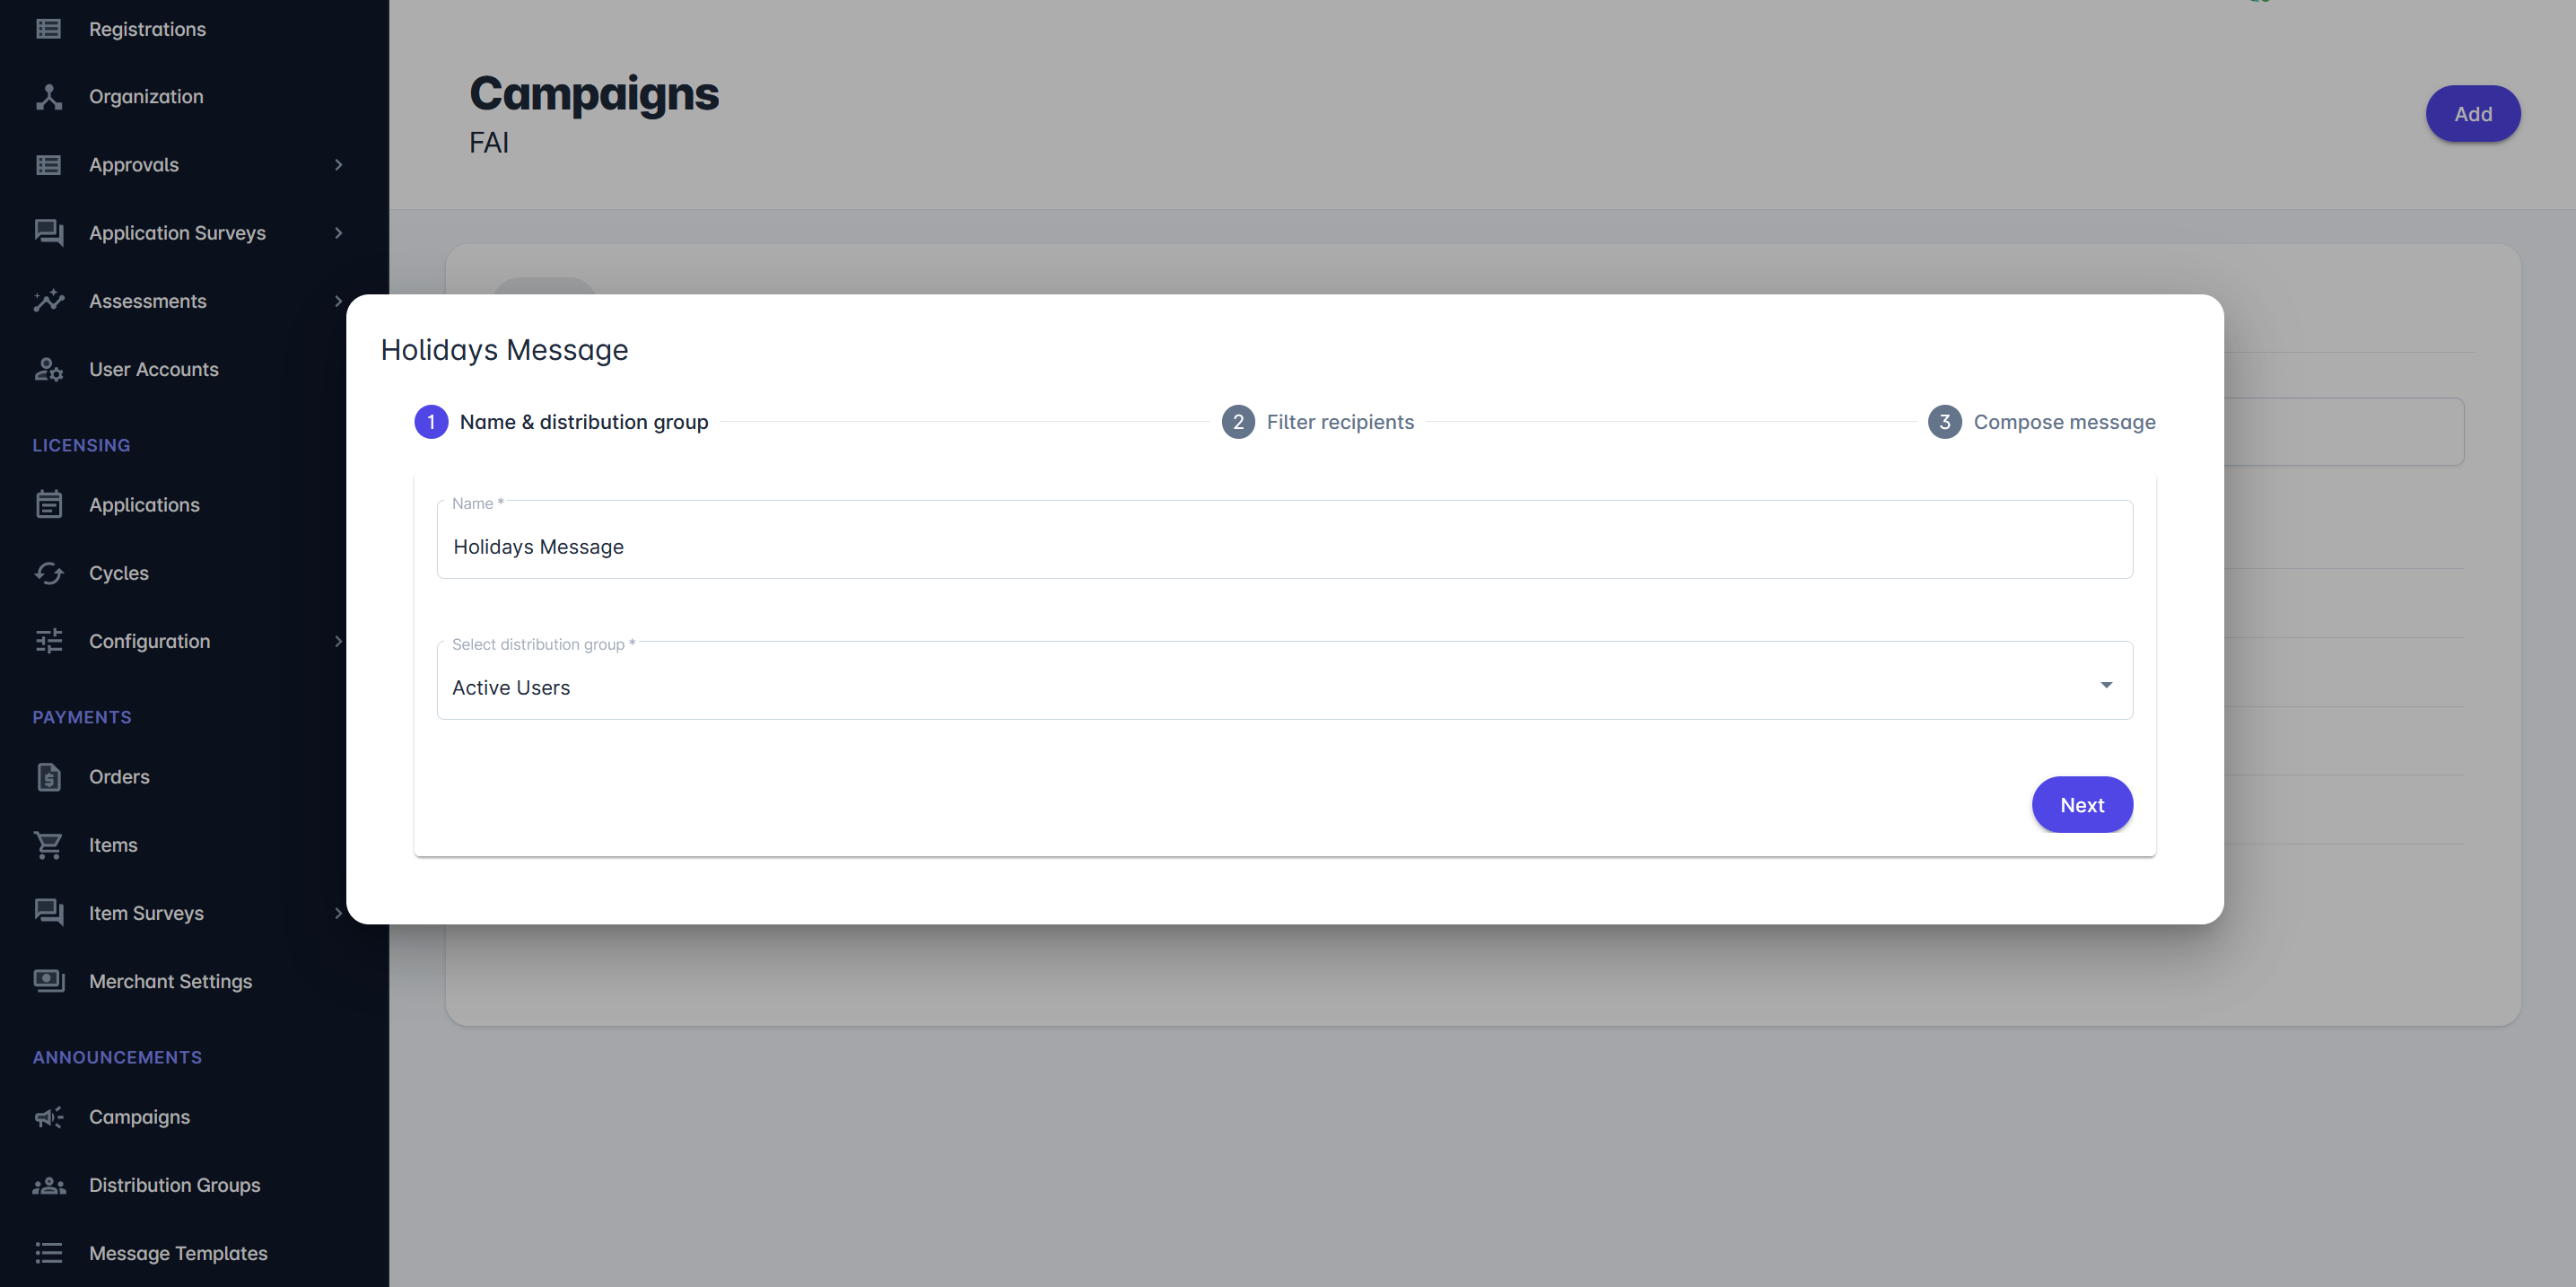
Step 1: Name and Distribution Group
-
In the pop-up window, fill out the name field and select the distribution group from the drop-down list.
-
Once this step is completed, click the Next button
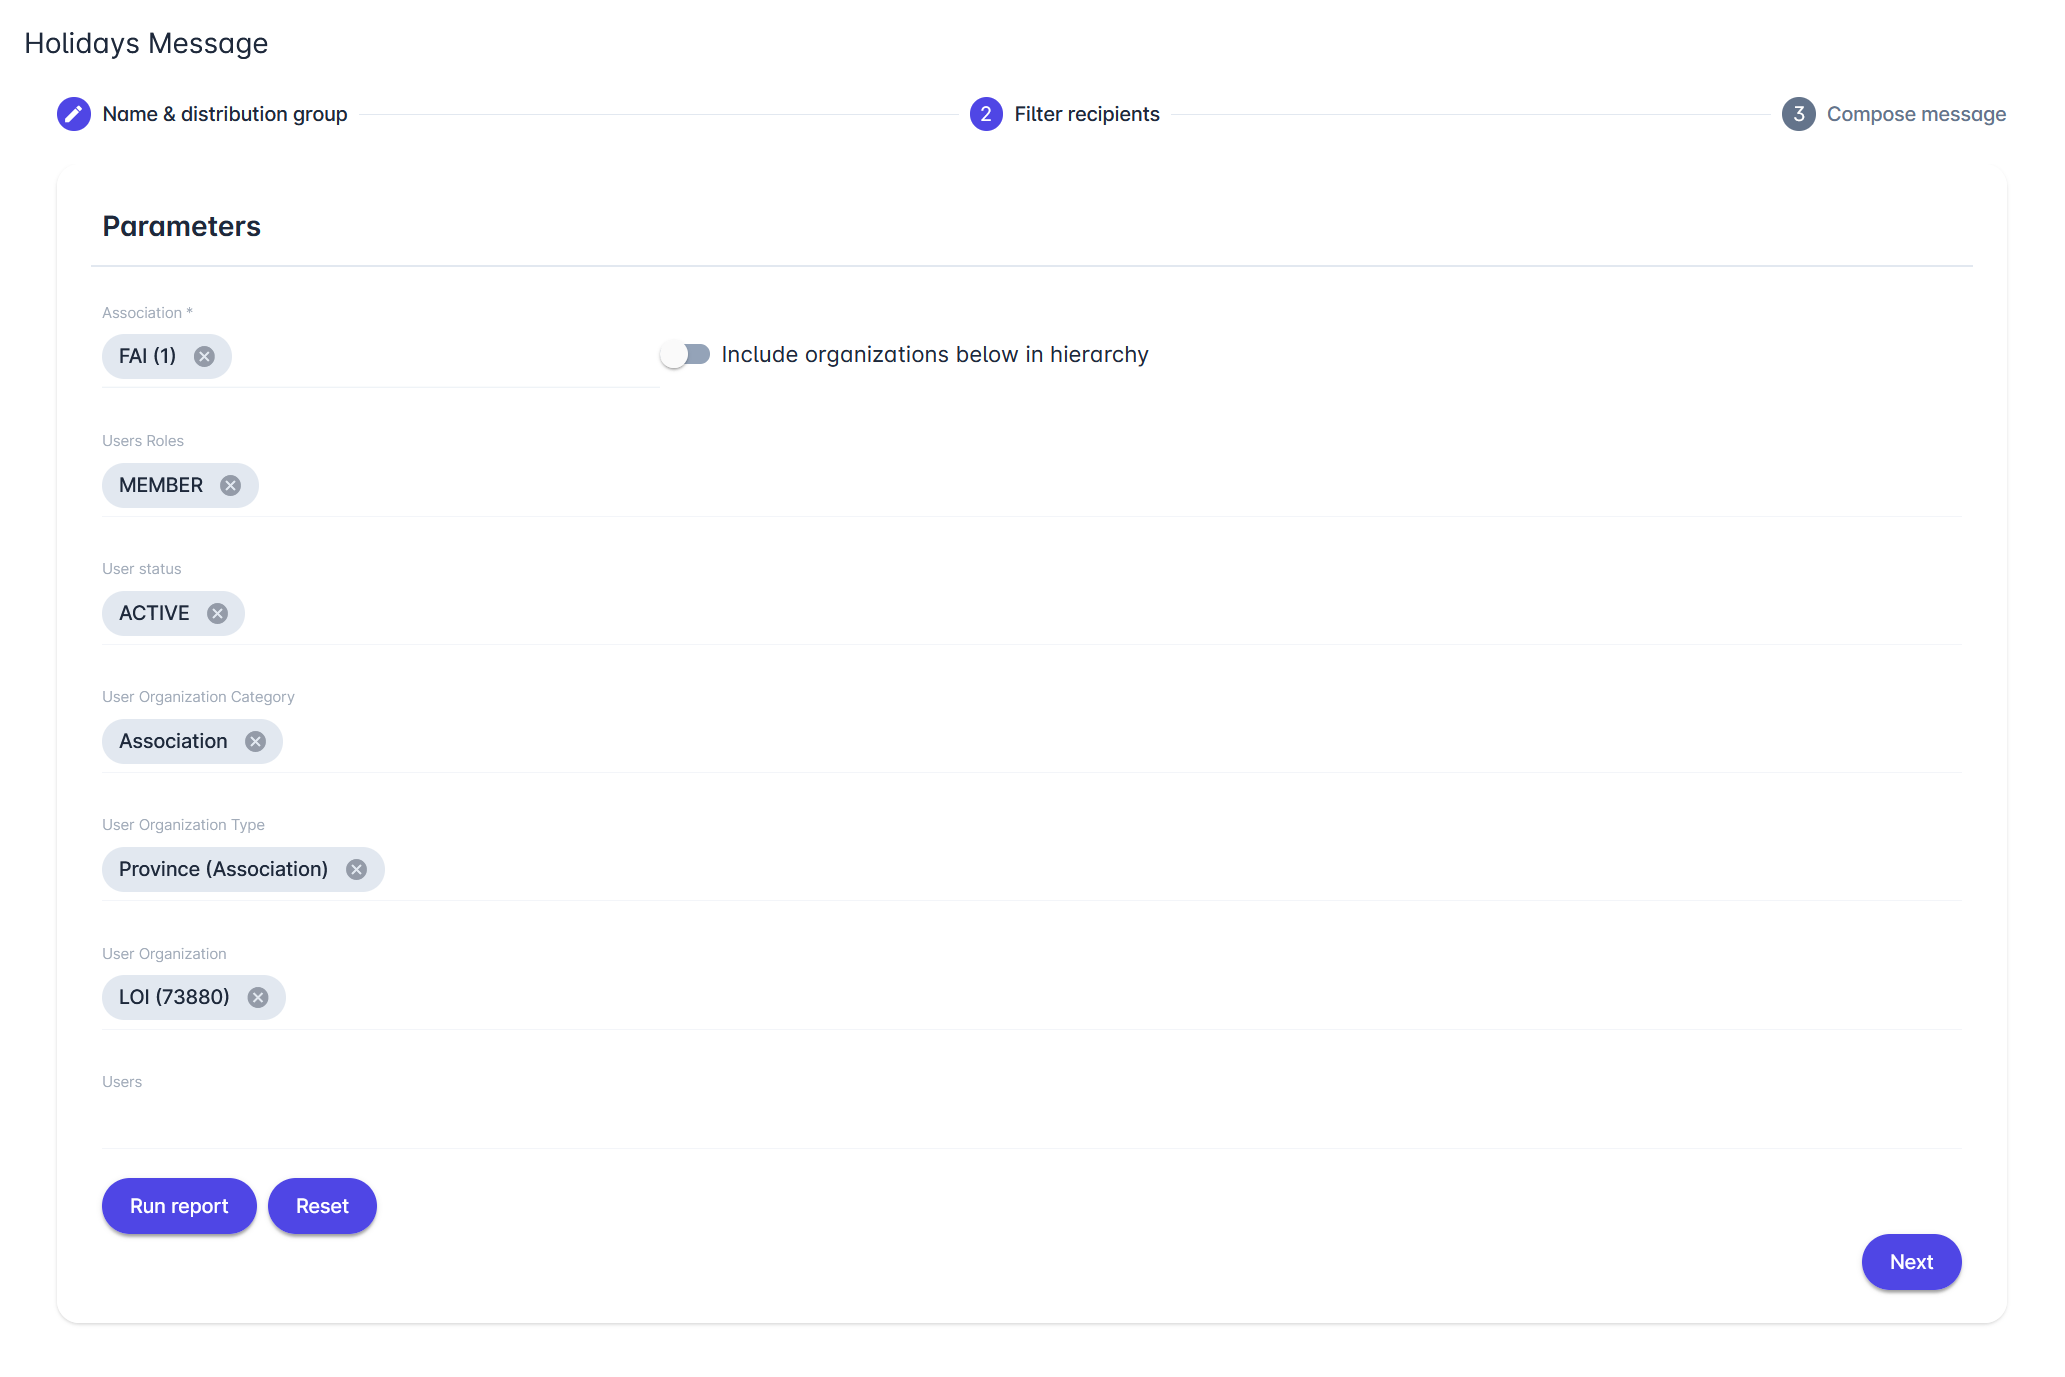
Step 2: Filter Recipients with Parameters
-
Depending on the report you have selected for your distribution group, in this step, you will be able to specify parameters for additional filtering of your distribution group (in the image below, you can check an example of parameter adjustment)
-
In this step, you can run the report to check the recipient list generated for the specific report.
-
You can also reset all the parameters you have initially entered for your distribution group.
-
Once this step is completed, click the Next button.
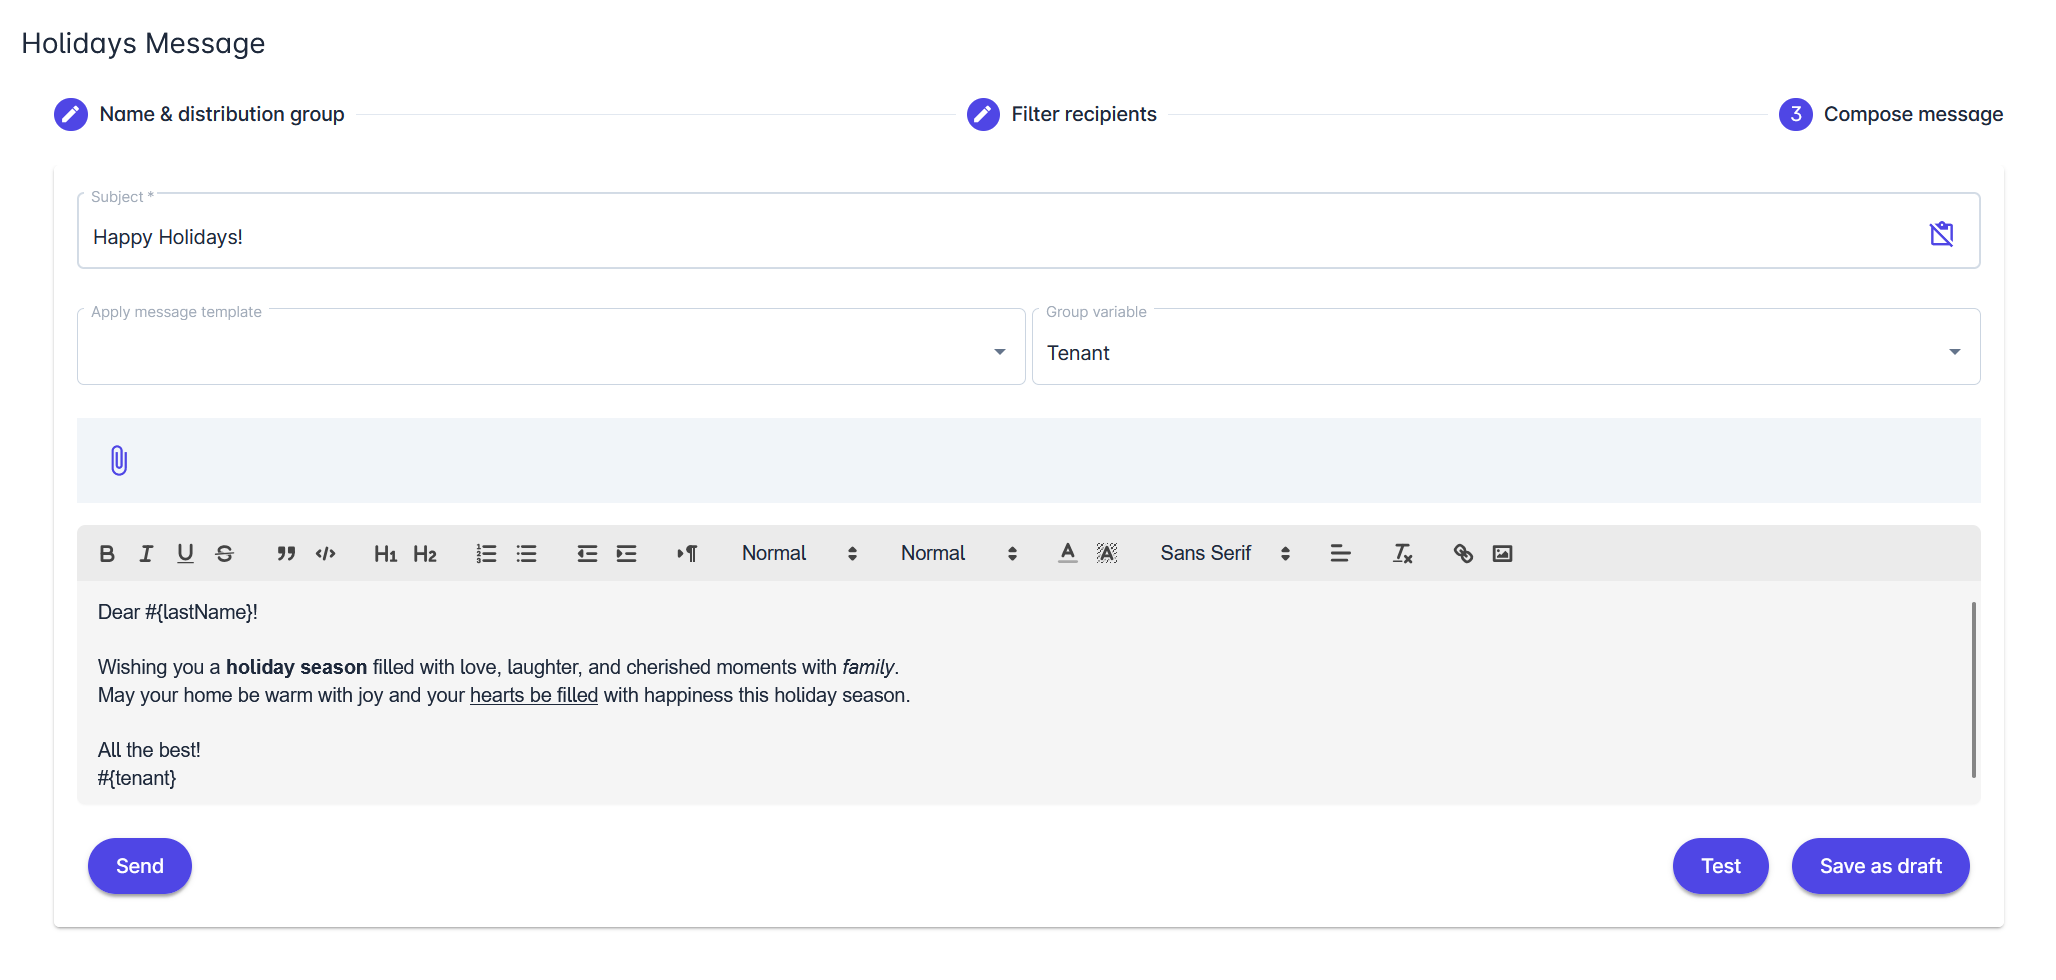
Step 3: Compose the Message
In the pop-up window, fill out the Subject field and start composing a new message. The body of the message can be formatted, hyperlinks inserted, pictures inserted, attachments added, etc.
Message Template
There is an icon labeled "Show message templates" on the right side of the Subject field. If you want to (re)use your message template instead of starting a message from scratch, please click on this icon. This will extend the field for message template insertion. Select the message template from the drop-down list.
Group Variable
You can use Group Variables to dynamically personalize the messages sent to each recipient with data from the Distribution Group report.
For example, the variables in the message template above will be replaced with each recipient's data from the distribution group list, as selected to generate the distribution group.
For more information and examples of Group Variables, please see Message Templates | Group Variable.
Final step
After you have completed your campaign, you have three options available:
-
Test: Send a test email to check how a campaign will appear in your inbox. Click this action to deliver the test email to the currently logged-in user.
-
Send: If you are ready to send the campaign to your distribution group, click the Send button.
The campaign can't be stopped or edited after it's sent. -
Save as draft: If you are not ready to send the campaign, save it as a draft and edit it later.