Organizing Events
As an admin or coach, you can create events of various types (such as recurring trainings), and invite members or groups of members. This article will help you understand how to create a new Event, and update an existing one.
In this article please check the instructions to:
To create a New event:
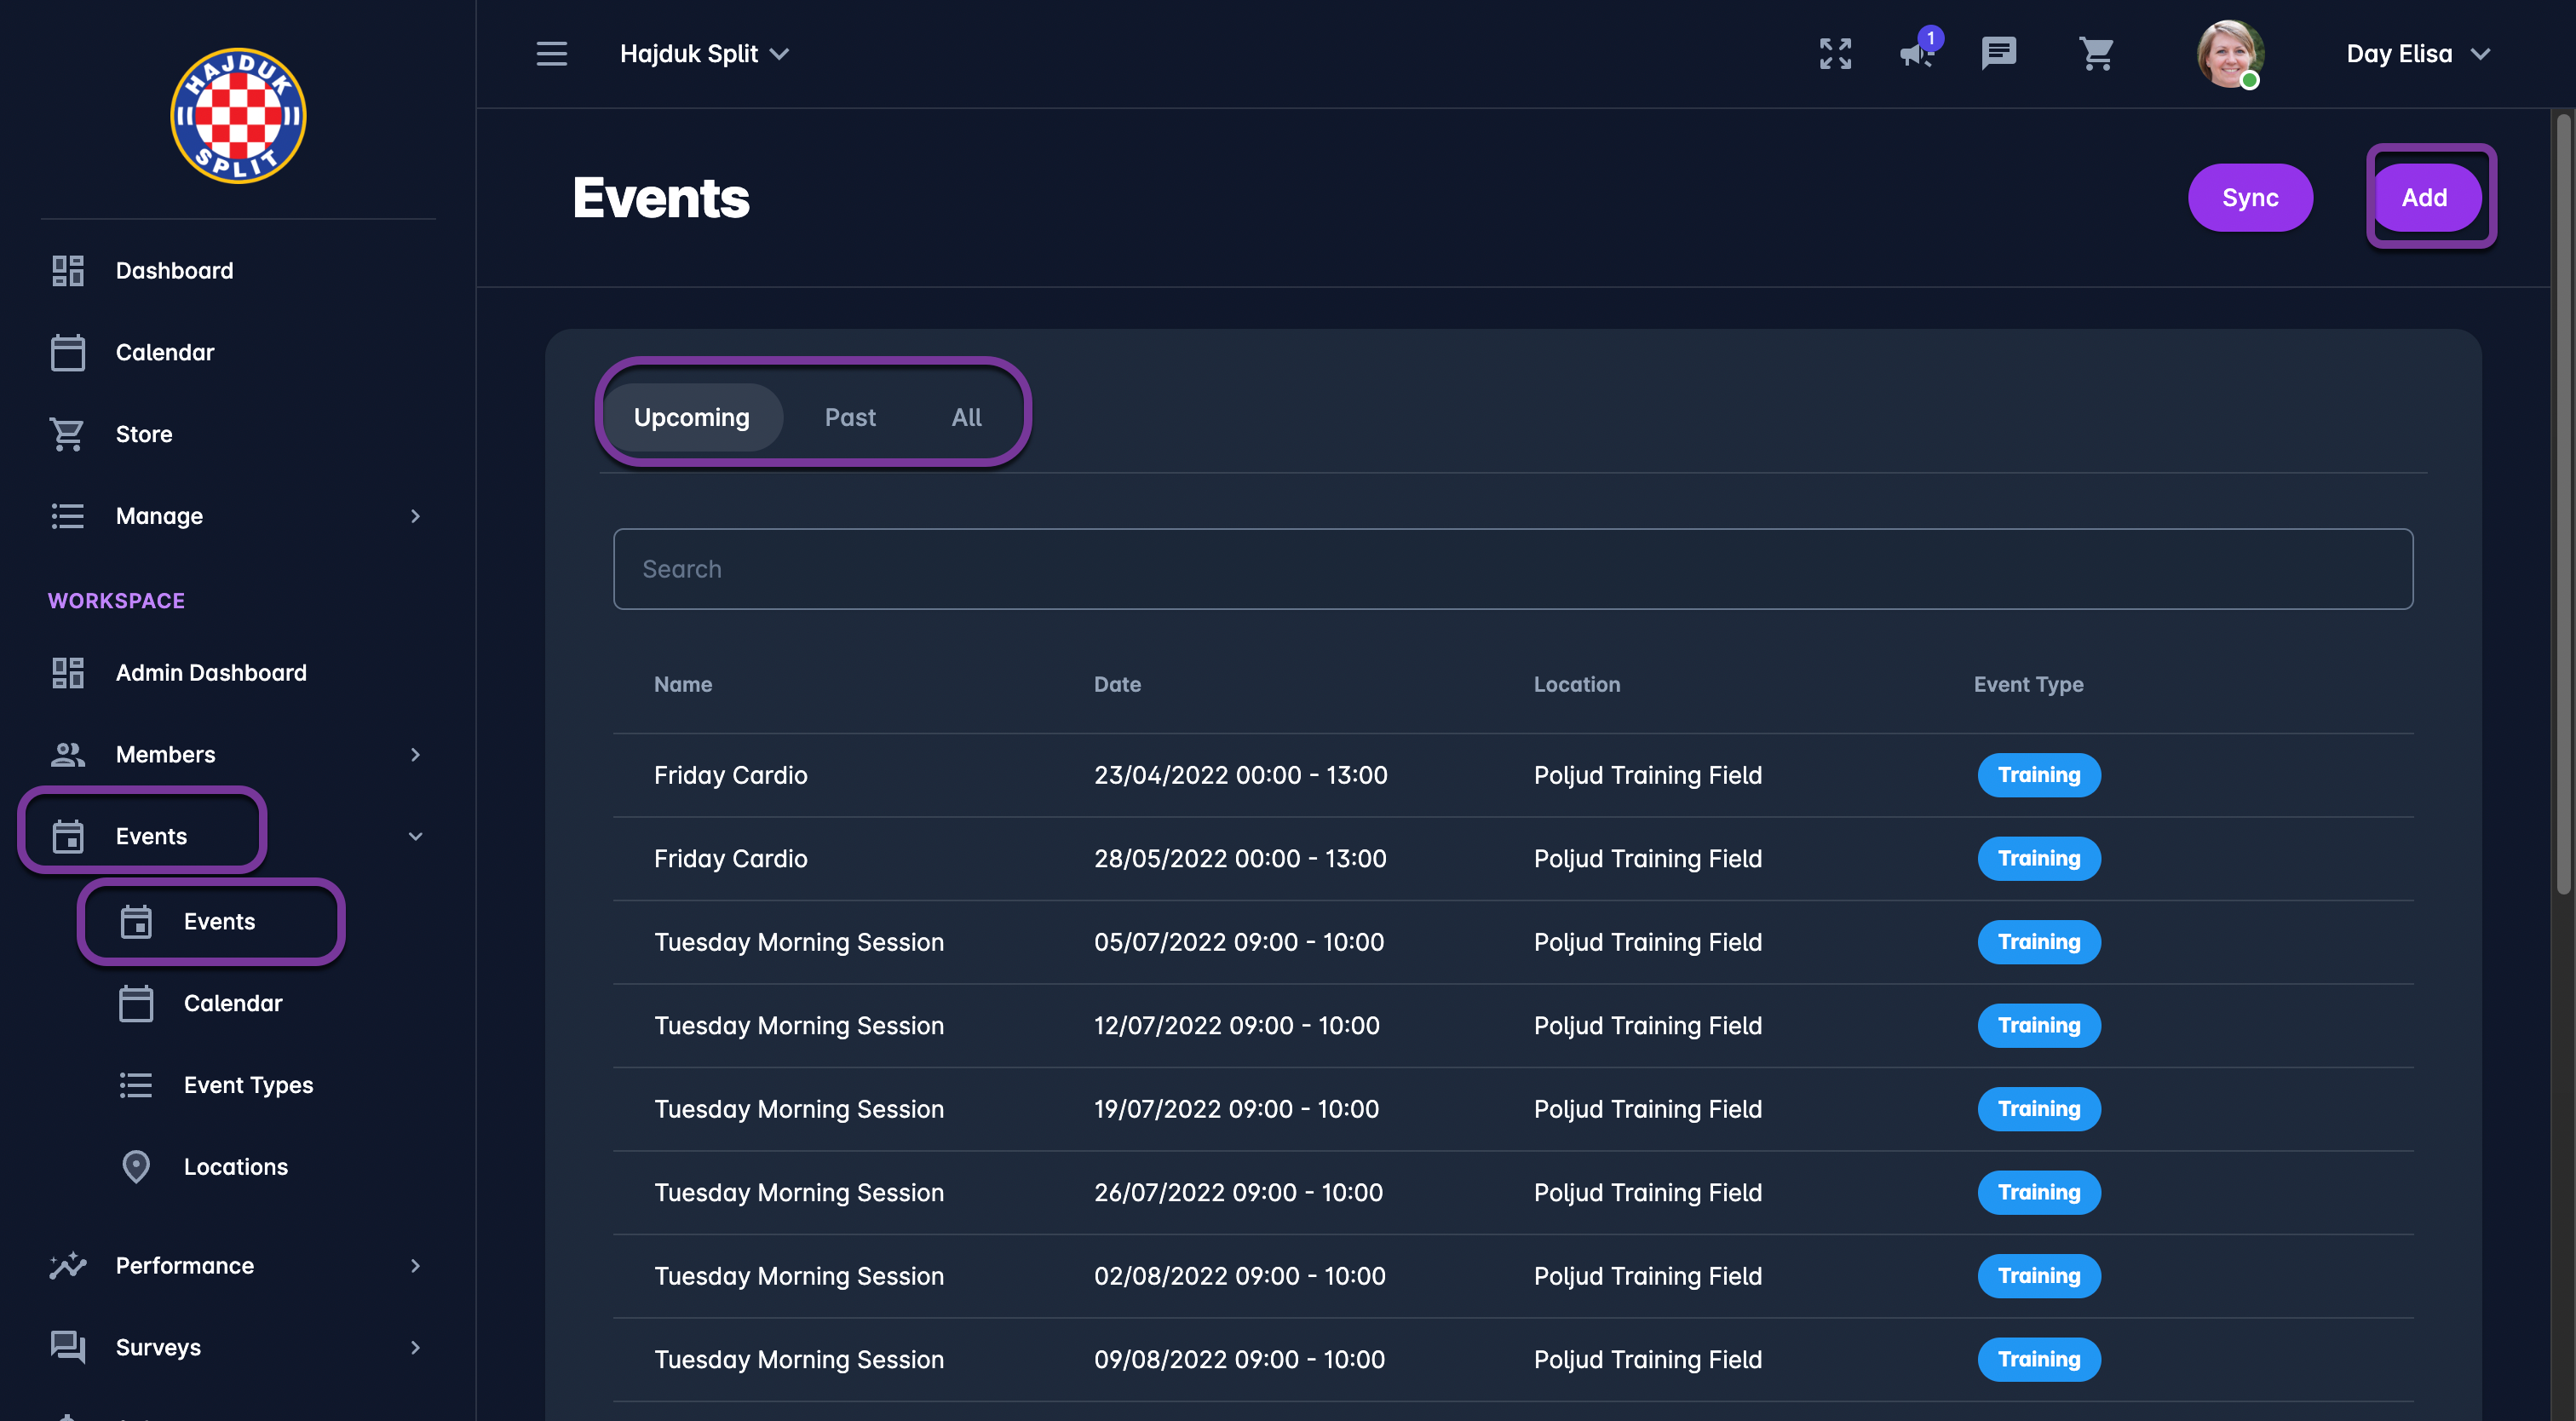
On the left nav-bar select 🗓️ Events → Events
This opens the Event menu which contains the list of events from your workspace. The events menu consists of the following tabs:
Upcoming
Past
All
Hit Add button in the upper right corner to create a new event
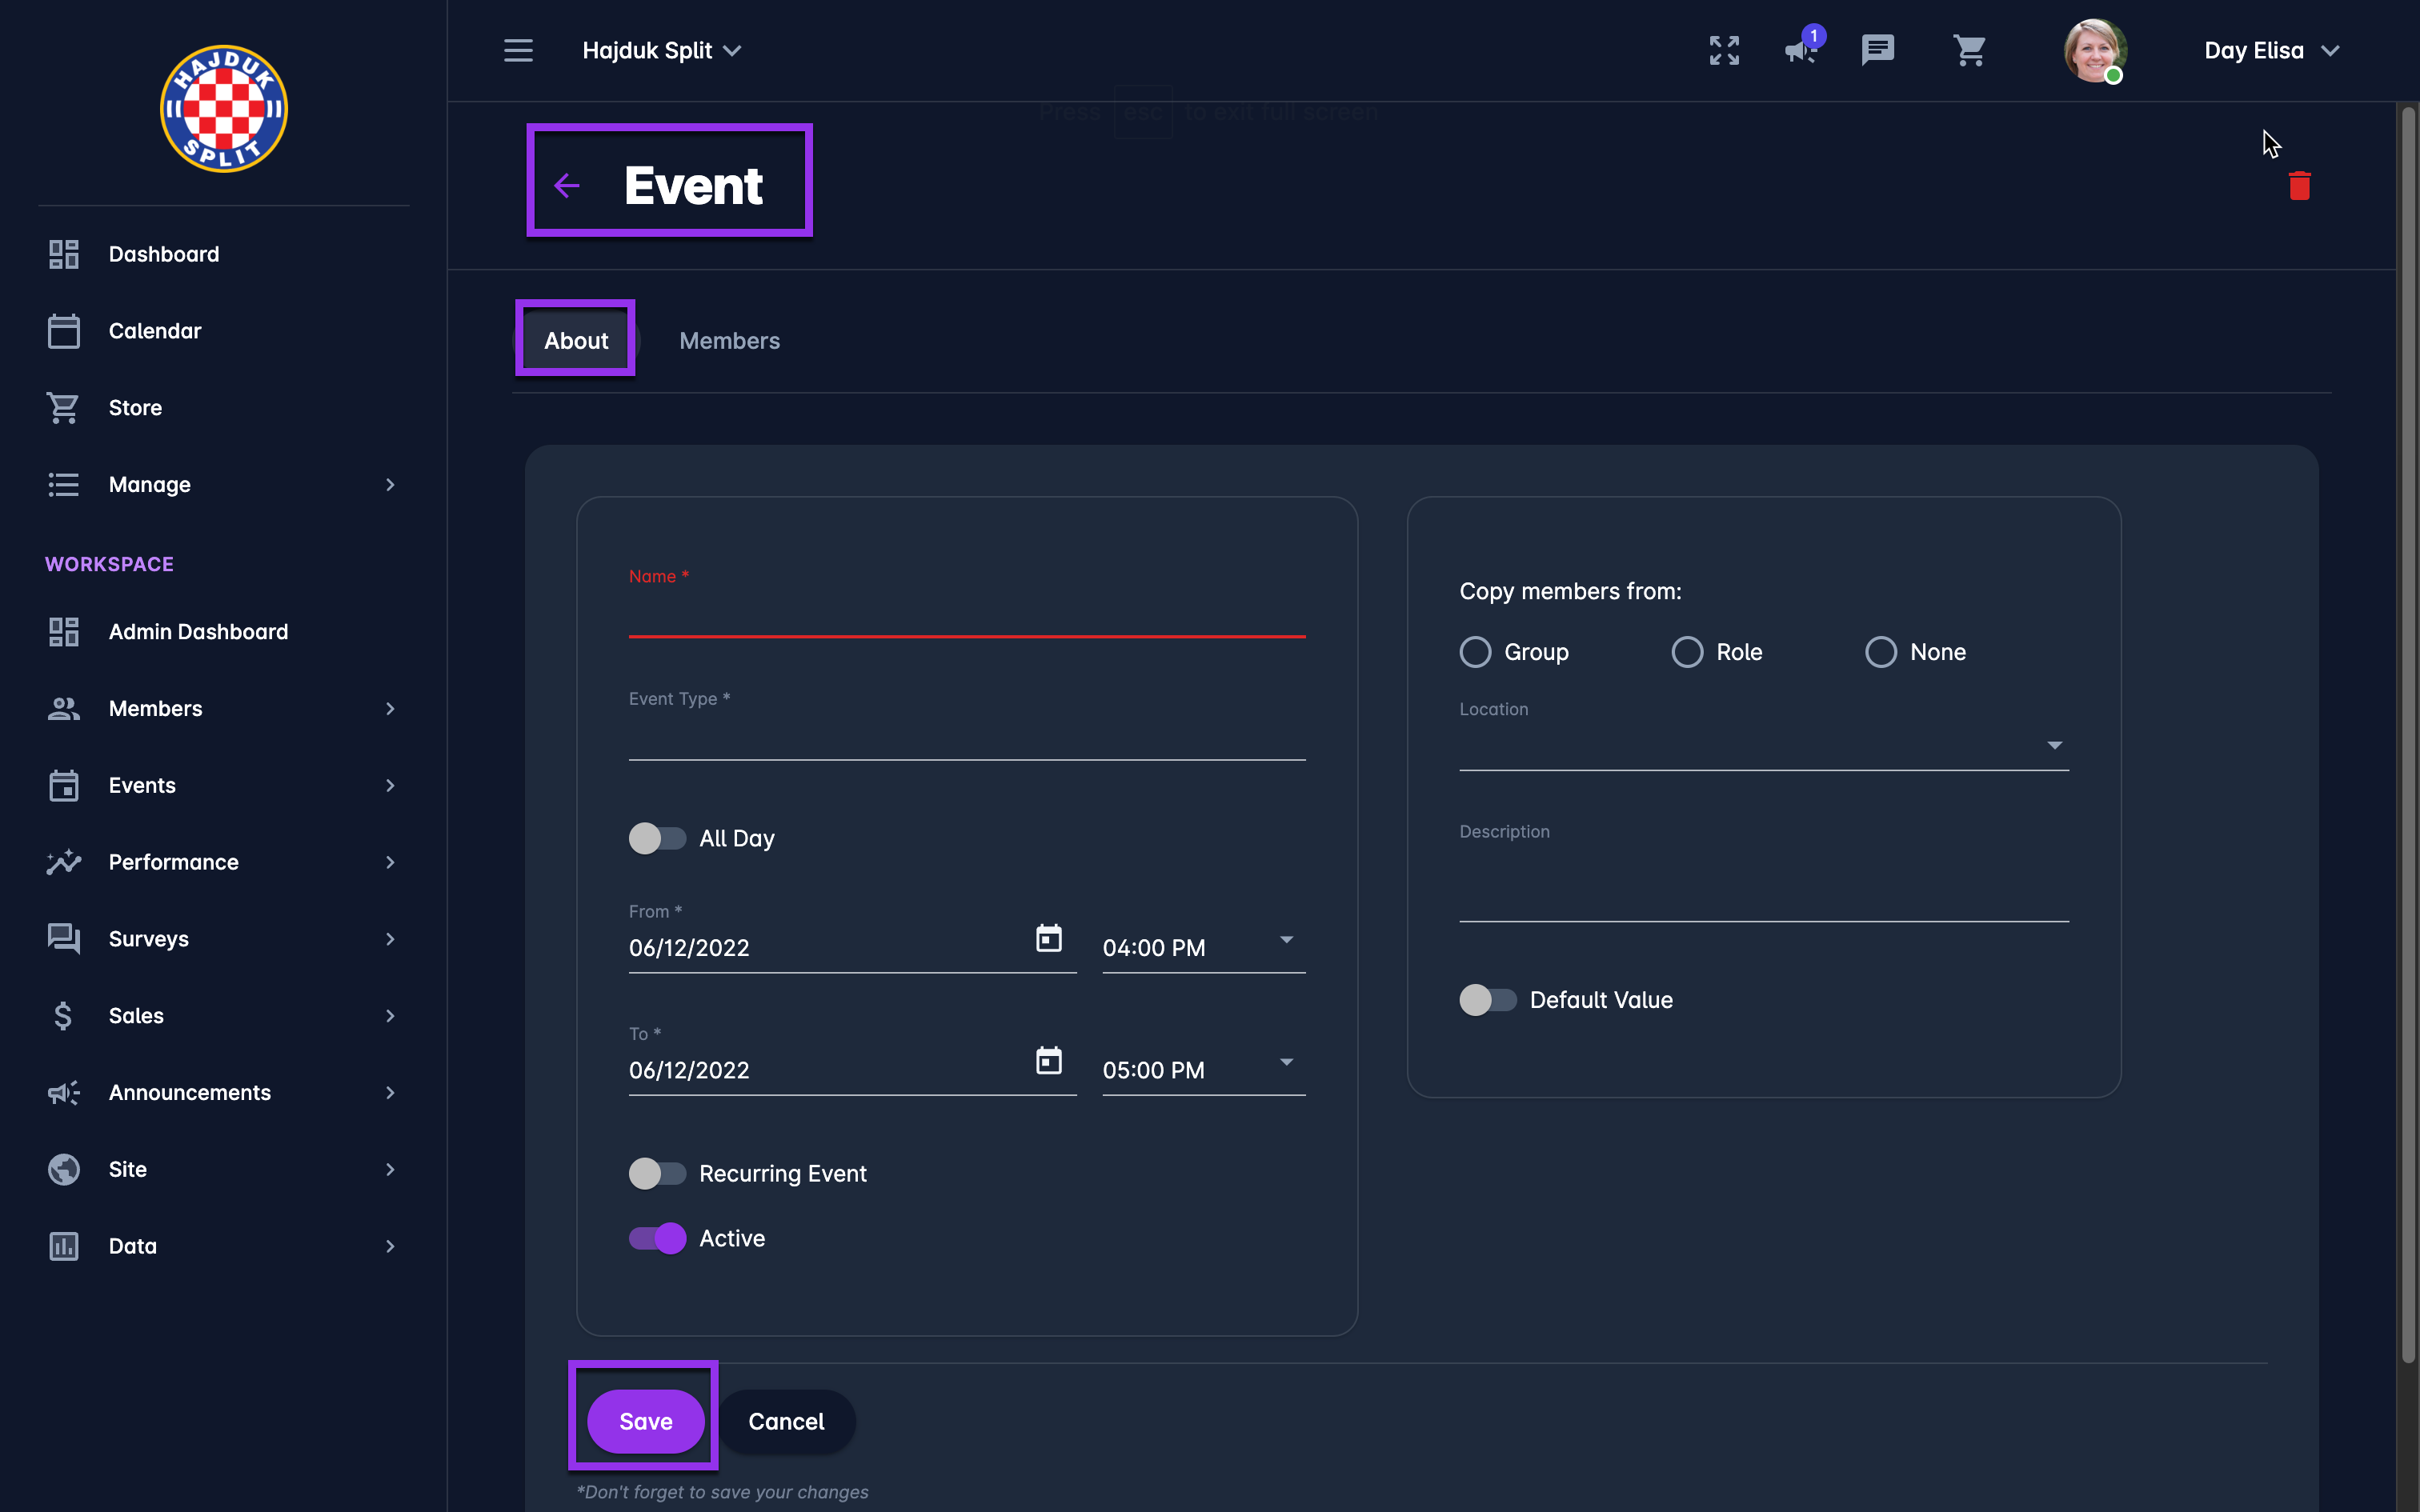
This opens the New Event page
On the About tab, you are able to fill in the Event details:
Chose the Event Name (mandatory)
Select the Event type (mandatory)
Select starting and ending Date and Time of the event (mandatory)
Copy members from certain groups, or add all members with a specific role*
Use the switch buttons to:
Mark the event as an all-day event
Mark the event as a recurring event — take into account that once the event is “switched” as recurring, additional fields are opened for the frequency of the repeat and the time frame in which the event needs to be repeated
Set an event as active - only events that are set as active can be edited and managed; inactive events are just displayed on the All tab
Set the event as the default value
Add Event Description
Once you have filled in all the data hit the 💾 Save button
*Please take into account that members can be also added manually on the Members tab.
Every new Event is listed in the 📅 Calendar. To access the calendar Select Events → Calendar on the left nav-bar
Members Tab
On the member tab, you are able to see the list of event members. The members can be added automatically by copying the members from a group or role or manually from the Members tab.
Access this tab to add the members to your Event
Hit the Add the button in the top right corner to add a member to your Event
Select the member from your workspace
Hit the Save button
The member tab contains the list of event members with the following columns:
name
Activity status
Attending - on the attending column you are able to see the members' response
Attended - on the attended column you are able to set the actual attendance for every participant

Please take into account that as the workspace admin, you are able to adjust the attending column (select the attendance response) for the participants.
To edit/delete an existing Event:
Access the Event list by selecting 🗓️ Events under the Events menu on the left nav-bar
The list of all Events is displayed
A single click on the Events from the list will open an Event page
Hit the Edit button to make changes to the Event on the About tab
Once you have entered all the changes press 💾 the Save button
Access the Members tab → hit the Add button to add new members
Hit the Bin icon button at the top right corner of the Event page to delete the Event