Authorized tenant users may manage their web store and collect electronic payments from COMET users for any purpose, such as membership, equipment, events, merchandise, or donations.
Authorized users can also create special prices and family discounts, track manual (offline) payments, process refunds, and request and track orders from members, thereby streamlining sales and cash collection.
Items are entities of certain types (e.g., Membership, Merchandise, Event, Donation, etc.) that the association can sell and users can purchase. Please differentiate these items from course items and competition items, as General items are available in the Store menu, which is accessible to all MyCOMET users.
Create New Item
To create an Item:
-
On the left nav-bar, select 💳 Payments → 🛒 Items
-
This opens the Items menu, which contains the list of your items
-
Click the ➕ New Item button in the upper right corner to create a new item
-
This opens a New item pop-up window to fill in the item details
-
Fill in the pop-up window to create a new item:
-
Item Icon - upload a photo of your product
-
Active switch-on button - items that are selected as inactive are not displayed to the user and cannot be purchased.
-
Name
-
Item Type - needs to be selected from a drop-down list.
-
Please note that if the Donation is selected as the “Item Type,” you will not be required to enter a price; only the price range.
-
Description
-
Price - the amount in the currency of your tenant country. The entered price will be listed on the Pricing tab
-
Survey template - if needed, you can choose a predefined set of questions for the customer to answer. Please check the following link for more details on this topic:
-
-
Once you have entered all the data, press 💾 the Save button

Once the item is saved, it will appear on the Store menu (available for purchase).
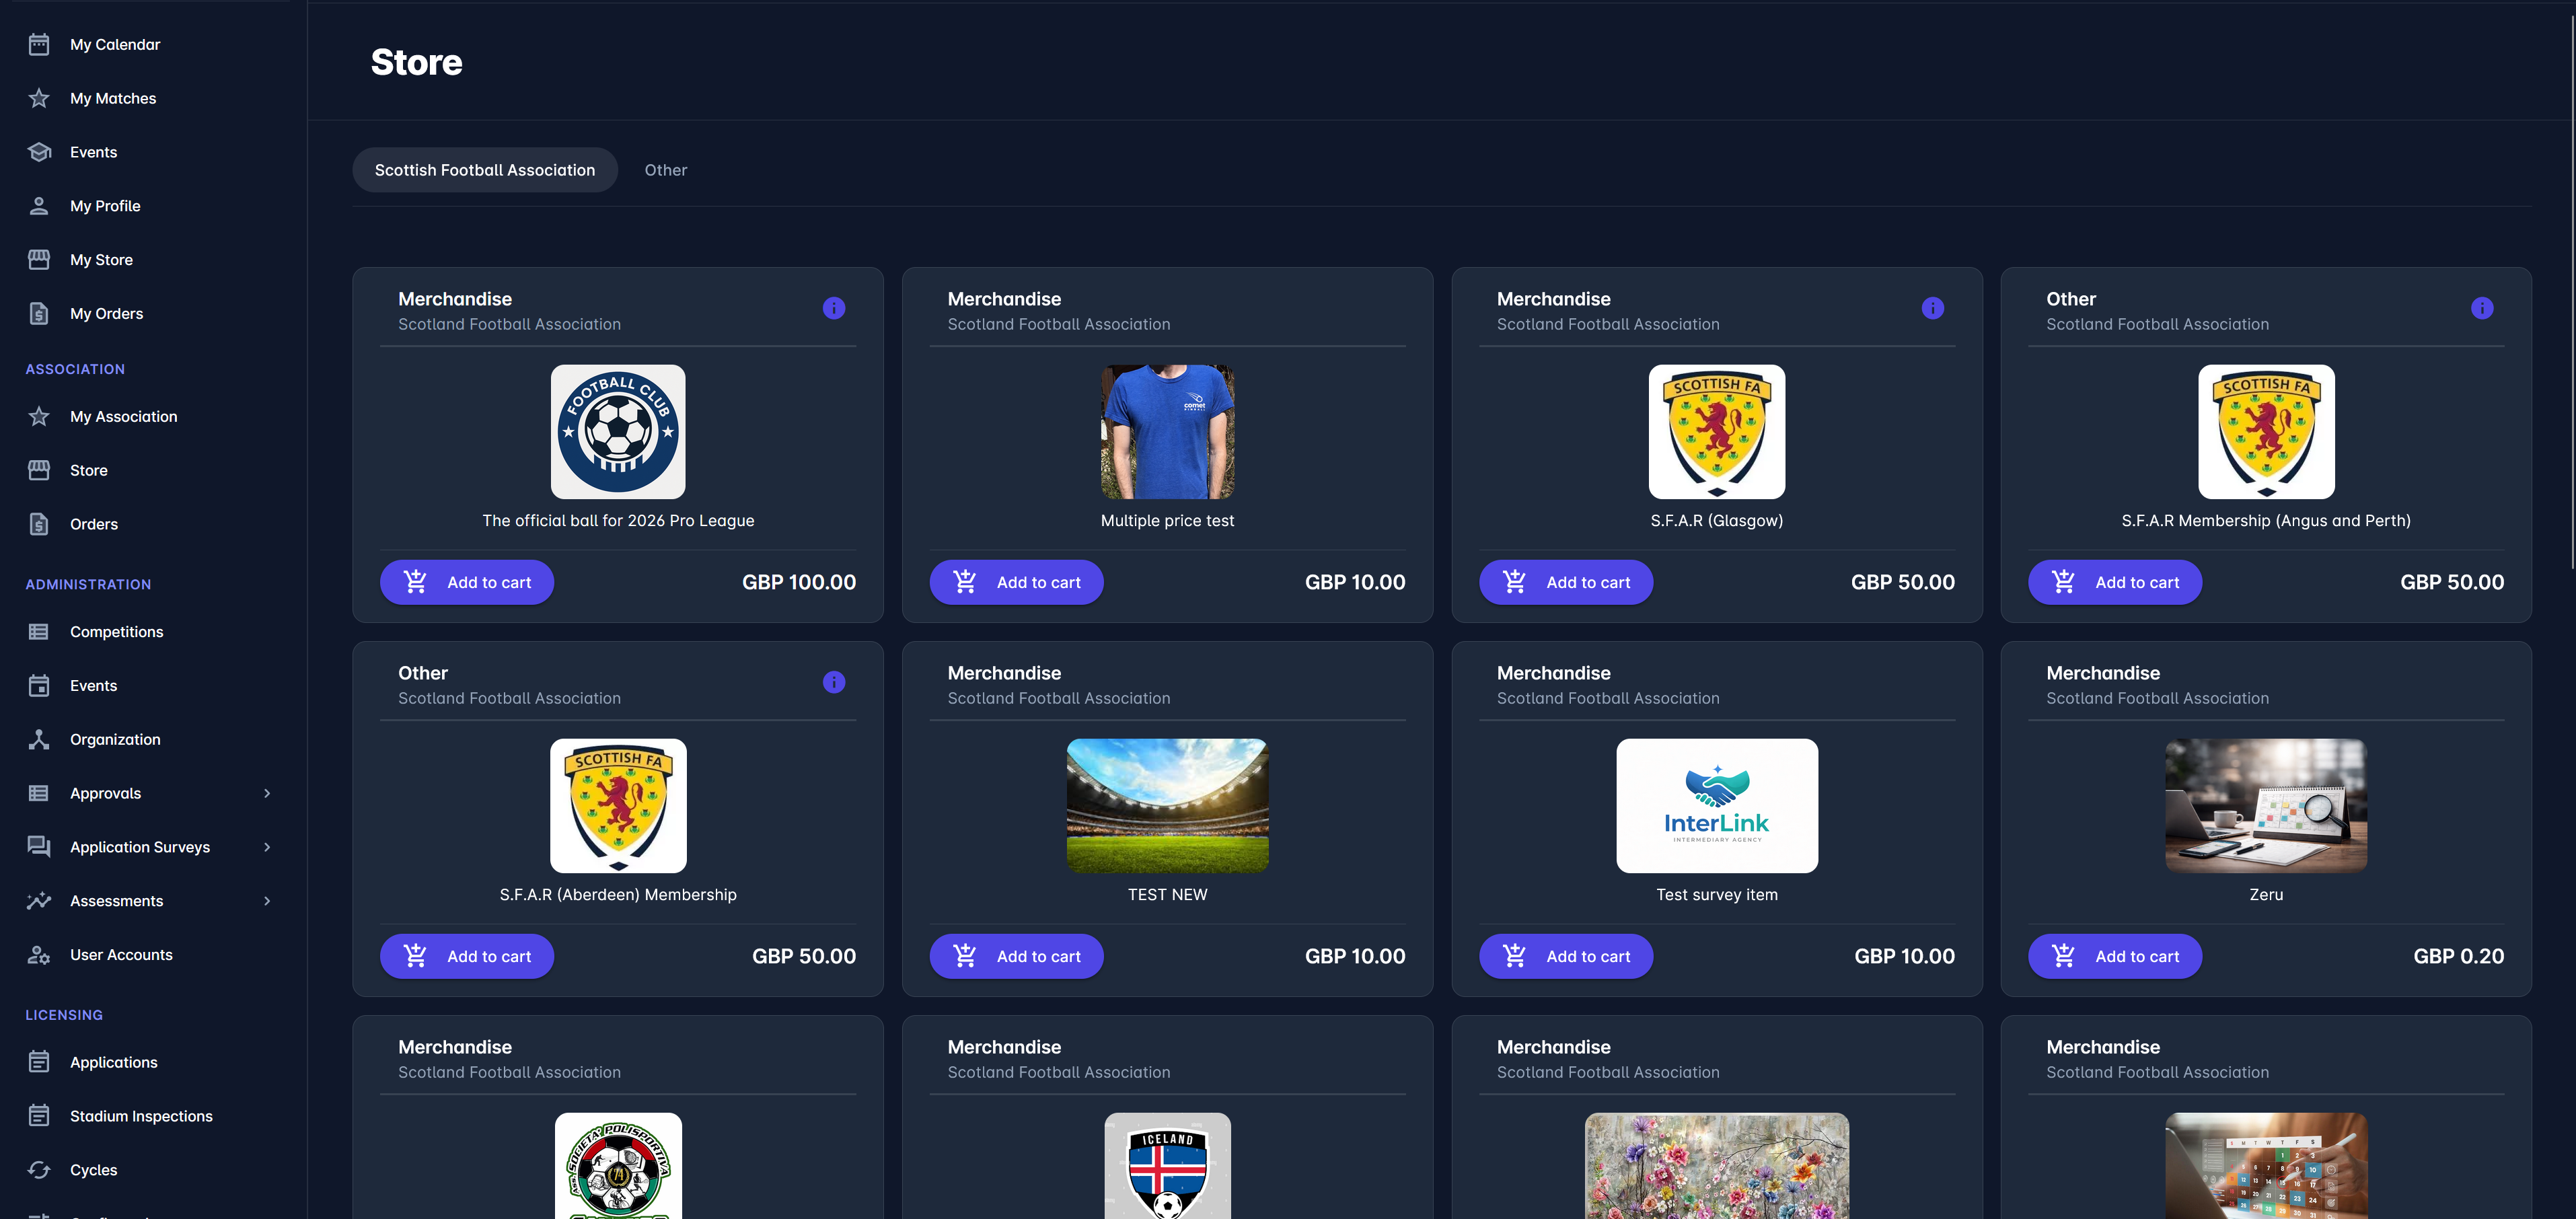
Furthermore, once the item is created and saved, it will appear in the Items menu, where it can be further edited and configured.
Edit Item
-
On the left nav-bar, select 💳 Payments → 🛒 Items
-
This opens the Items menu, which contains the list of your items
-
Hit Item from the list
-
This opens an Item Page with the following tabs:
-
DETAILS
-
PRICING
-
ASSIGNMENTS
-
SURVEY
-
Details Tab
The details tab contains General info you added when creating the item: Item Icon, Active switch-on button, and Description. In case you want to edit the entered details:
-
Hit the Edit button at the bottom of the page
-
Hit the Save button to save your changes
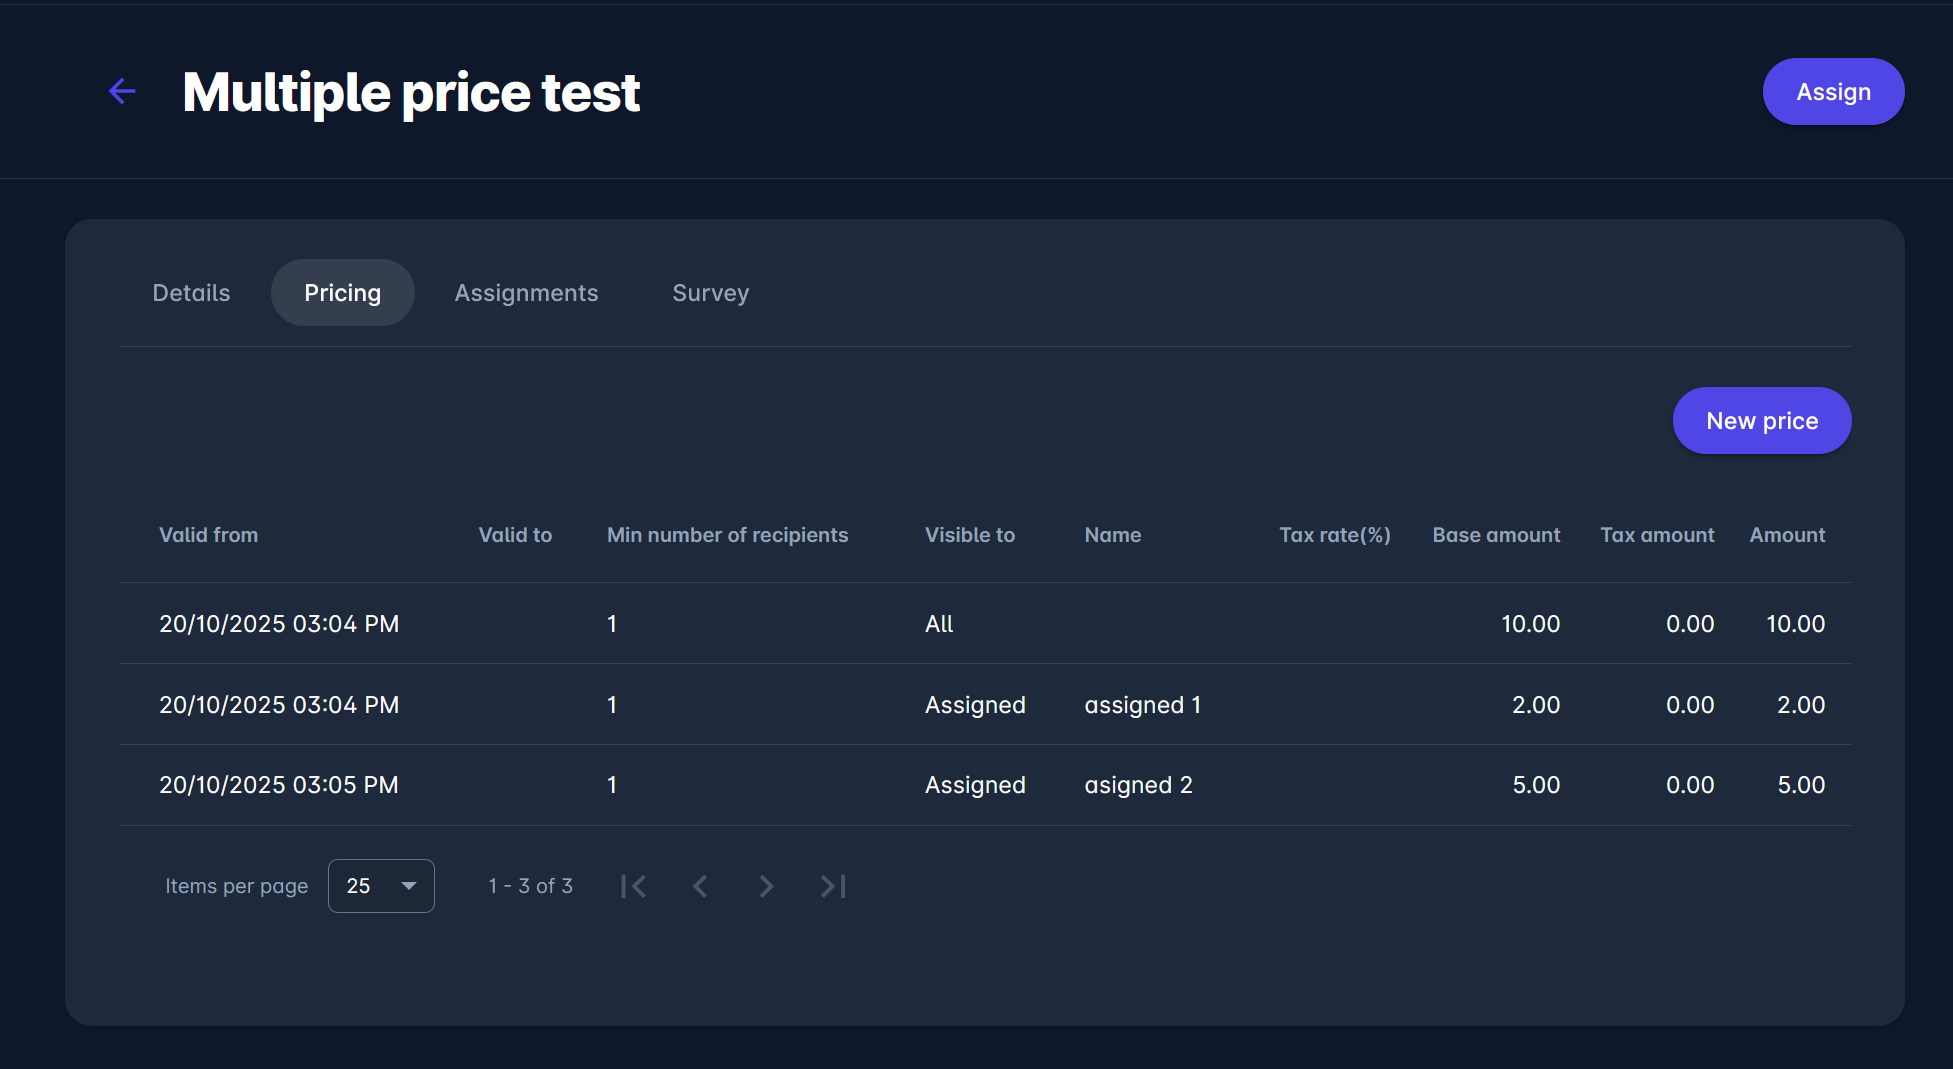
Pricing Tab
On the pricing tab, you can define special prices that are valid for a specific period (such as early-bird prices) or special prices (e.g., discounts) that are visible only to users who have the assigned price.
Please note that if the Donation is selected as the “Item Type,” the Pricing Tab will not be displayed.
To add new pricing:
-
Open the item and access the Pricing Tab
-
Hit ➕ New Price button in the upper right corner
-
This opens a New price pop-up window to fill in the item details
-
Fill in the pop-up window to create a new special price
-
Select a visibility option:
-
Visible to “All” - everyone will be able to see and purchase the item for this price
-
Visible to “Assigned” - only the users who have this price assigned will be able to buy the item for this price
-
-
Select Amount
-
Select Tax rate
-
Select the “Valid from” and “Valid to” dates - note that items will be available for purchase at this price only during the selected period.
-
Select the minimum number of recipients.
-
-
Once you have entered all the data, press the Save button.
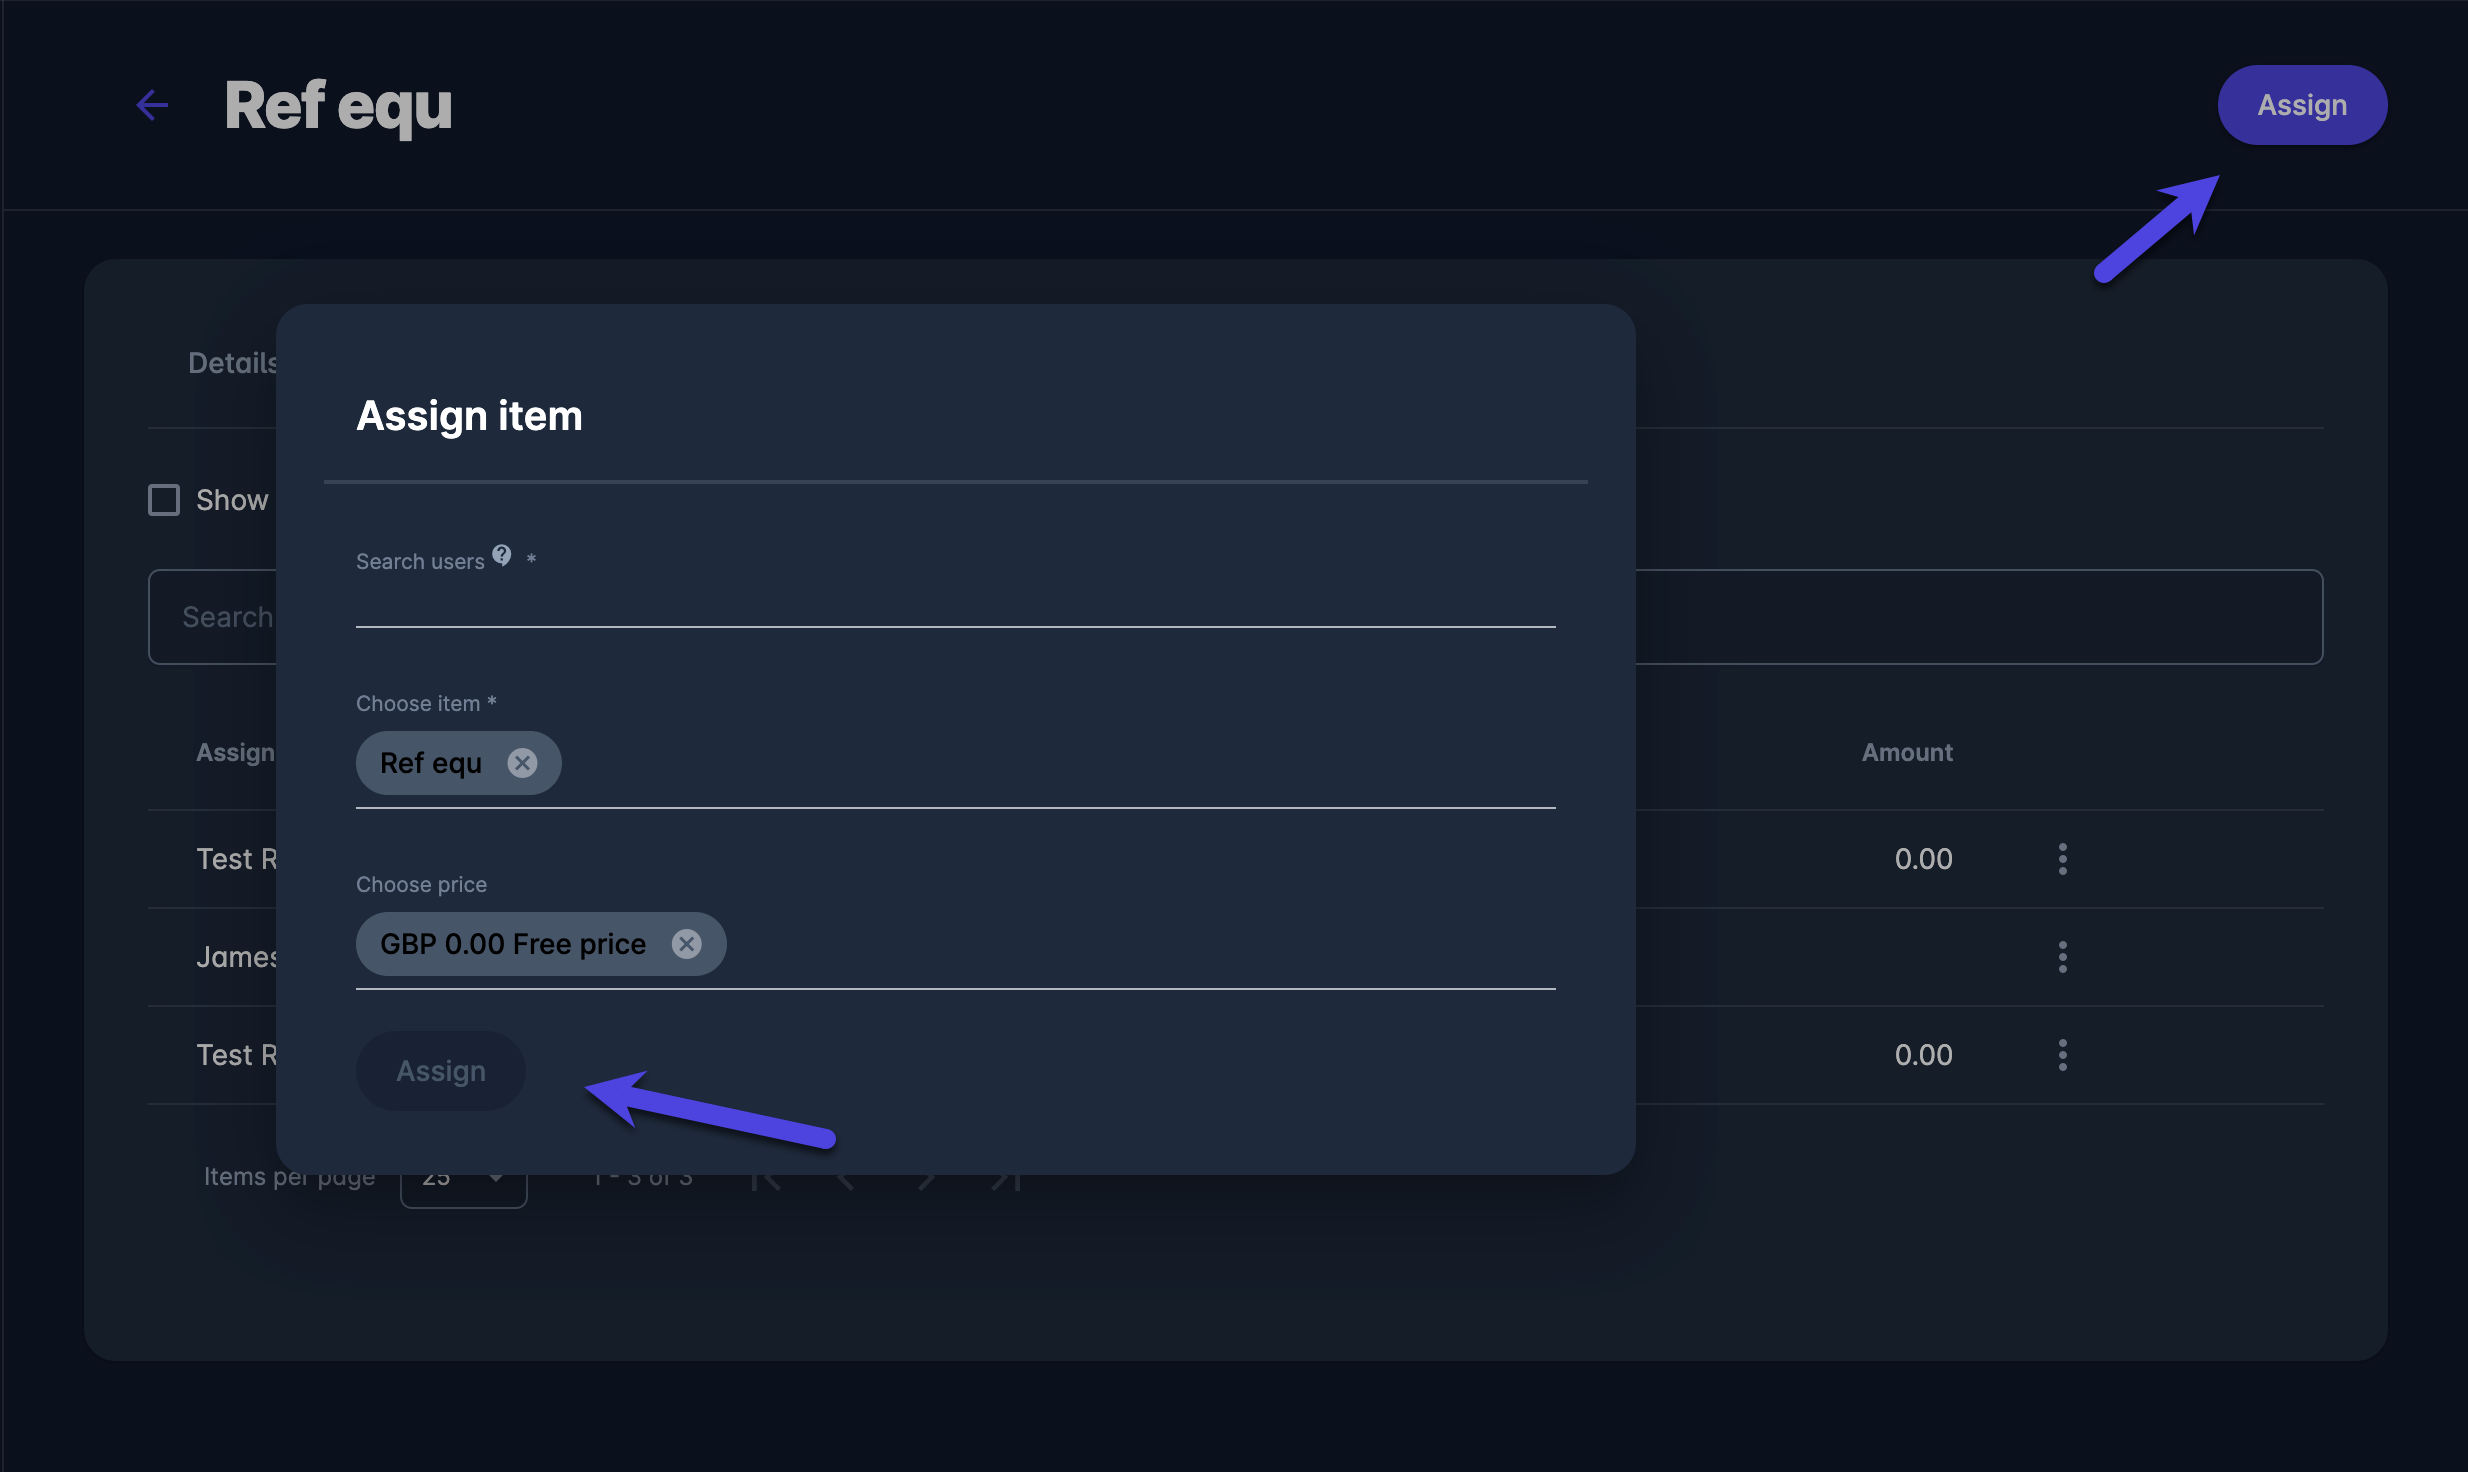
Assignments Tab
You can assign a specific item to specific users. Users assigned a special price will be listed on the Assignments Tab. Also, when accessing the Store, users will see the Items assigned to them highlighted at the top.
To assign the item to users:
-
Open the item and access the Assignments Tab
-
Hit ➕ the Assign button in the upper right corner
-
This opens an Item Assignment pop-up window to fill in the details
-
Select the User(s) to whom you are assigning this price
-
If you have prices with visibility=Assigned defined, then you will be able to select one of those prices
-
If you assign an Item to Users but do not set an assigned price, the Item will be highlighted in store for those Users, but the price will remain the default/standard one.
-
-
Press the Assign button.
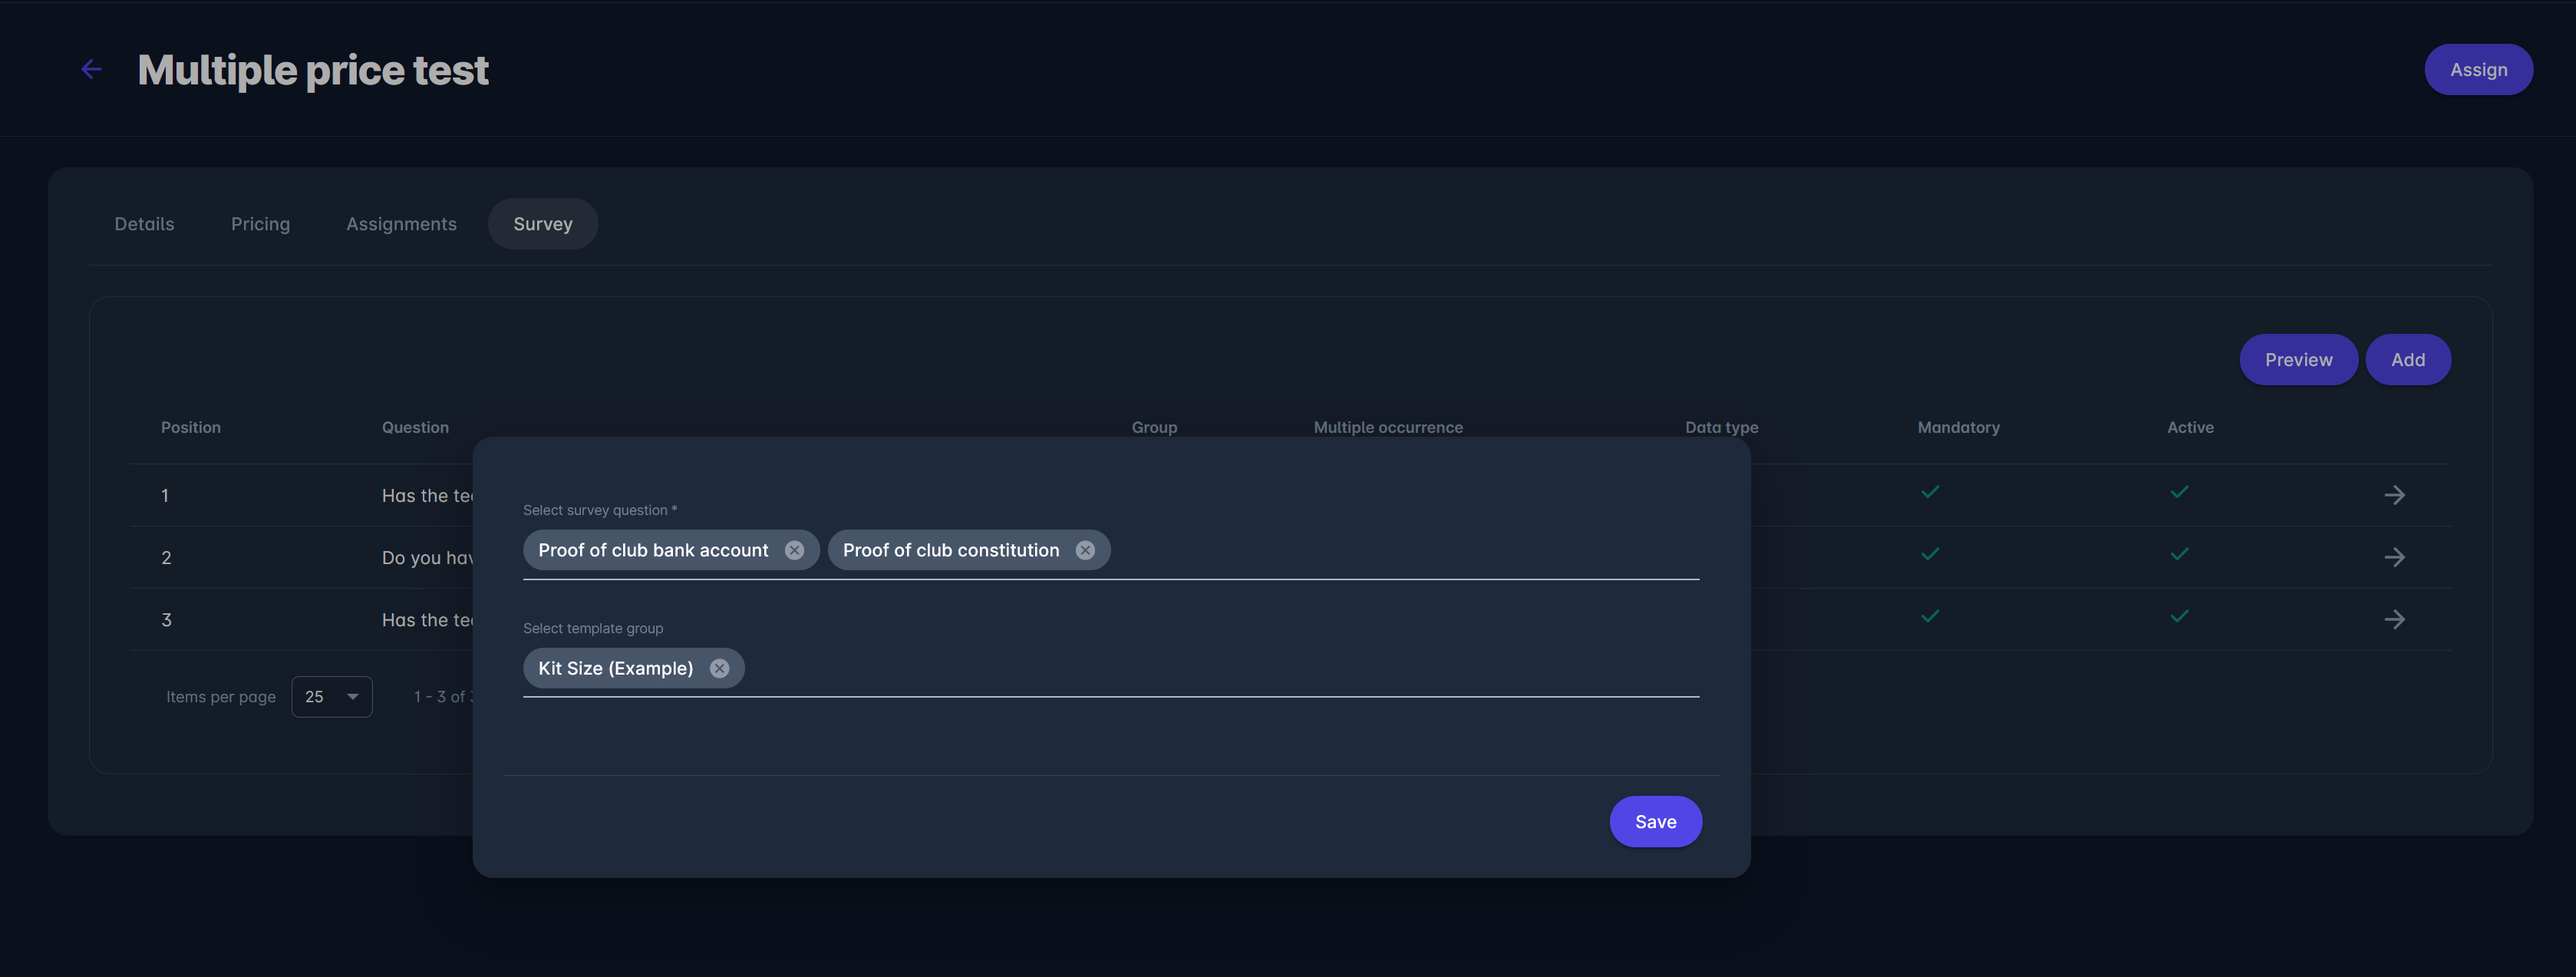
Survey Tab
Authorized users can define Item Surveys, i.e., the form /set of questions that customers must submit before purchasing an item.
To add Item survey questions to the item:
-
Open the item and access the Survey Tab
-
Hit the Add button in the upper-right corner
-
This opens a Survey pop-up window, select the details:
-
Select the Survey Question
-
Select the Template Group
-
-
Press the Save button
The created Item Survey will be displayed to the customer when purchasing the item or adding it to the cart.
If date-dependent prices are configured for the same item, e.g., one is valid today and another starts tomorrow, the item’s price will be defined by the day the payment is made.
It is not possible to create an order at one price period to secure the price, then pay that amount later while another price period is active.