Assigning Roles and Permissions
Each Workspace Member is assigned one or more workspace roles, such as Player, Coach, Staff, Admin, etc. Each role can have one of the three sets of permissions:
Administration (e.g. Admin)
Organization (e.g. Coach)
Participation (e.g. Player)
Every set of permission allows specific actions:
The administration permission level is hierarchically the strongest one and it has permission for all the actions described in Instructions for Admins and Organizers including the same permissions as two other roles
The organization permission level has the permission for all the organizational activities and actions described in Instructions for Admins and Organizers such as measurements, members invitations, etc. including the same permission as the Participation level. However, roles with this set of permissions are not able to administer the Workspace Settings or to execute other administrative-specific actions such as COMET Integration.
The participation permission level is hierarchically the weakest one, it is intended for end-users (participants) and it has permission just for actions described in Instructions for Members
💡 Workspace Admins are allowed to create specific workspace roles (e.g. player, parent, fan, coach, manager). The number of roles is unlimited, i.e. Workspace Admins can define as many roles as they want but the set of permissions for each role is always defined by one of the three levels above.
For example:
Players, Fans, and Parents will be assigned participation role
Coaches and Administrative staff will be assigned organization role
Workspace Administrators will be assigned administration role
A Member can have one or more roles in a workspace. E.g. a Member can be both a Player and a Coach at the same time. The list of Member Roles is defined and managed by the Workspace Administrator
Managing Member Roles
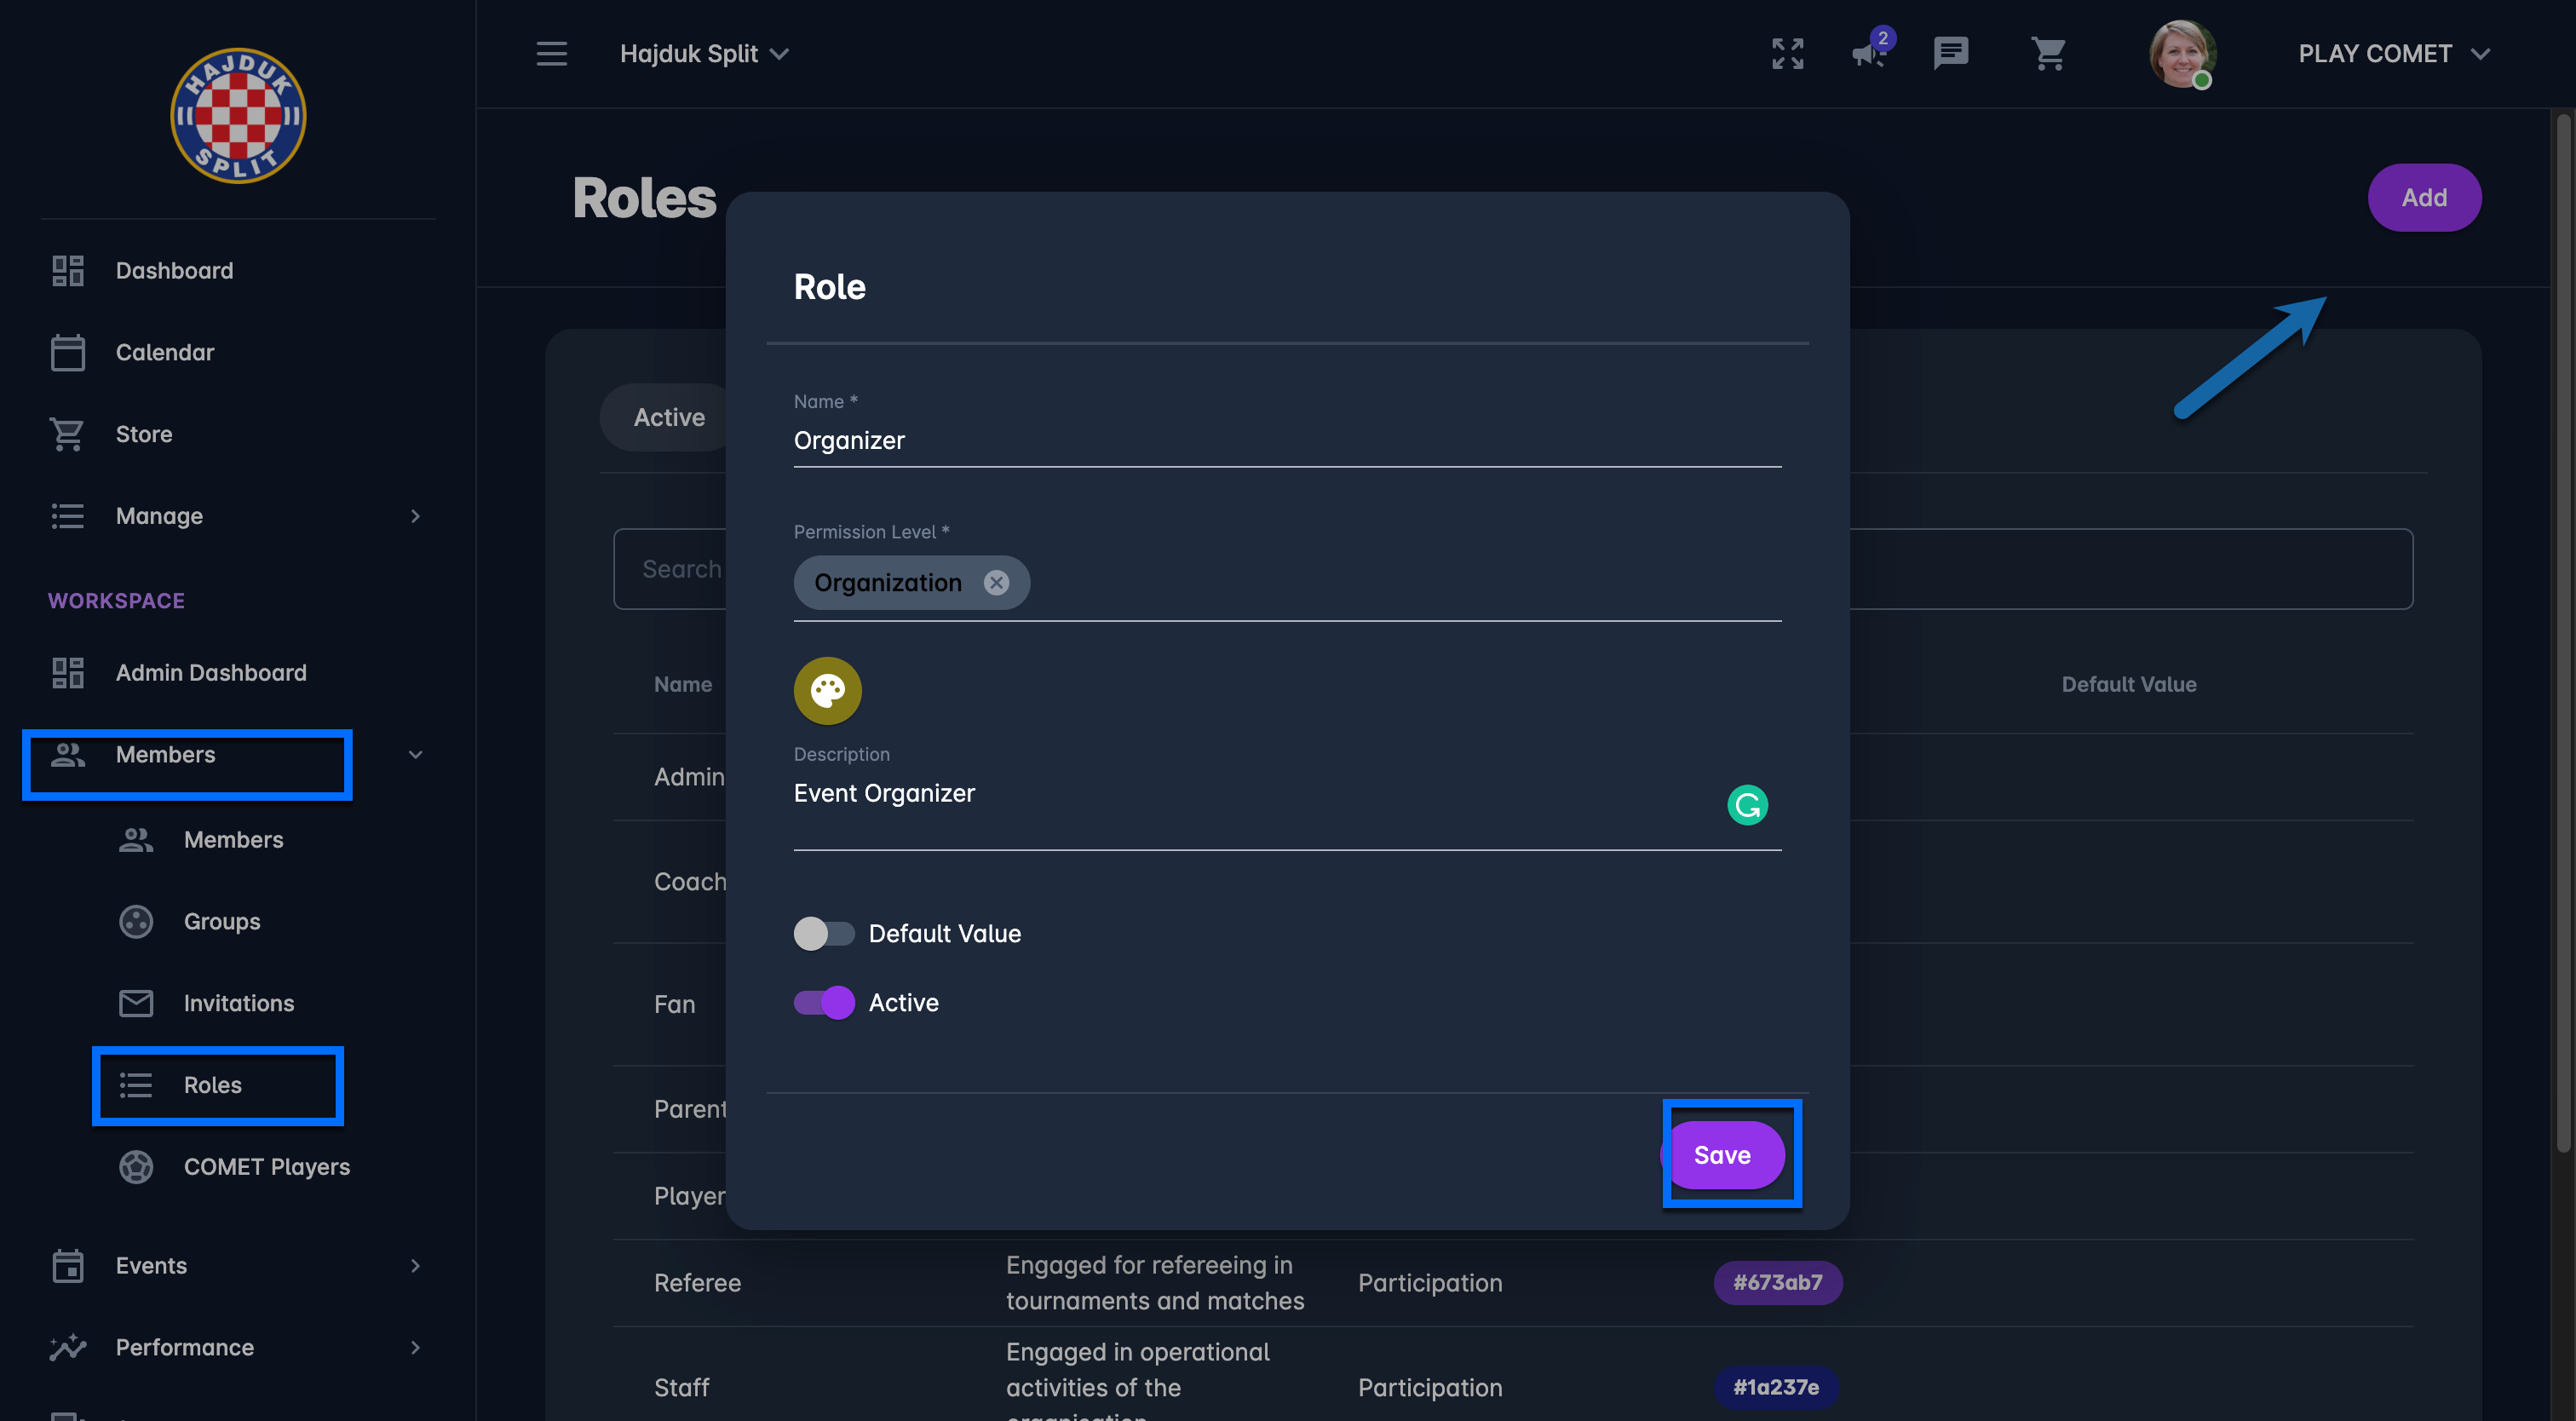
Select Roles under the Members menu on the left nav-bar
The list of all created Roles is displayed with two tabs Active*/ All, the list consists of the following details:
Name
Description
Permission Level
Color of the label
Default value status
The search box (use the search box to search the roles s that are entered in the system)
Create a new Role:
Click on the Add button in the top right corner
This opens a Role menu to fill in the details
Fill in the following details:
Name
Permission Level
Color
Description
Switch on buttons:
Default value - if this feature is turned on, this value will be prefilled in the role filed on the member and invitation form
Active /Inactive - *only roles that are set as active can be used for members; inactive roles are just displayed on the All tab
Once you have entered all the data press 💾 the Save button
You can assign any role to any Workspace Member by editing the Roles field when editing the profile of that Member. If the Member has multiple roles, the highest permission level will apply. E.g. if the Member is bot Coach and Player, he will have organizational permission level (coach)