Managing Child Accounts
As a COMET PLAY User, you can open and manage one or more Child Accounts. In most cases, this feature is used by parents or guardians, who open accounts for their children, so that they can supervise and manage the activities of their children from their own (Parent) account.
Please take into account that the child will be able to login with its credentials and access only its own account. You (Guardian) will have access to the accounts of all your children, using your own credentials.
Once you create a child account:
you will be able to view and access Child Accounts profile(s)* and act in the workspace(s) on behalf of your Child from your own COMET PLAY Account, i.e. you will be able to execute the workspace-related actions on behalf of your child such as:
respond to invitations (RSVP) to trainings and events
purchase items in the store, such as membership, equipment, etc
access calendar
review measurements
chat
read announcements
manage account details
you will be receiving a copy of all e-mail notifications that are sent from the system to your Child Account's e-mail, including any invitations to join a workspace
you will have full control over the Child Account, including the ability to update the password of the Child Account
*Take into account that a child can be a member of various workspaces and you will be able to manage all child member profiles in all workspaces.
Creating a Child account:
There are two ways in which you can create a new child account:
On the Join Workspace form by hitting the Add new child account button
From the Account Settings menu
To create a Child Account on Account Settings:
Click your name button in the upper right corner of the COMET Play Toolbar
Hit the Account Settings button
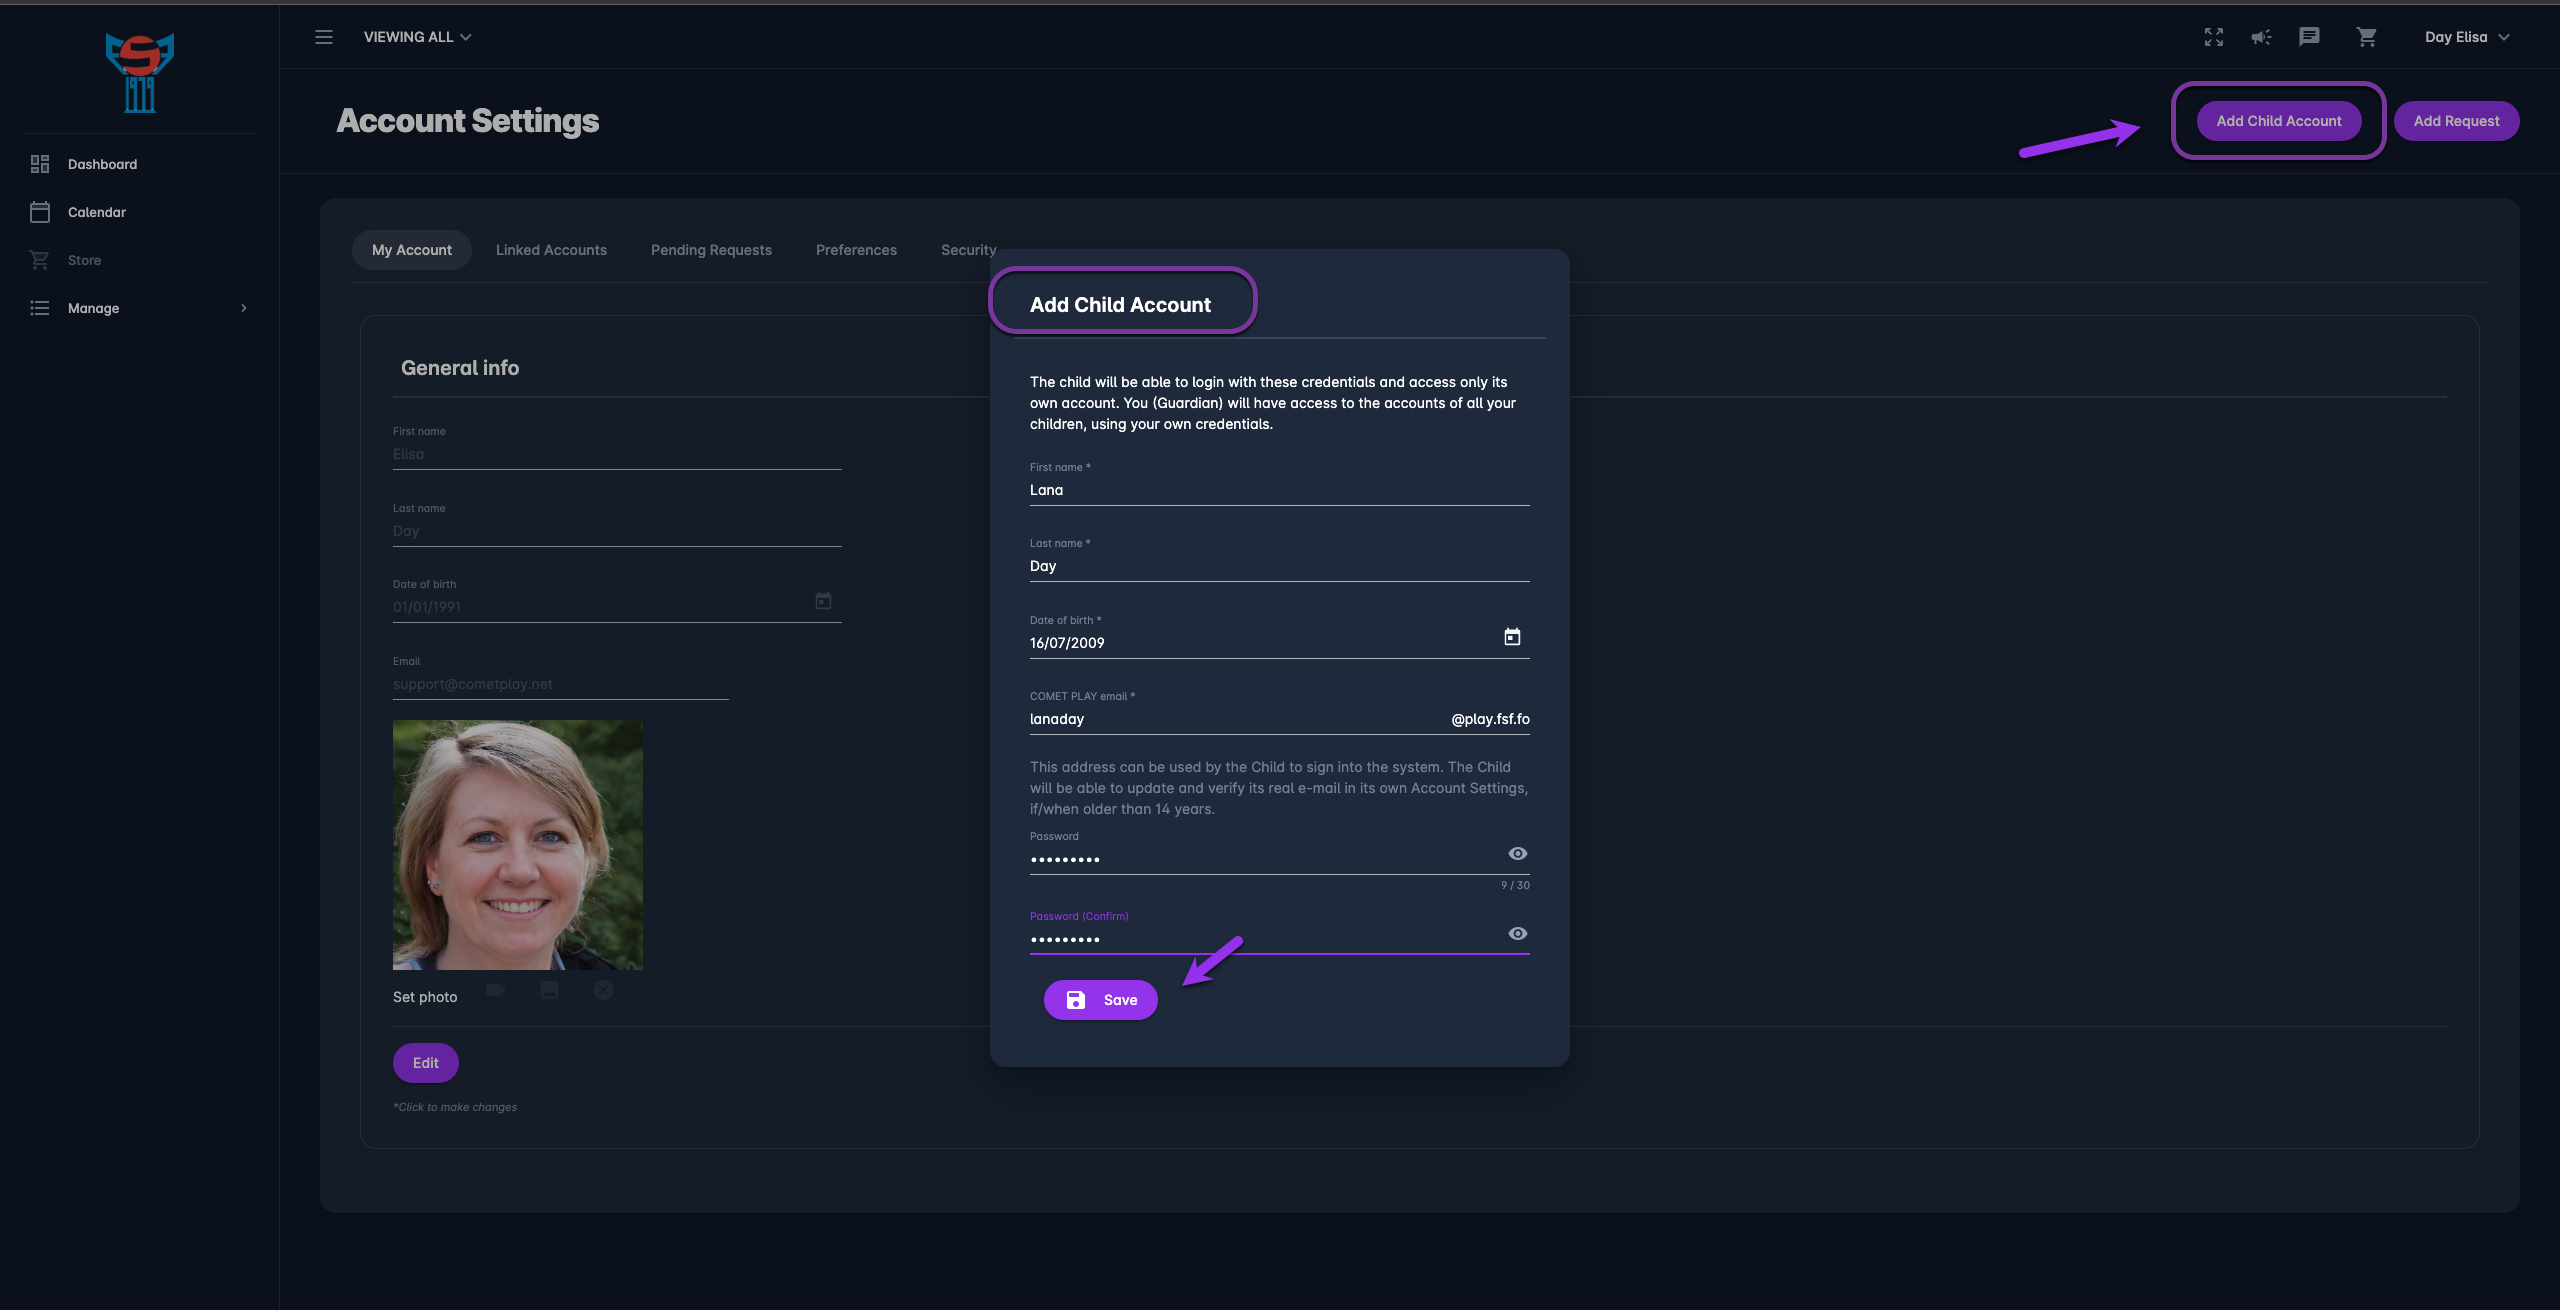
Click on the Add Child Account button in the upper right corner
The Add Child Account form is displayed
Fill in the form details: first name, family name date of birth, e-mail* and password of the child.
Hit the 💾 Save button
COMET PLAY Address
When creating a Child Account, Parents will choose a COMET PLAY address (e.g. @play.fsf.fo) for the Child. The e-mail filed on the Add Child Account form is prefilled with this e-mail address suffix. Please take into account that this is not an actual e-mail inbox, but will be used only as an identifier, and username for the Child to access COMET PLAY.
The Parent Account will always receive to its own e-mail, any notifications sent to the Child Account
Editing Child Accounts
As a parent/ guardian you are able to define and edit the account details of your children.
To edit the account of your child:
Hit on the avatar icon in the upper right corner or access the Member Switch button in the upper left corner of the COMET Play Toolbar and select your child account
This will redirect you to your child view that is refreshed for the newly selected member.
Click your name button in the upper right corner of the COMET Play Toolbar.
Hit the Account Settings button
On the My Account tab and Security Tab you are able to change the account details for your child
💡 Child Workspace Profile can always be edited from the My Profile Menu when a child account is selected.
Add Requests
From the Account Settings menu, COMET play users are able to send a request for linking an account in parent-child relation. This is useful in cases when your child already has an active and independent PLAY profile or in cases when the second parent wants to link the child’s profile to his/ hers own profile.
To add a request:
Click your name button in the upper right corner of the COMET Play Toolbar
Hit the Account Settings button
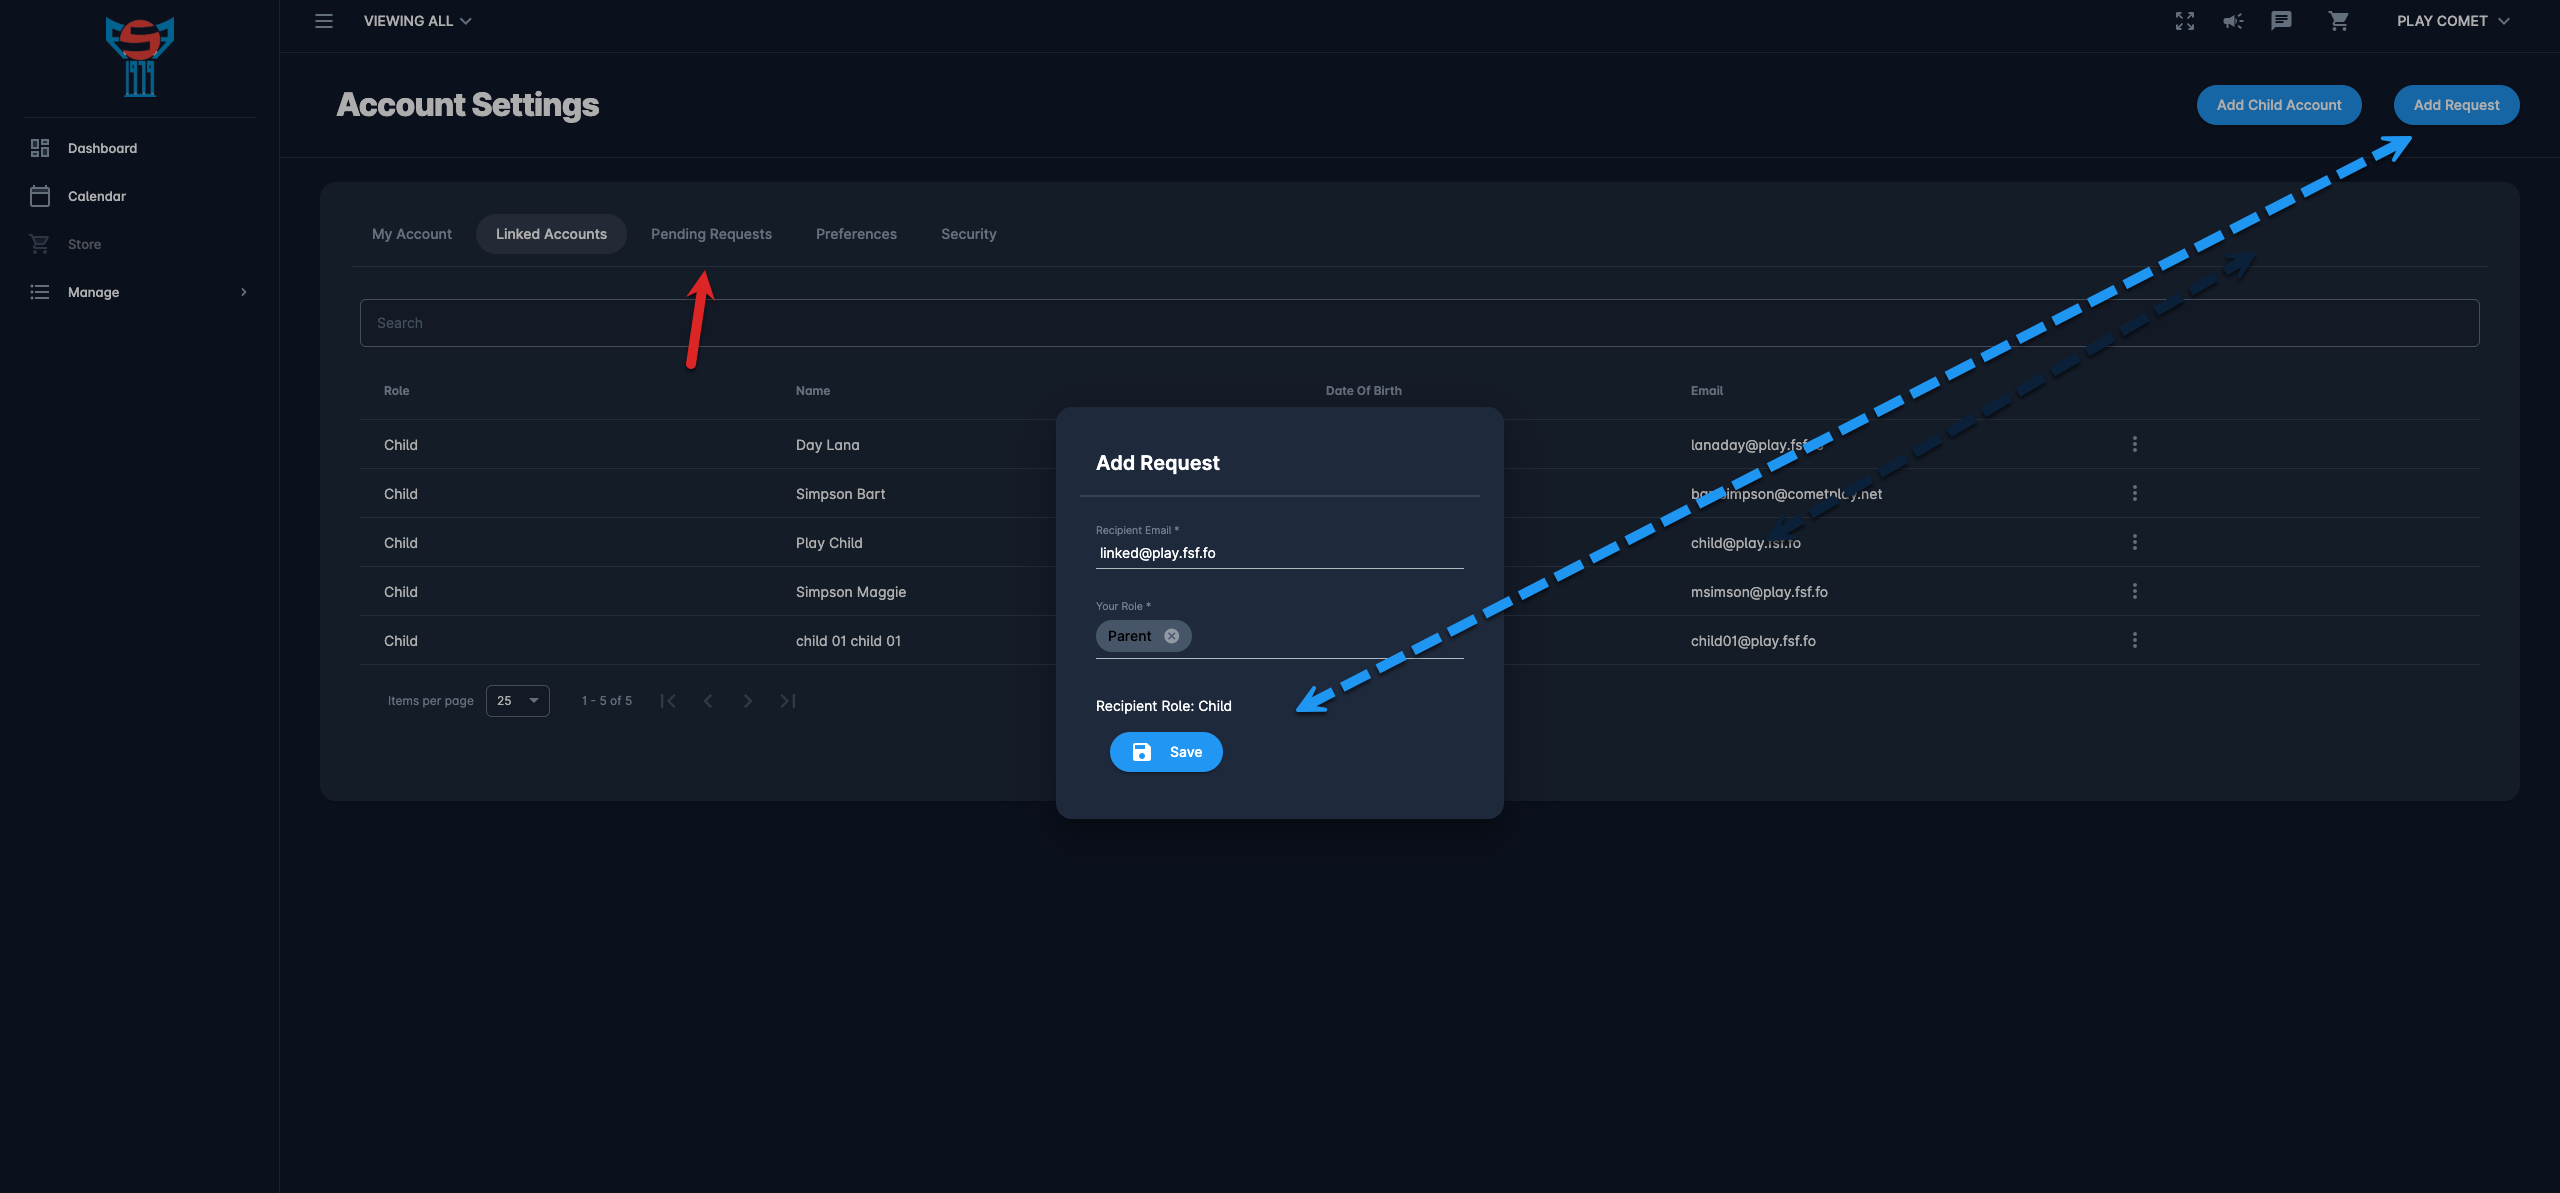
Click on the Add Request button in the upper right corner
The Add Request form is displayed
Fill in the form details: e-mail of the account you want to link, your role*
Hit the 💾 Save button
✅ The automatic e-mail invitation will be sent to the user you have requested to link.
ℹ️ The unresponded requests (of the invited and invitee) are displayed in the Pending request tab of the Account Settings menu → The inviter will have his/hers request listed on the Pending request tab with the “delete” action enabled
*After you define your role the system will display the (reciprocal) role of the recipient
To accept a request:
Accounts are linked in parent-child relations when the invitee accepts the request.
Click your name button in the upper right corner of the COMET Play Toolbar
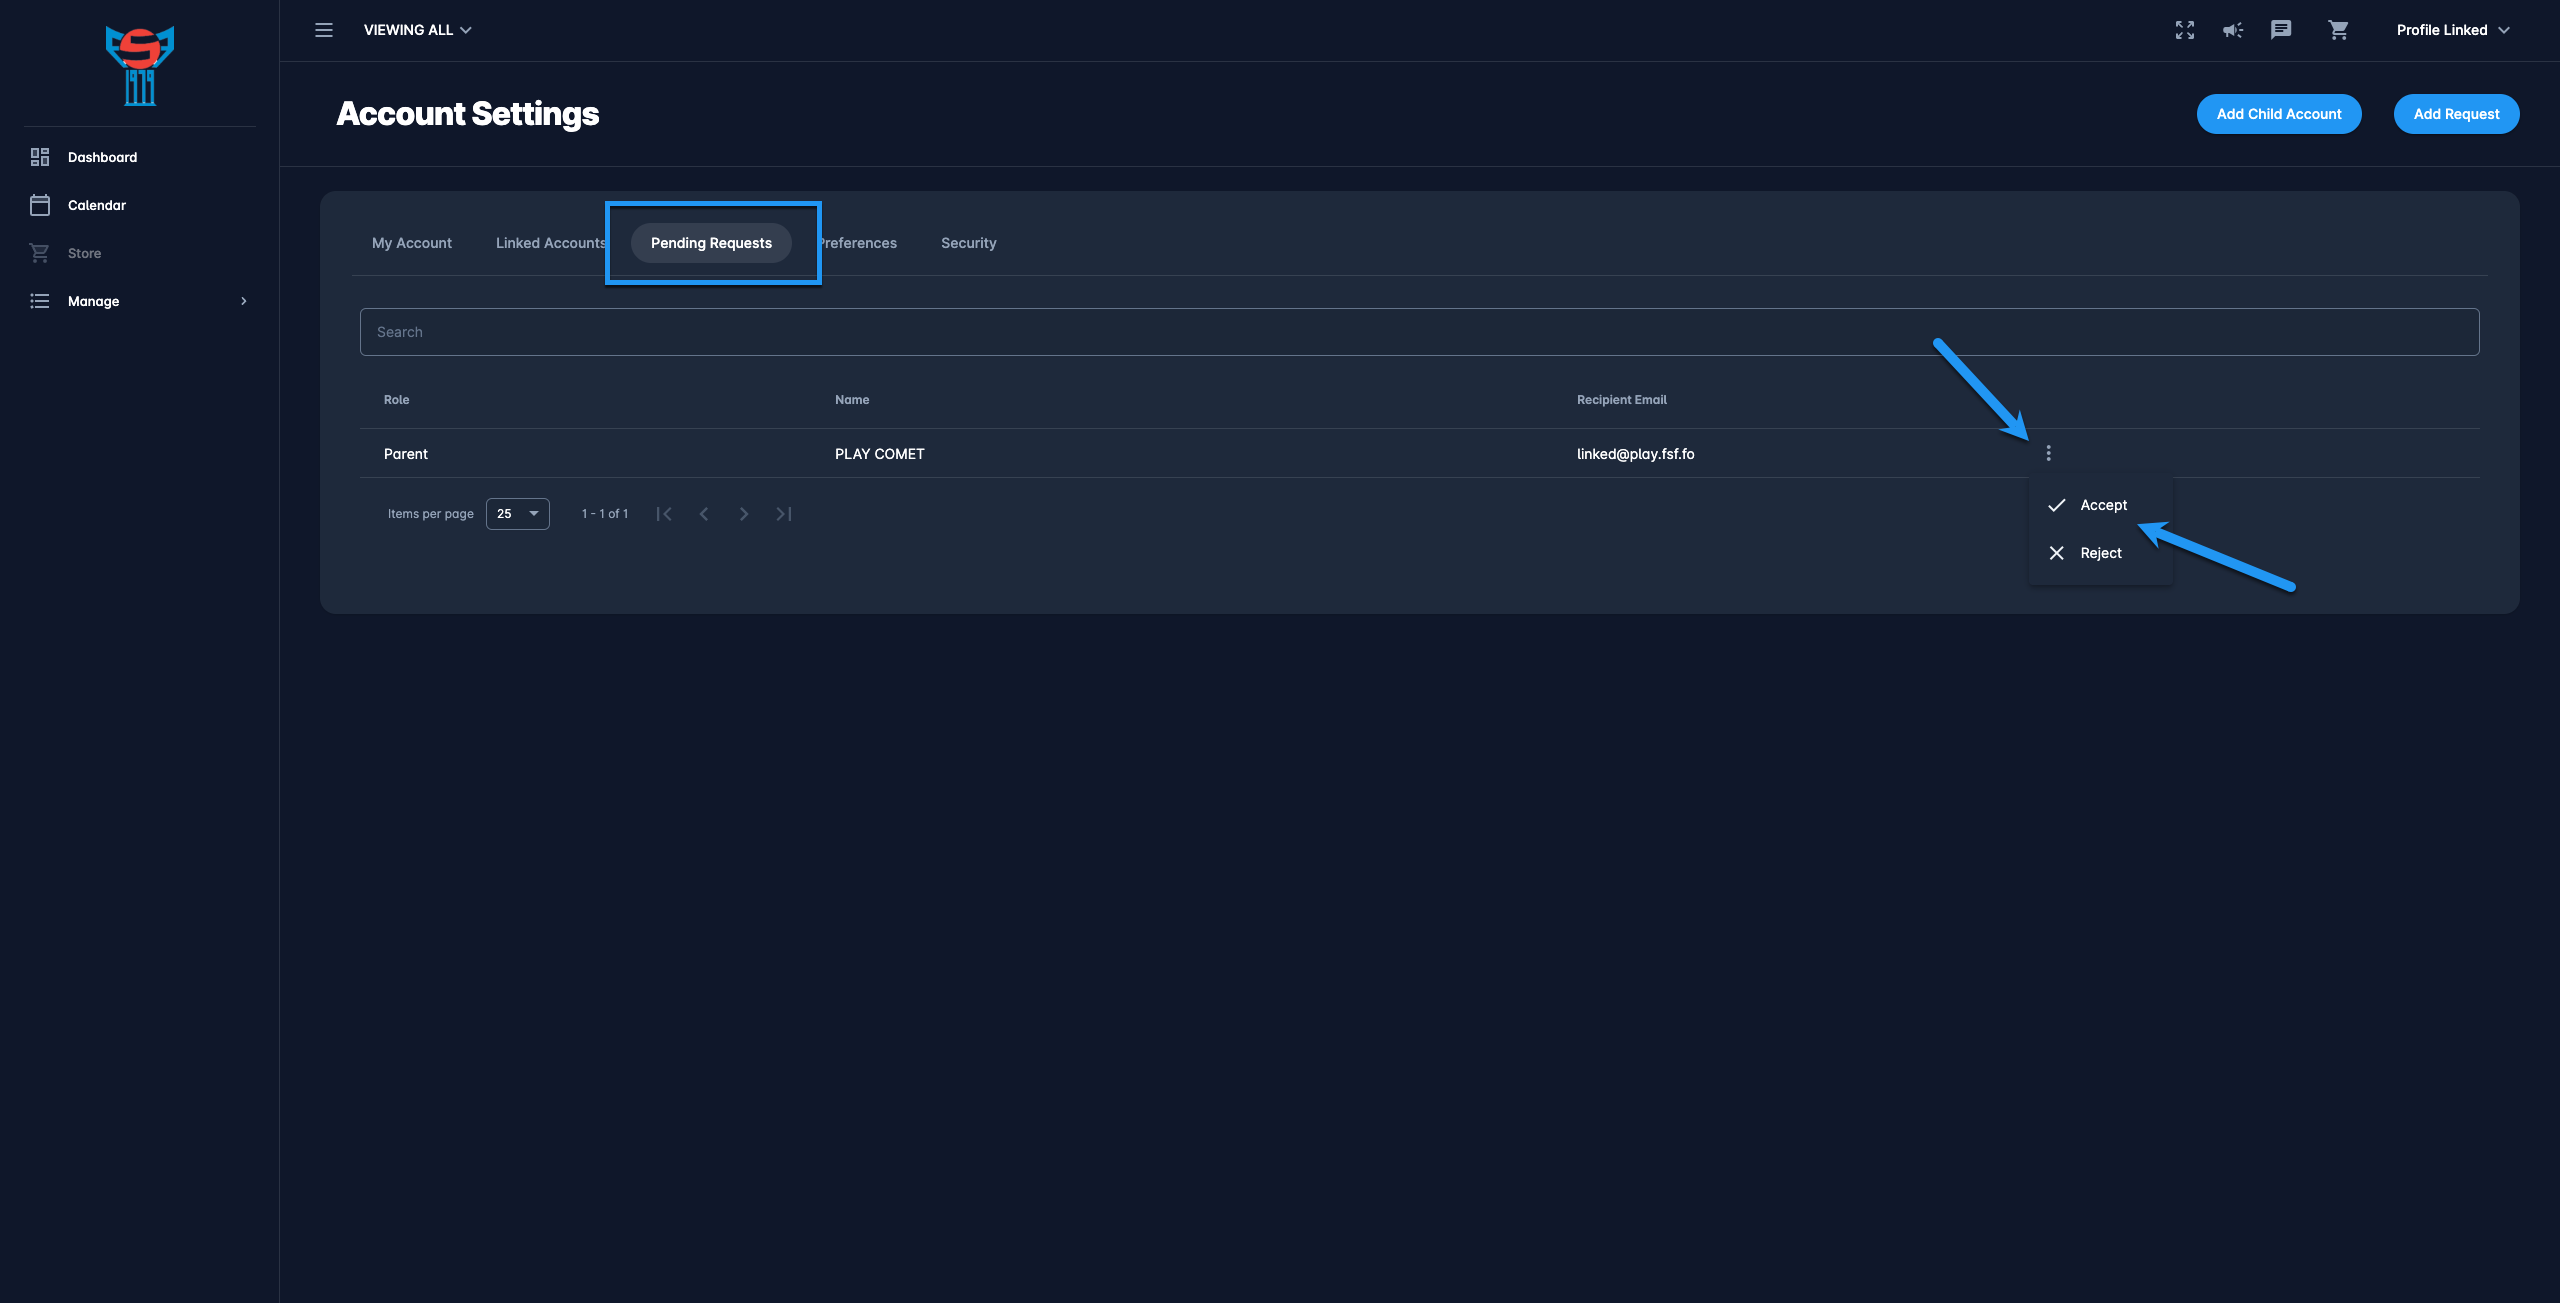
Hit the Account Settings button → Open the Pending Requests Tab
This request for linking accounts will be displayed
Hit the Three dots icon button next to the request and select the ✔️ Accept option
The accounts are successfully linked
Once the request is accepted the Parent will able to manage the account of their child and switch to the child’s account https://analyticom.atlassian.net/l/cp/PPFuRTs7
Please take into account that the request needs to be accepted from the Pending Requests Tab of the person who has been invited, i.e. the invited child needs to log in to his/ hers profile to accept the request.