Once the License cycle is created, info tabs are generated depending on your chosen Application Type. Below, you will find the description of all Licensing Cycle Tabs.
Details Tab
The Details tab is the primary tab of the cycle profile and is always displayed, regardless of the selected Application type. The Details tab displays all the details and entry fields listed in the previous section, which Licensing Admins can edit at any point.
Managers Tab
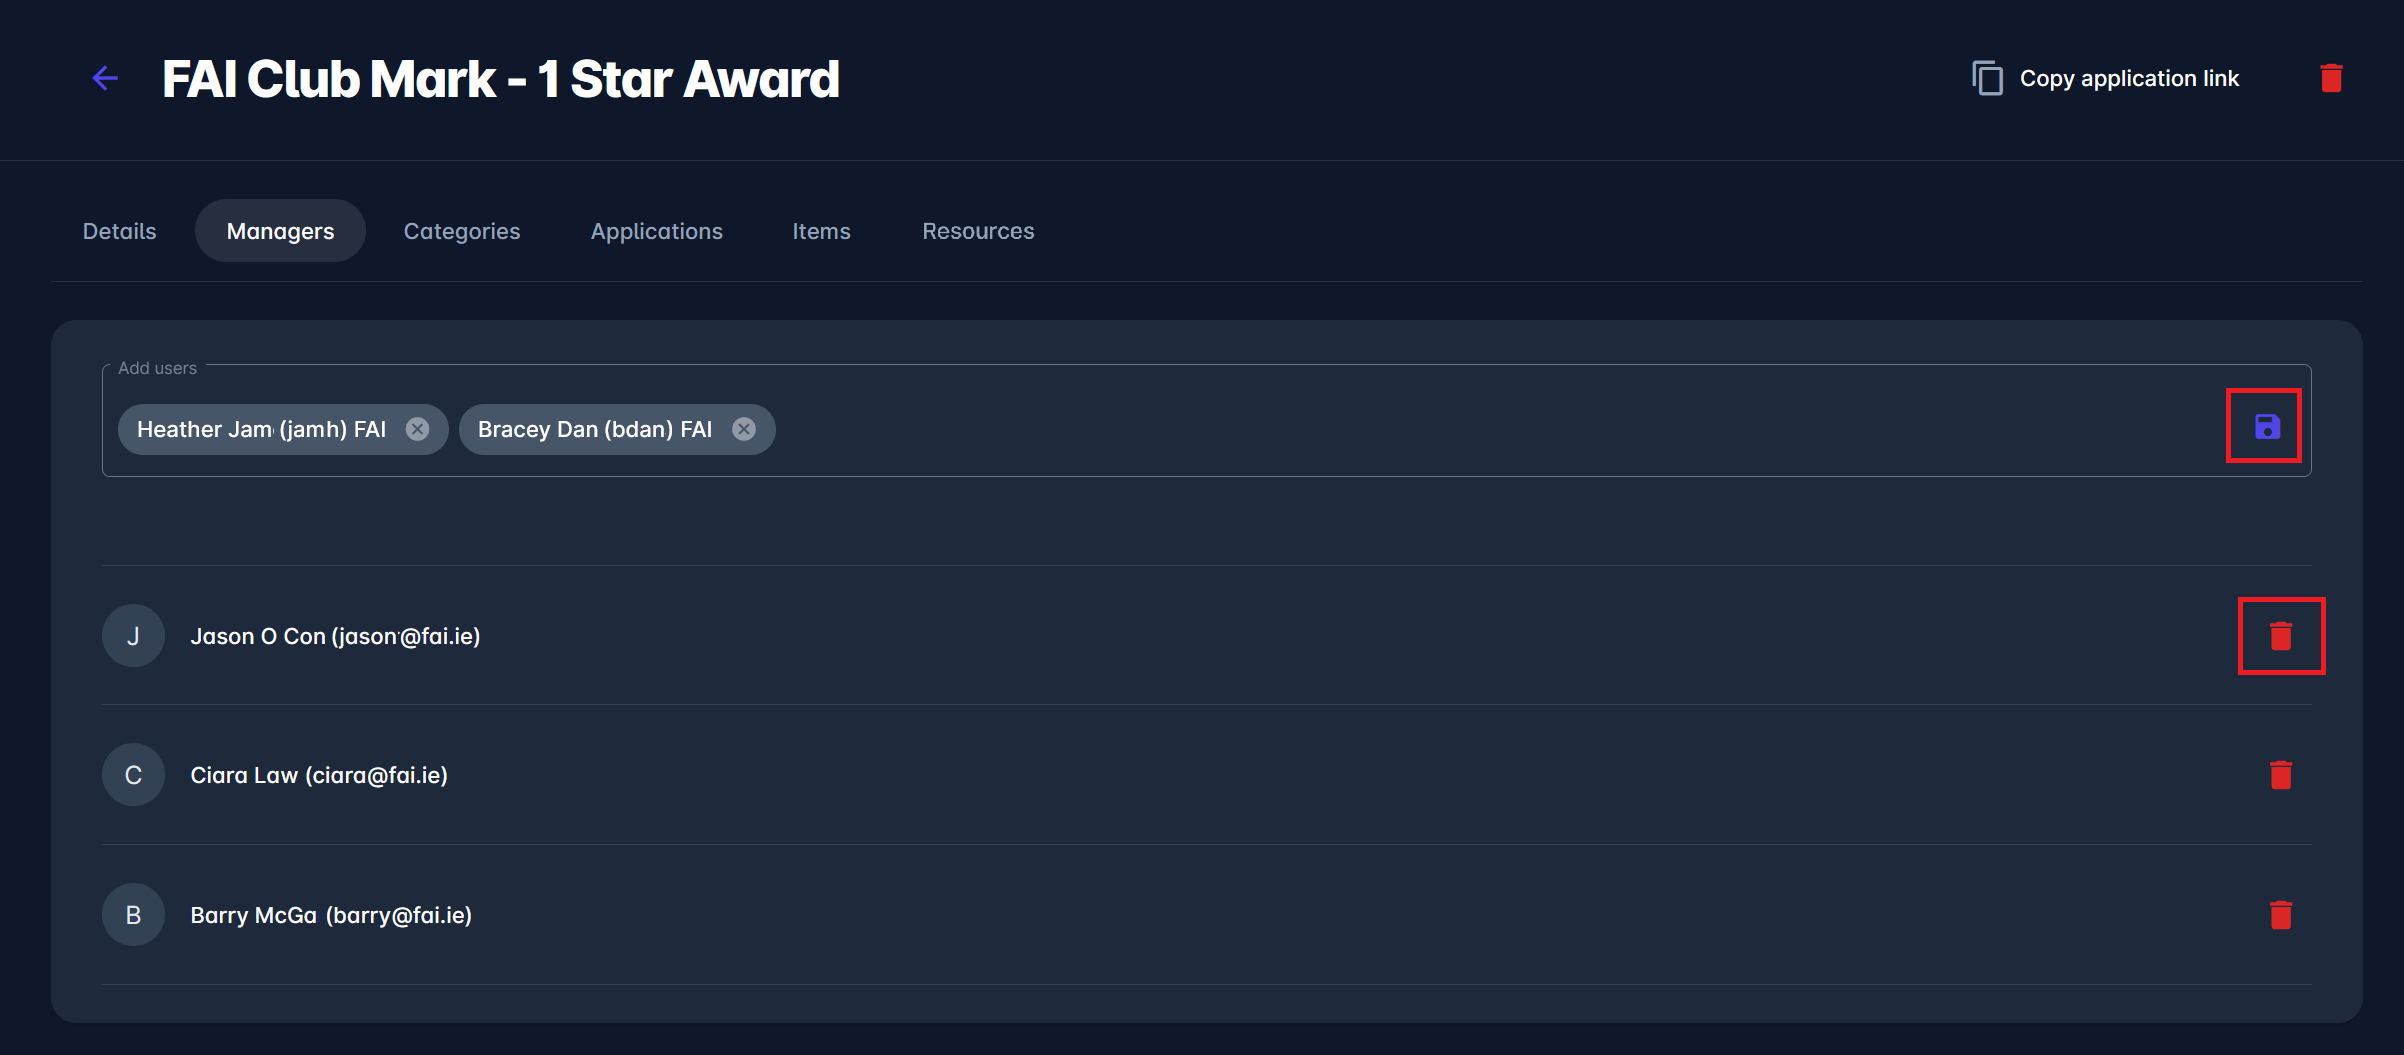
The Managers tab is displayed on all cycles regardless of the selected Application type. It displays the list of all licensing managers assigned to the licensing cycle.
To add a new Licensing Manager:
-
Access the Managers Tab
-
Reach the Add user search box
-
Select the Licensing Manager from the list
-
Hit the 💾 Save Icon button to assign the user as the manager
To delete/unassign the Licensing Manager from the Licensing Cycle:
-
Access the Managers Tab
-
Reach the User that you want to delete
-
Hit the Bin Icon button to delete the manager
Managers can manage Applications on the Cycle to which they have been assigned.
Categories Tab
Categories and evidence are defined for each cycle by the Licensing Administrator. The most common categories are Sporting, Legal, Infrastructure, Financial, and Personnel. The Licensing Administrator appoints Experts to one or more Application Categories.
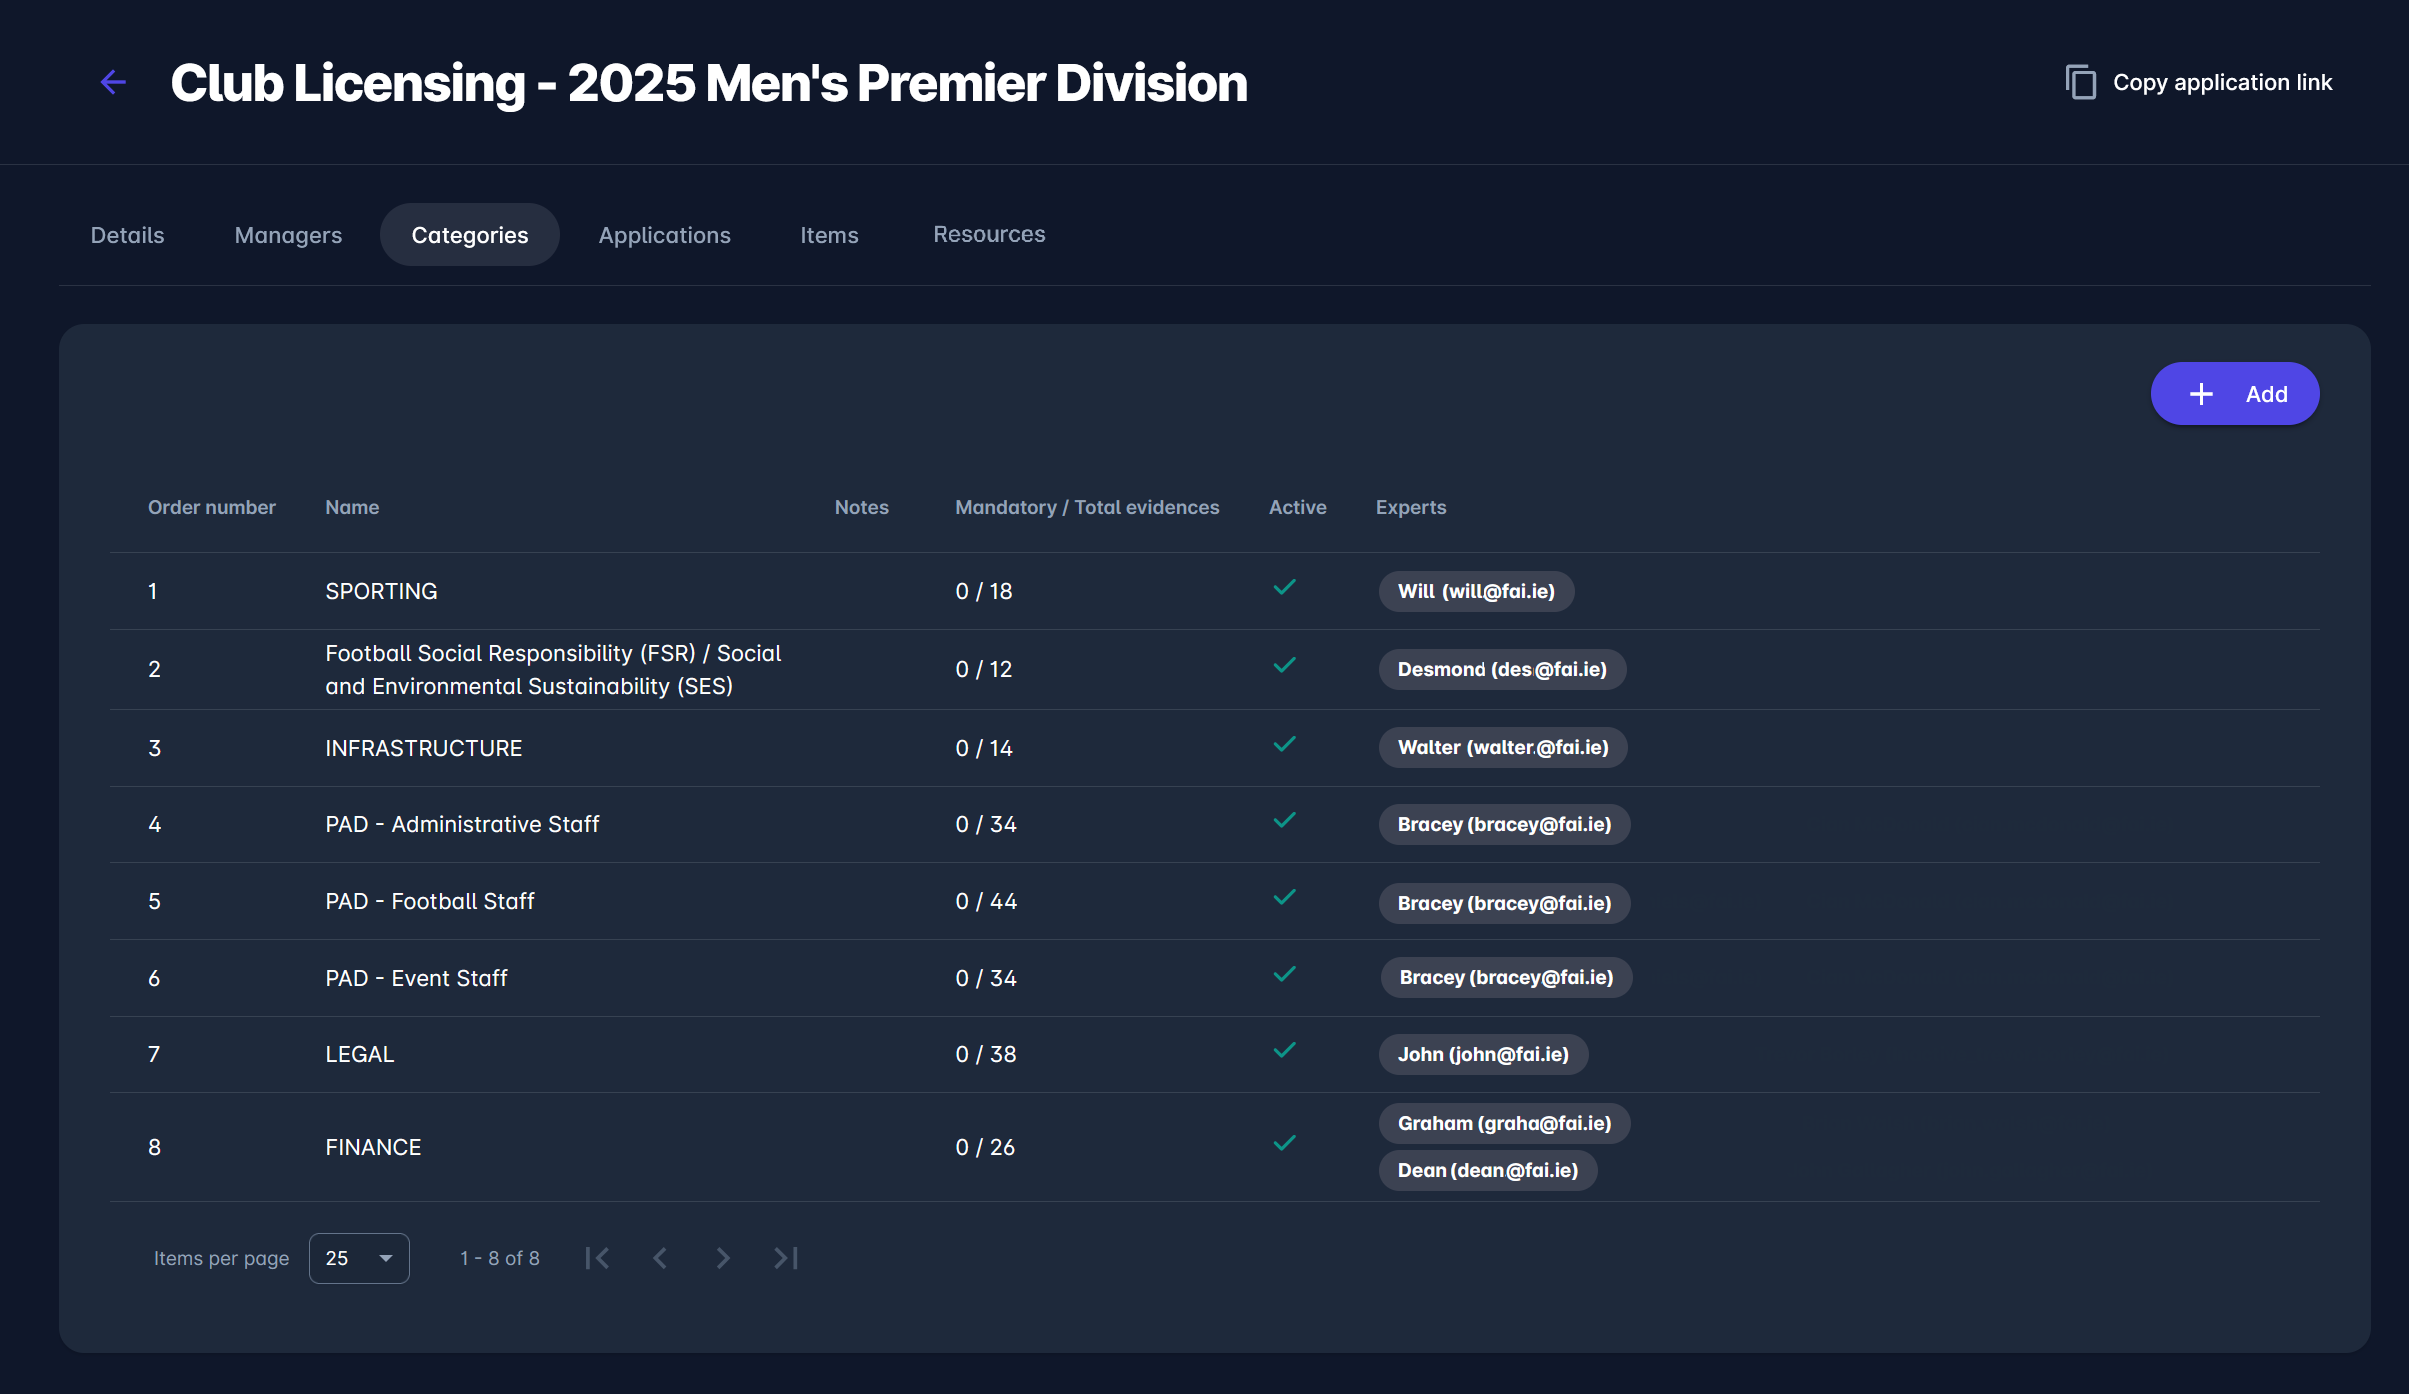
The Categories tab is displayed on all cycles regardless of the selected Application type. It shows the list of all evidence categories required for the licensing.
The list consists of the following details:
-
Order Number
-
Name
-
Notes
-
Mandatory indication & Total evidences required for Category
-
Active - activity status
-
Experts assigned
To add a new Category:
-
Access the Categories Tab
-
Hid the + Add button
-
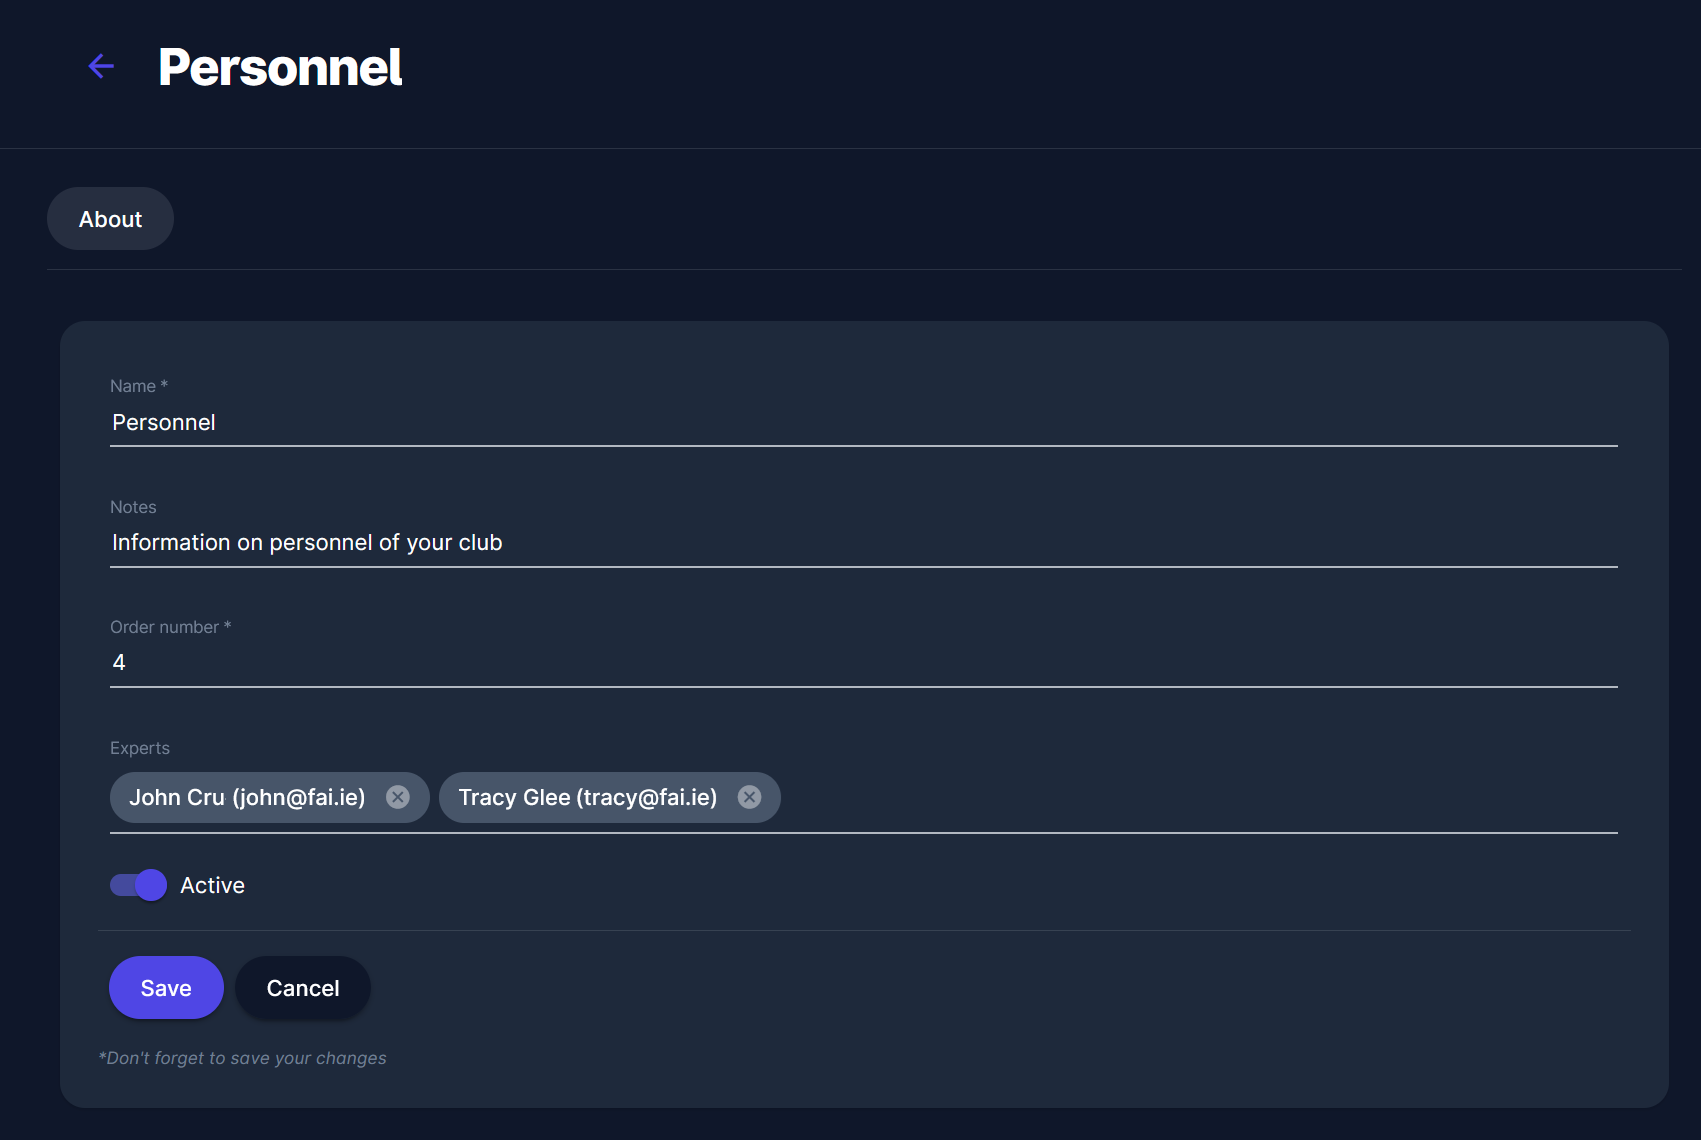
This opens the new Category page to fill in the “About” details:
-
Name of Category
-
Notes
-
Order number
-
Experts - please select the expert from the system (users with the role of Licensing Managers and Experts) who will be assigned to this category. Each Category can have its own Experts responsible for evaluating specific categories.
-
The switch button “Active/ Inactive” (please take into account that inactive categories cannot be used in a cycle)
-
-
Hit the 💾 Save button.
To delete/ unassign the Category from the Licensing Cycle:
-
Access the Categories Tab
-
Reach the Category that you want to delete
-
Hit the Bin Icon button
Category Preview
The Category Preview feature enables Managers and Administrators to conveniently visualize how the Category will appear to end users entering data into the form.
To see the Preview of a Licensing Category:
-
click on the Cycle on the left nav-bar
-
click on the Categories tab
-
choose one of the Categories (e.g., Administration)
-
navigate to the Evidence tab
-
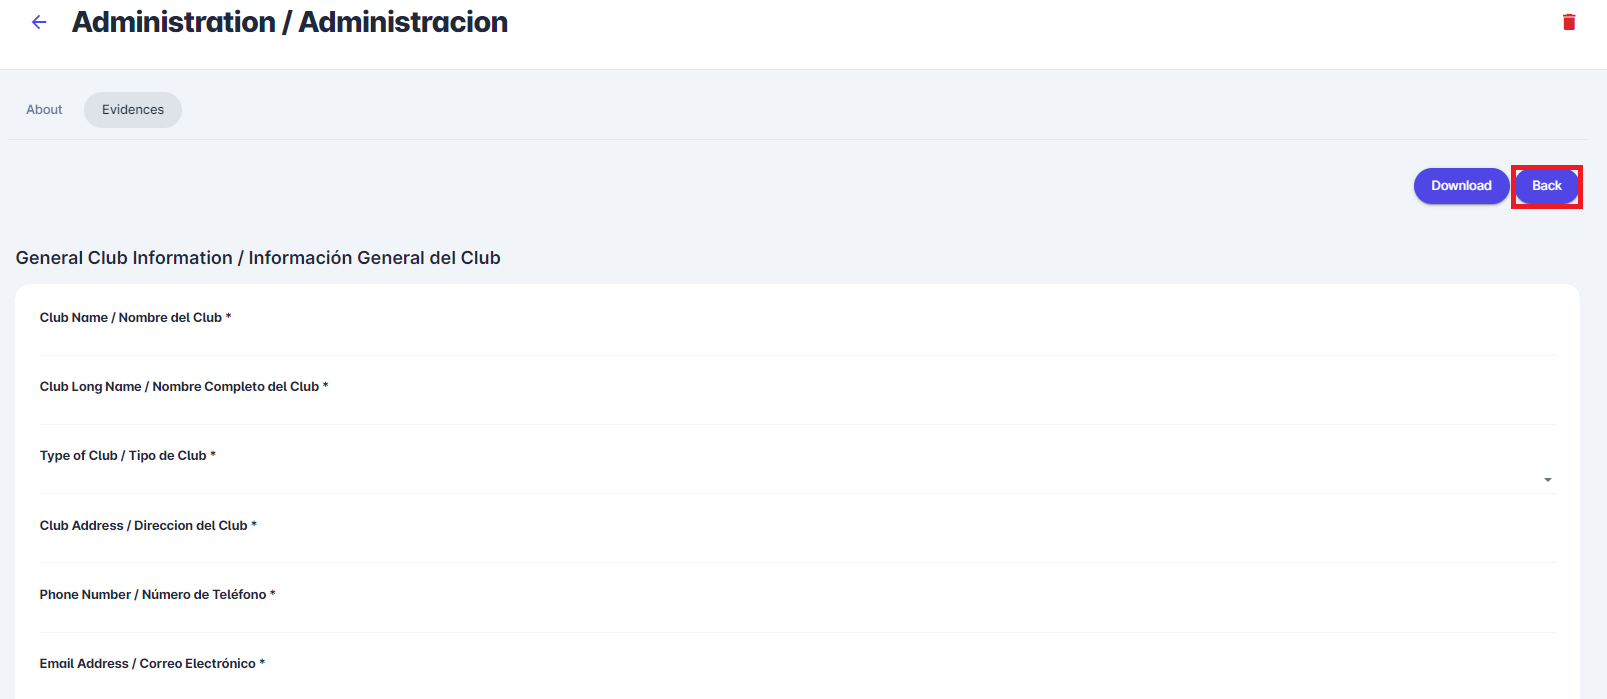
click on a Preview button in the upper right corner of your screen to see how the Category will be presented to the end user
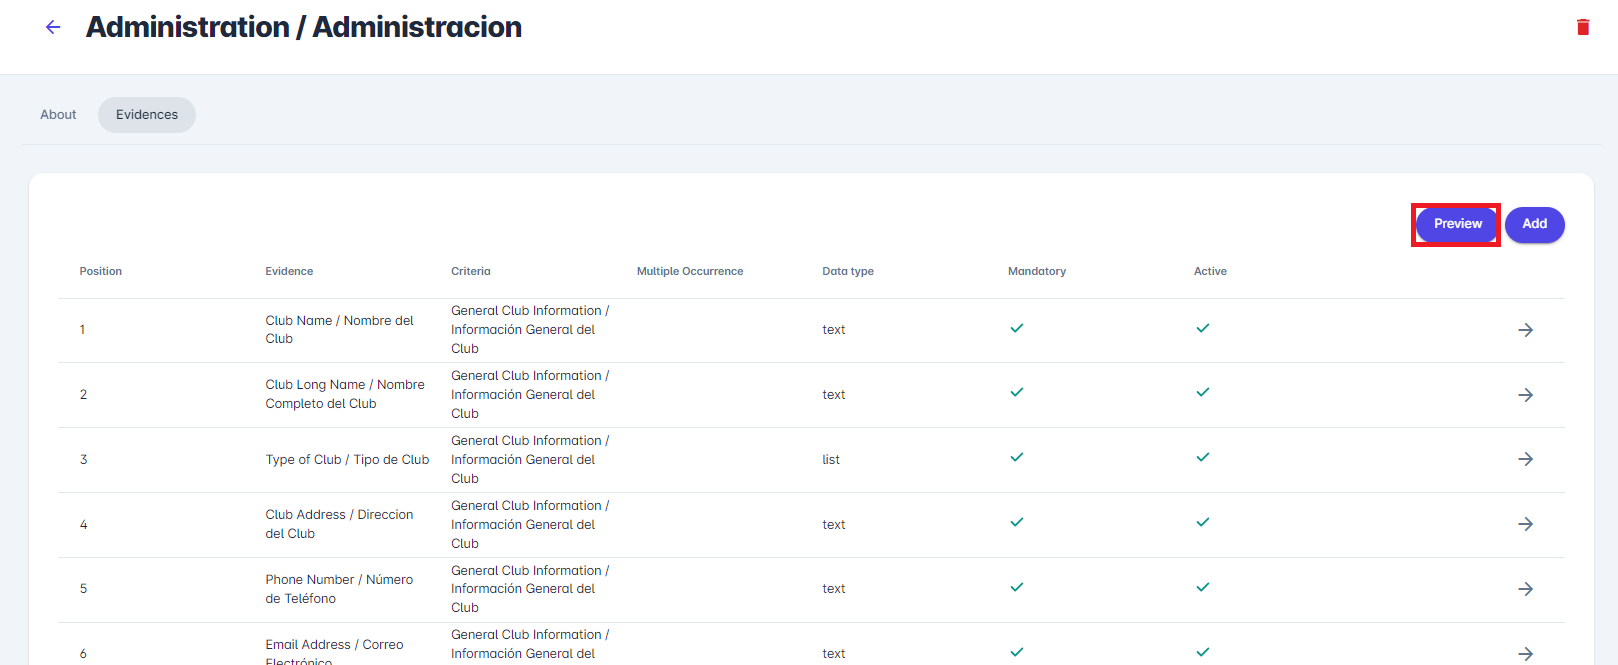
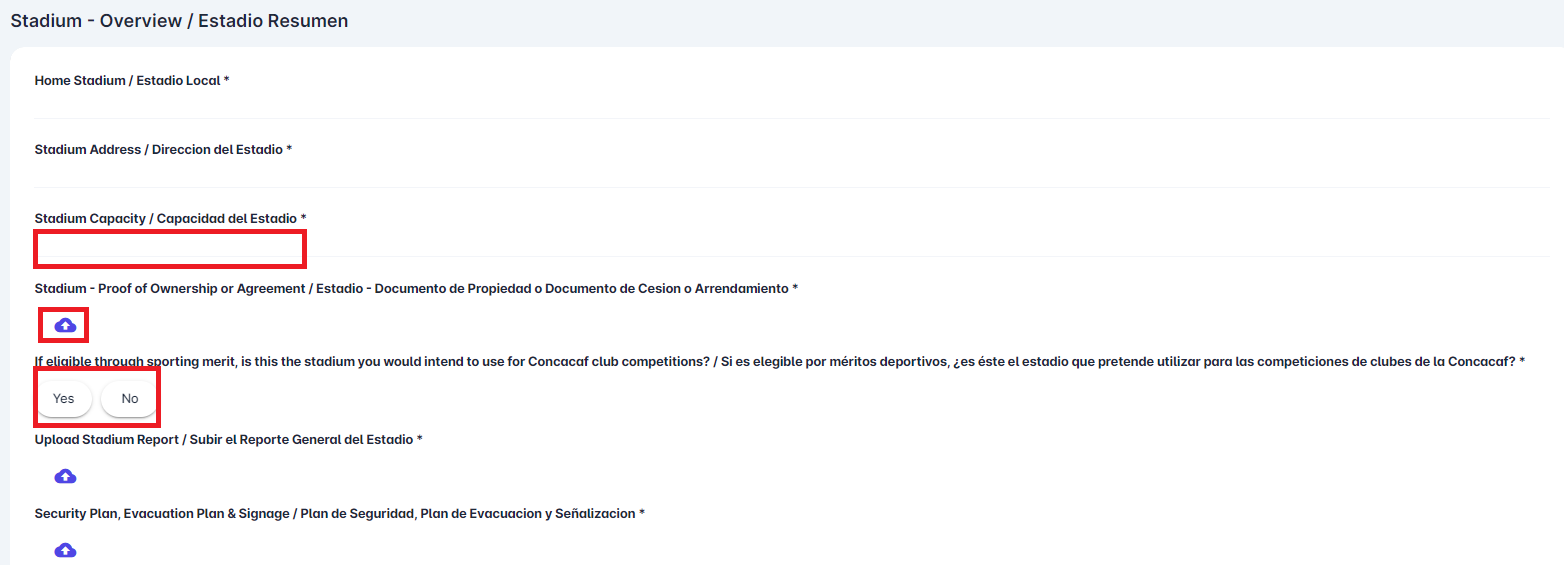
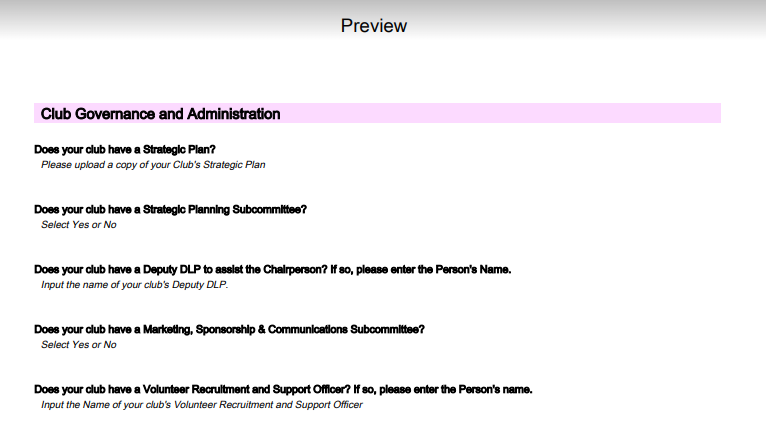
This opens a preview version of your licensing Category, including Criteria and all Evidence. It shows Yes/No buttons, empty lines, a list of all possible answers, a calendar, Info buttons, and more, depending on the data type you have set as a prerequisite to enter the evidence.
Close the preview by clicking the Back button.
Download Preview
You can also download the category preview, including its questions and instructions, as a PDF. This is useful if you want to share the preview with Licensing Managers who do not have permissions to view/edit the cycle details. To download the PDF, click the Download button located at the top right corner of the preview screen.
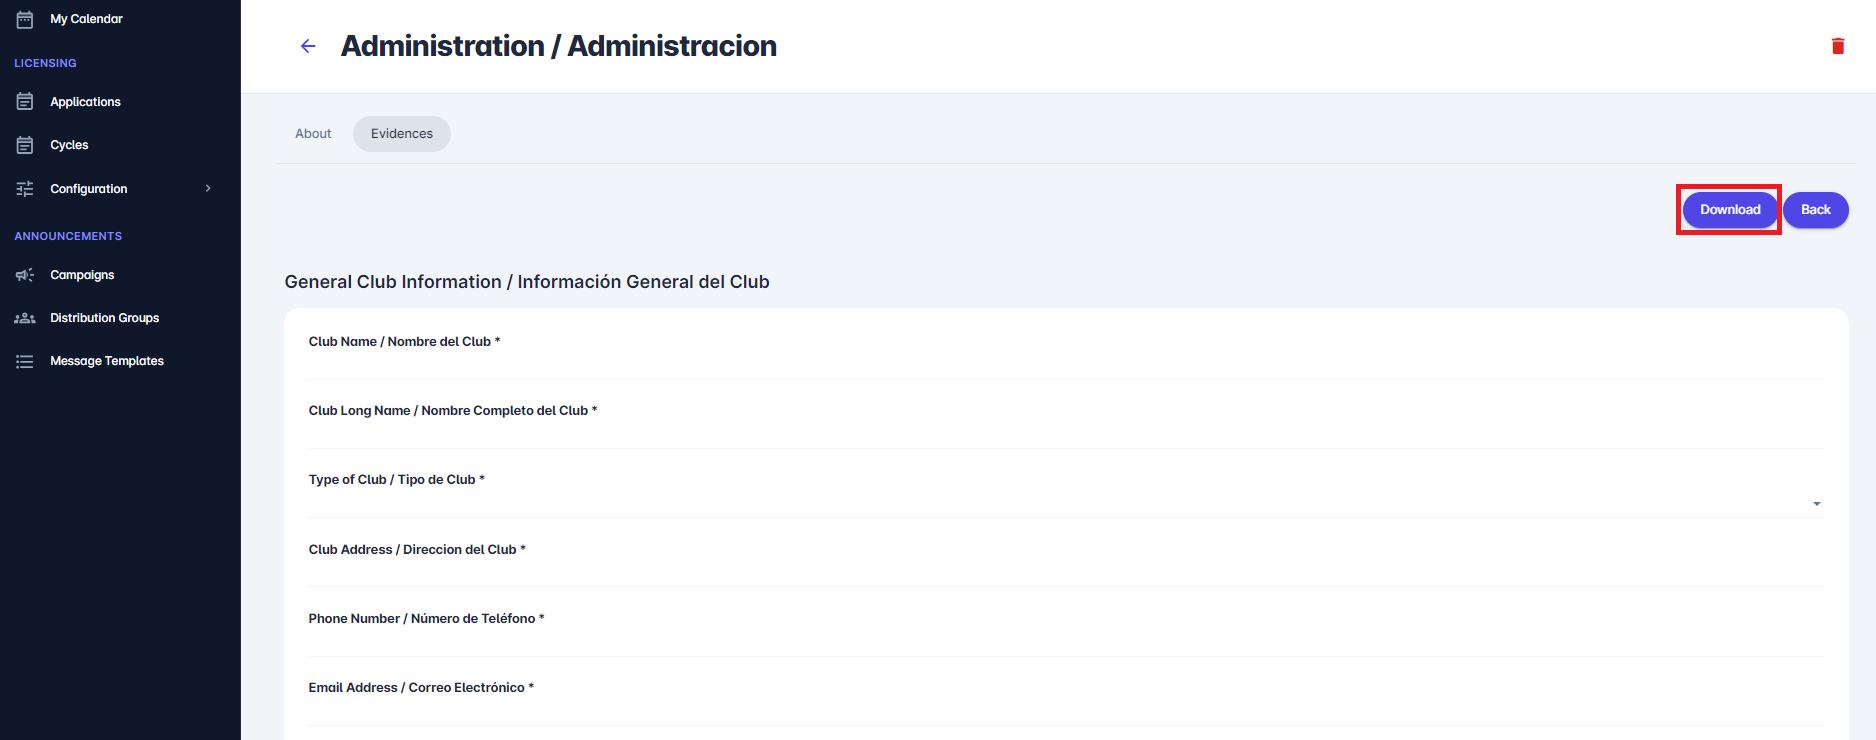
This will save a copy of the form on your device, which you can easily share as needed.
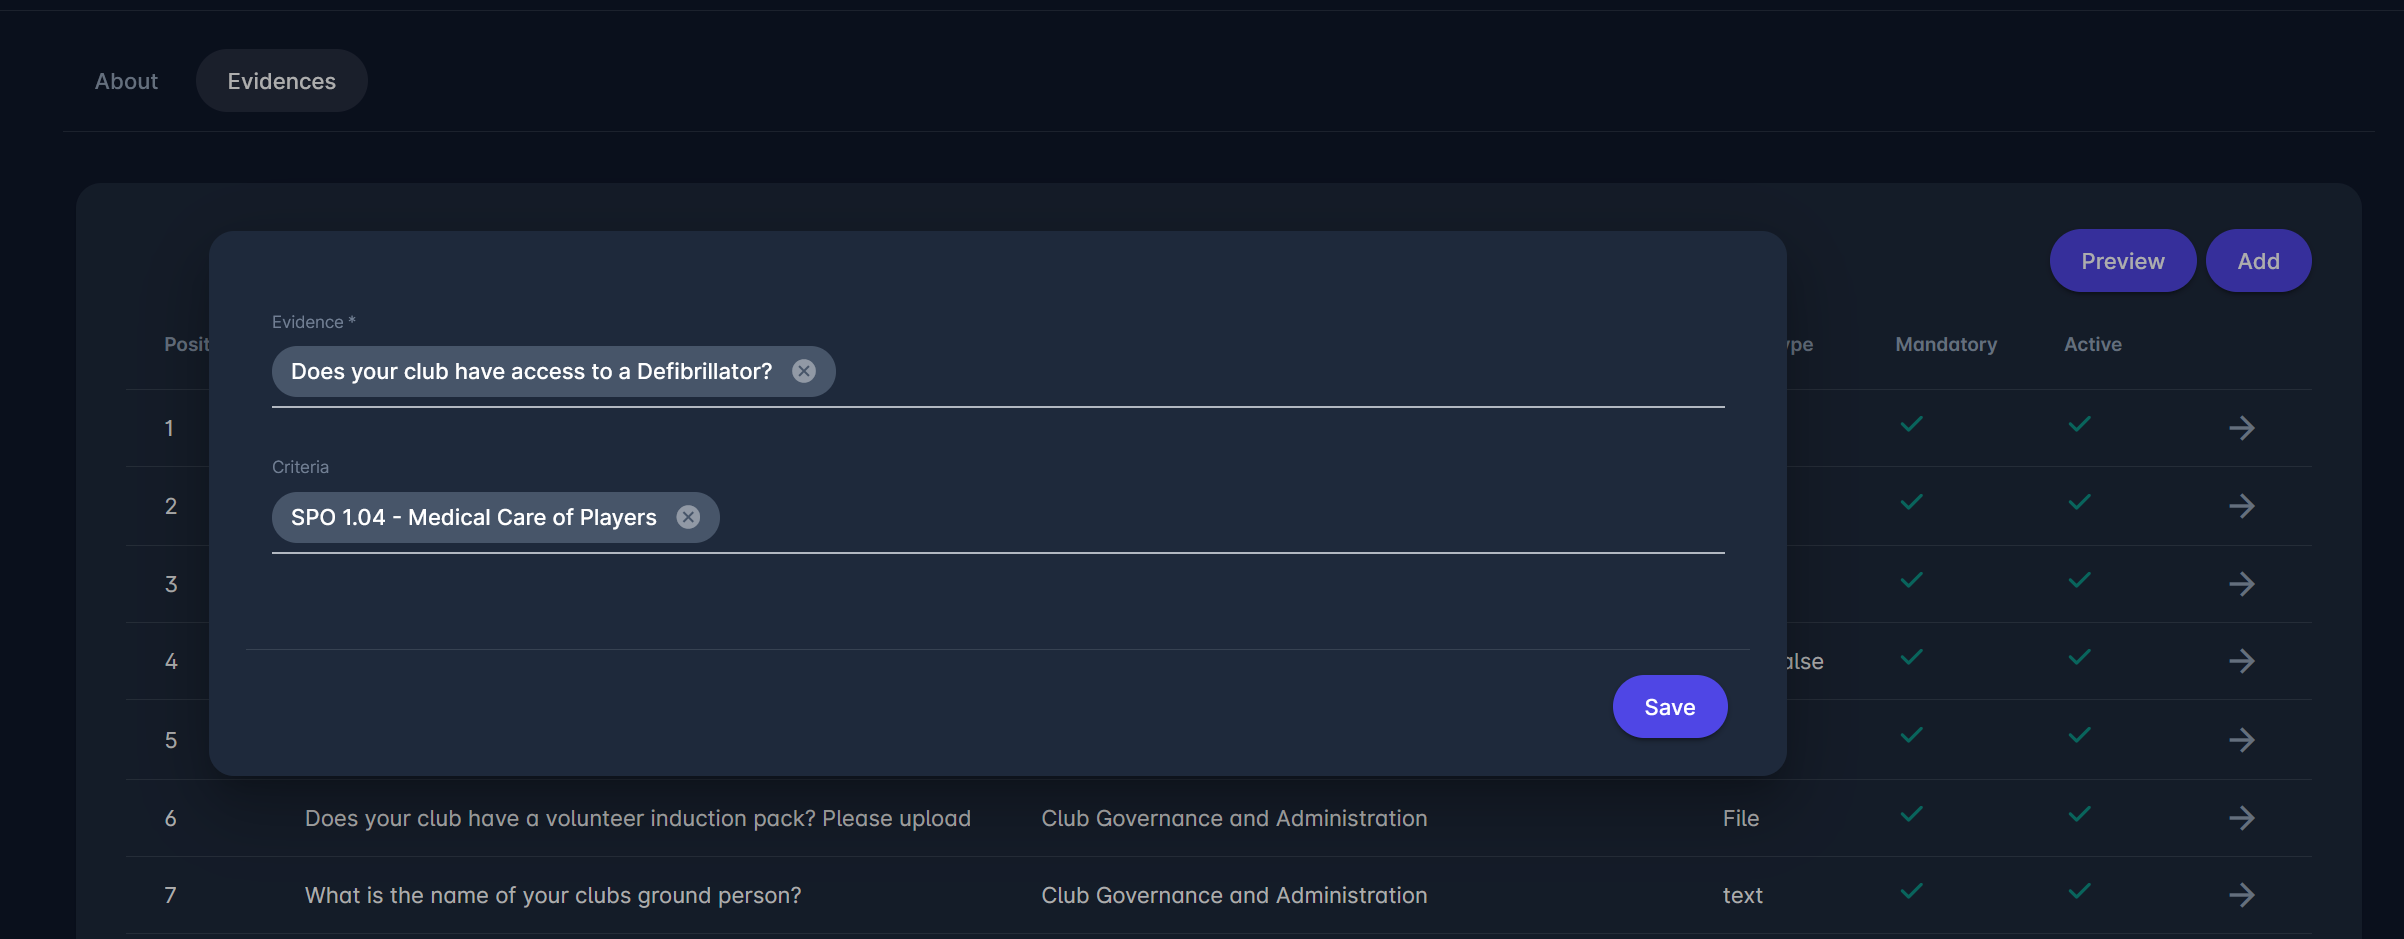
Once the newly created Category is saved, the Evidence tab is automatically generated.
To add evidence to the category:
-
Access the Evidences Tab on the Category Page
-
Hid the + Add button
-
This opens the Evidences window to select:
-
The evidence from the system
-
The criteria from the system
-
-
Hit the 💾 Save Icon button
Applications Tab
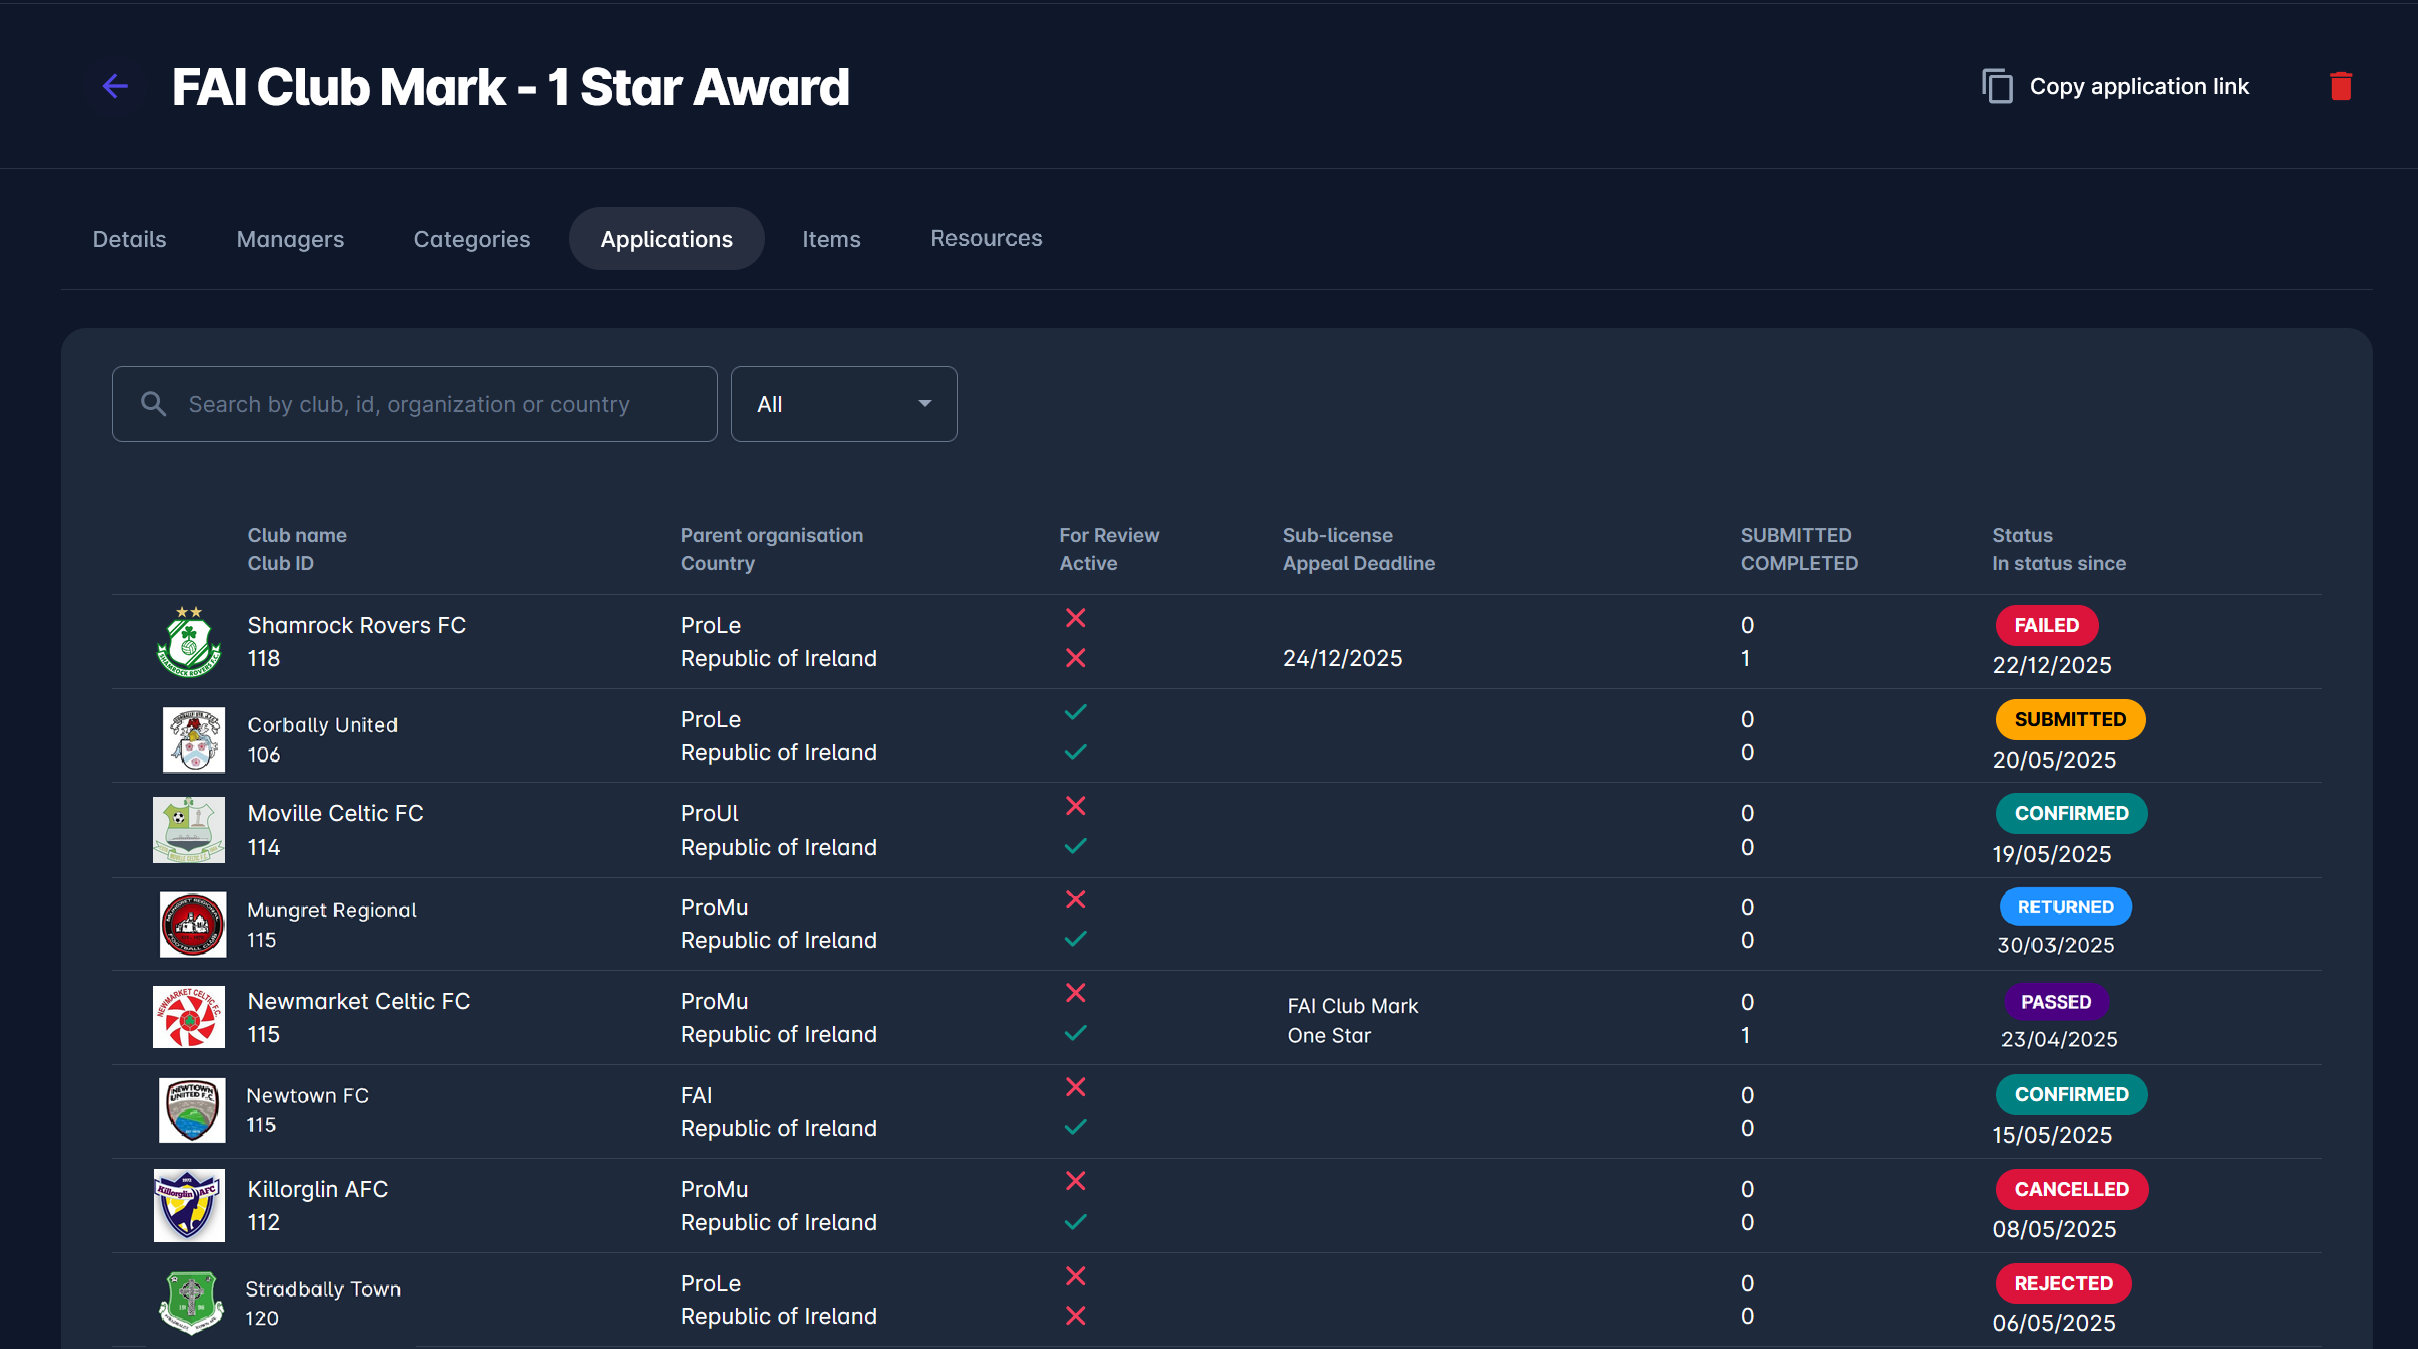
The Application tab is displayed on all licensing cycles regardless of the selected Application type. The Applications tab displays a list of all clubs (including all club applicants) and their application status. The list consists of the following details:
-
Club/Team name & Club ID
-
Parent organization & Country
-
For Review & Active
-
Sub-license & Appeal Deadline
-
Submitted & Completed
-
Status & In Status since
-
The Application Filter - use it to filter the application waiting for “In Review” or “Active.”
Click the Application in the list to open a Profile of the Applicant Club.
Items Tab
If Pay after approval, Just Pay, or Pay Later is selected as the Application Mode, the Items tab will appear in the Licensing Cycle profile.
Please check the following links for more instructions on managing the Cycle Items from the Item tab:
Resources Tab
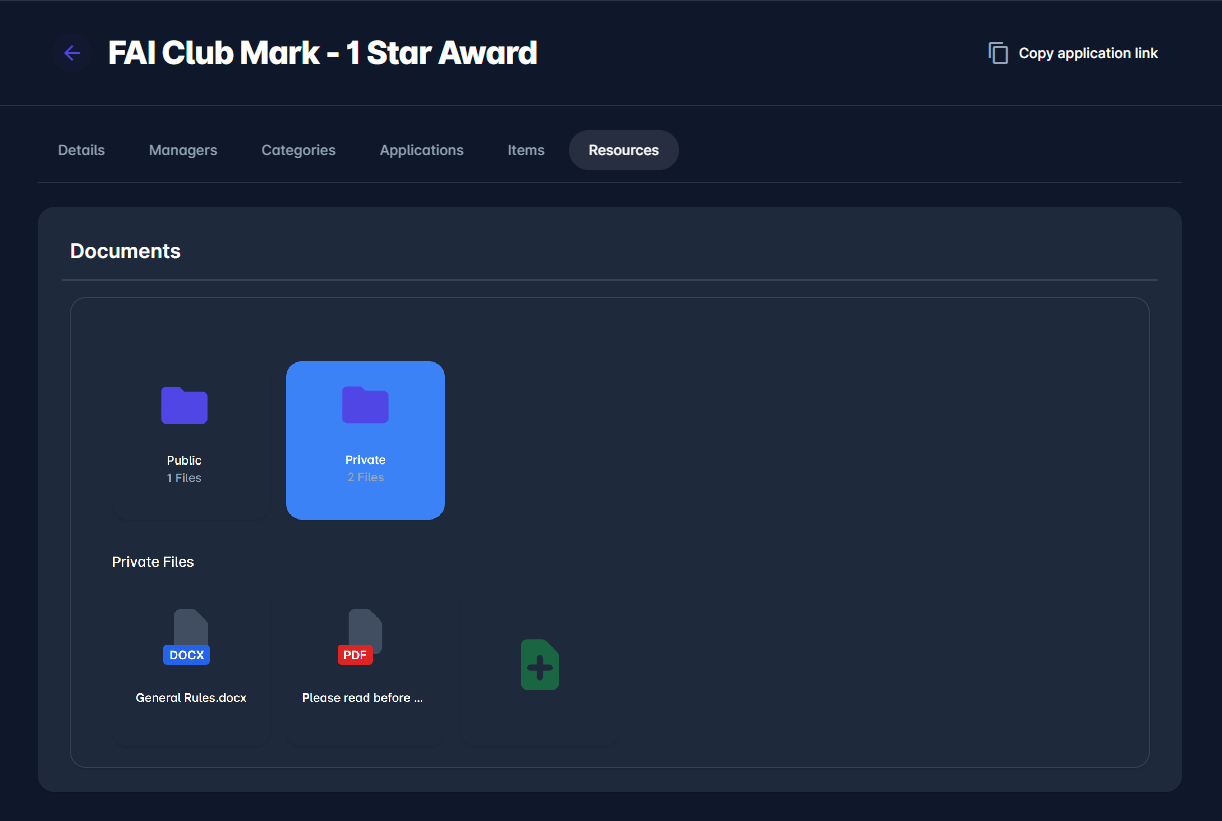
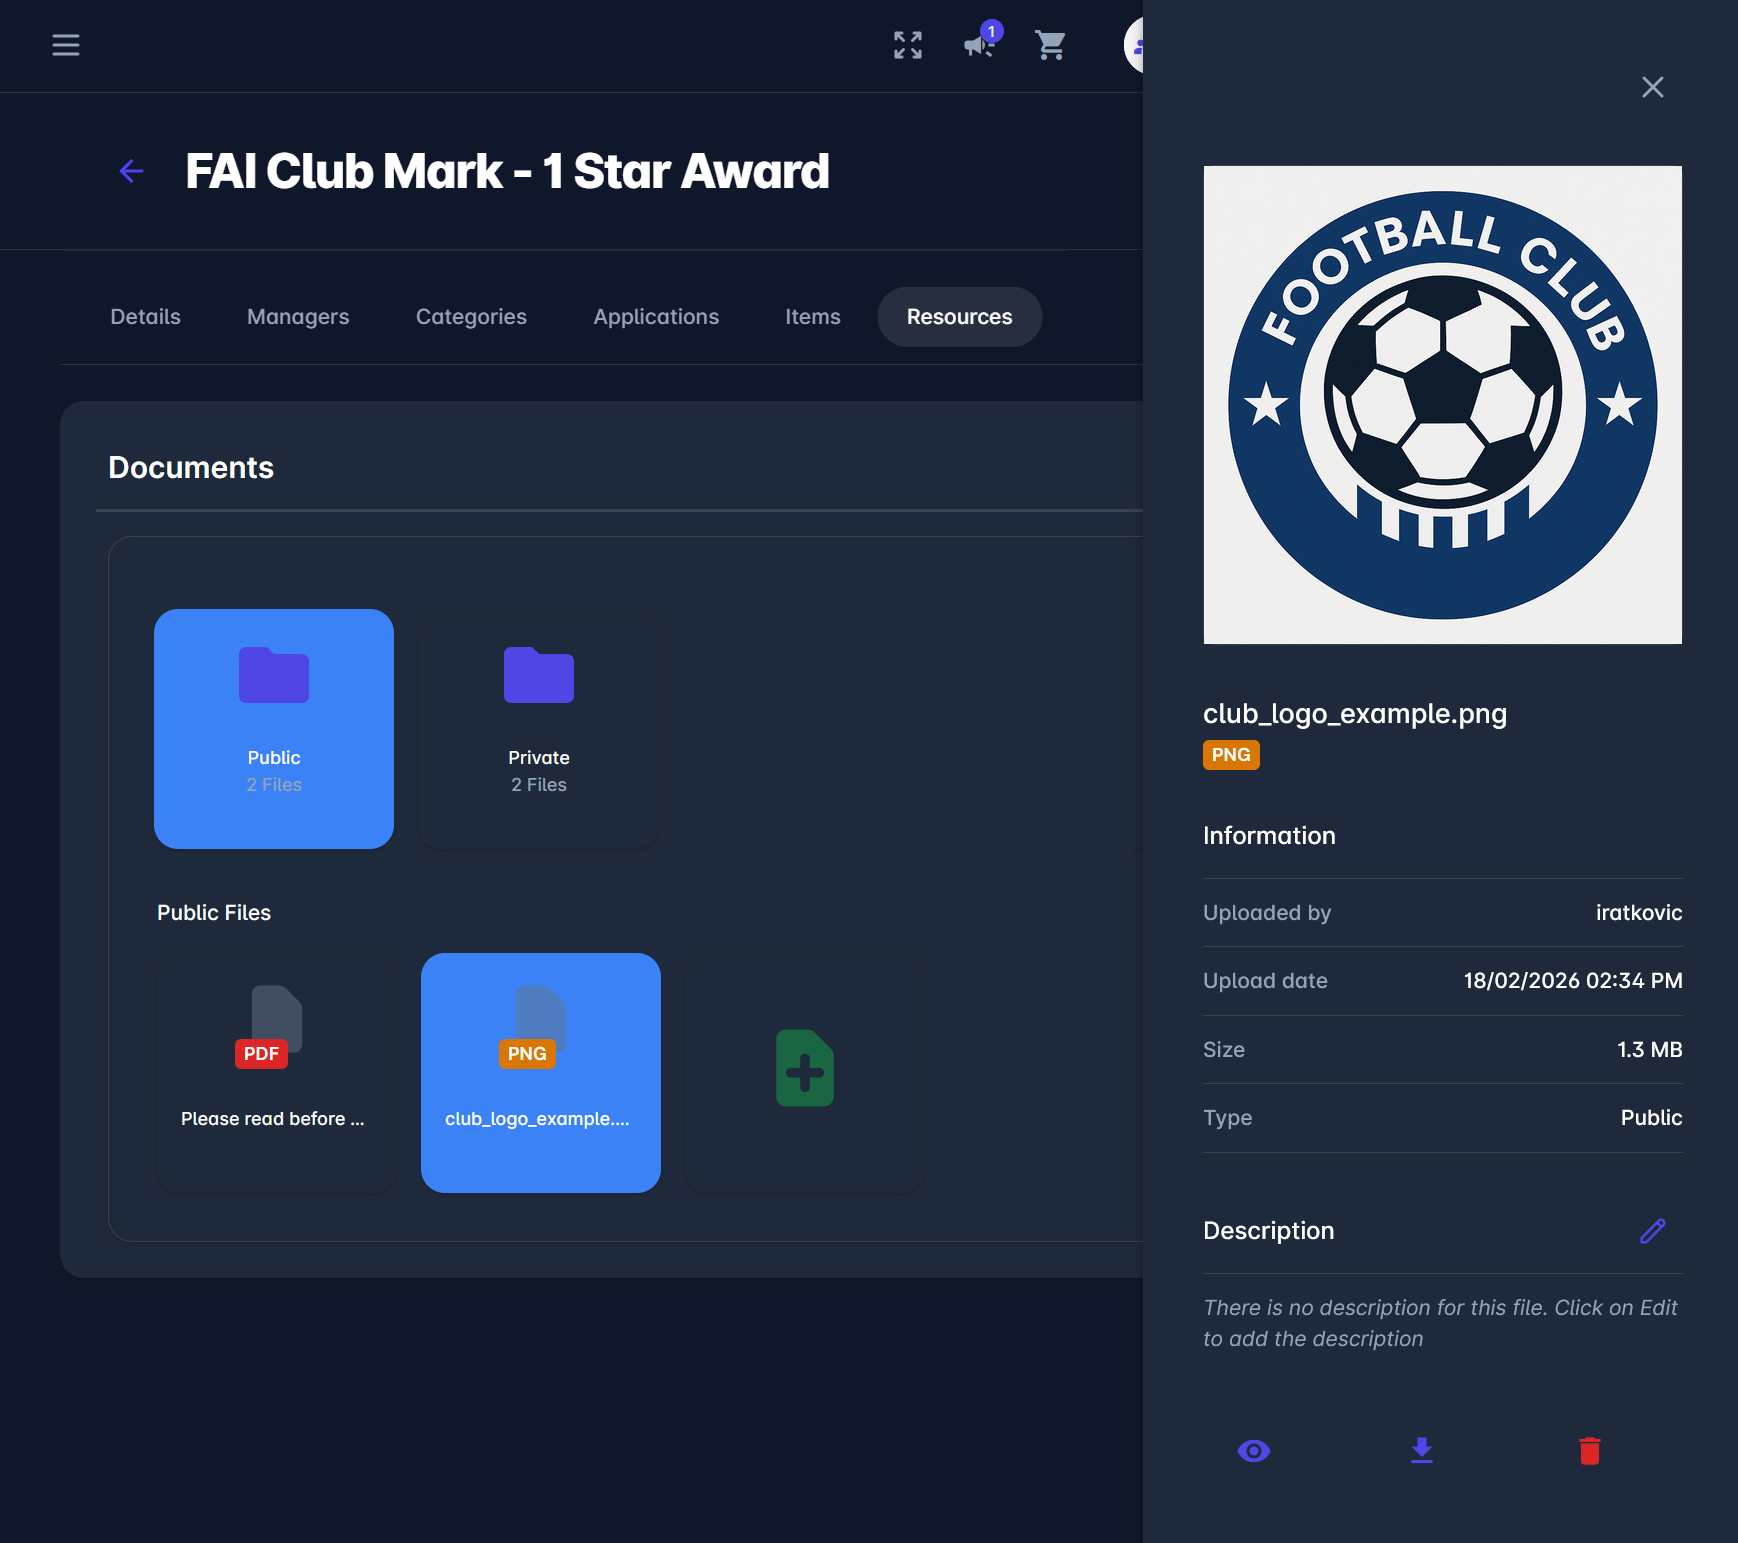
Resource file management is a component of the Licensing module that facilitates uploading files/resources related to the specific event.
The Documents section represents two file types, Public and Private, shown as folders. Resources under those file types/folders can be viewed by selecting the tile type/folder, in the lower row, with their corresponding title - Public files or Private files.
Public resources will be available to all users before applying to the cycle, whereas private resources will be available only to confirmed applicant clubs.
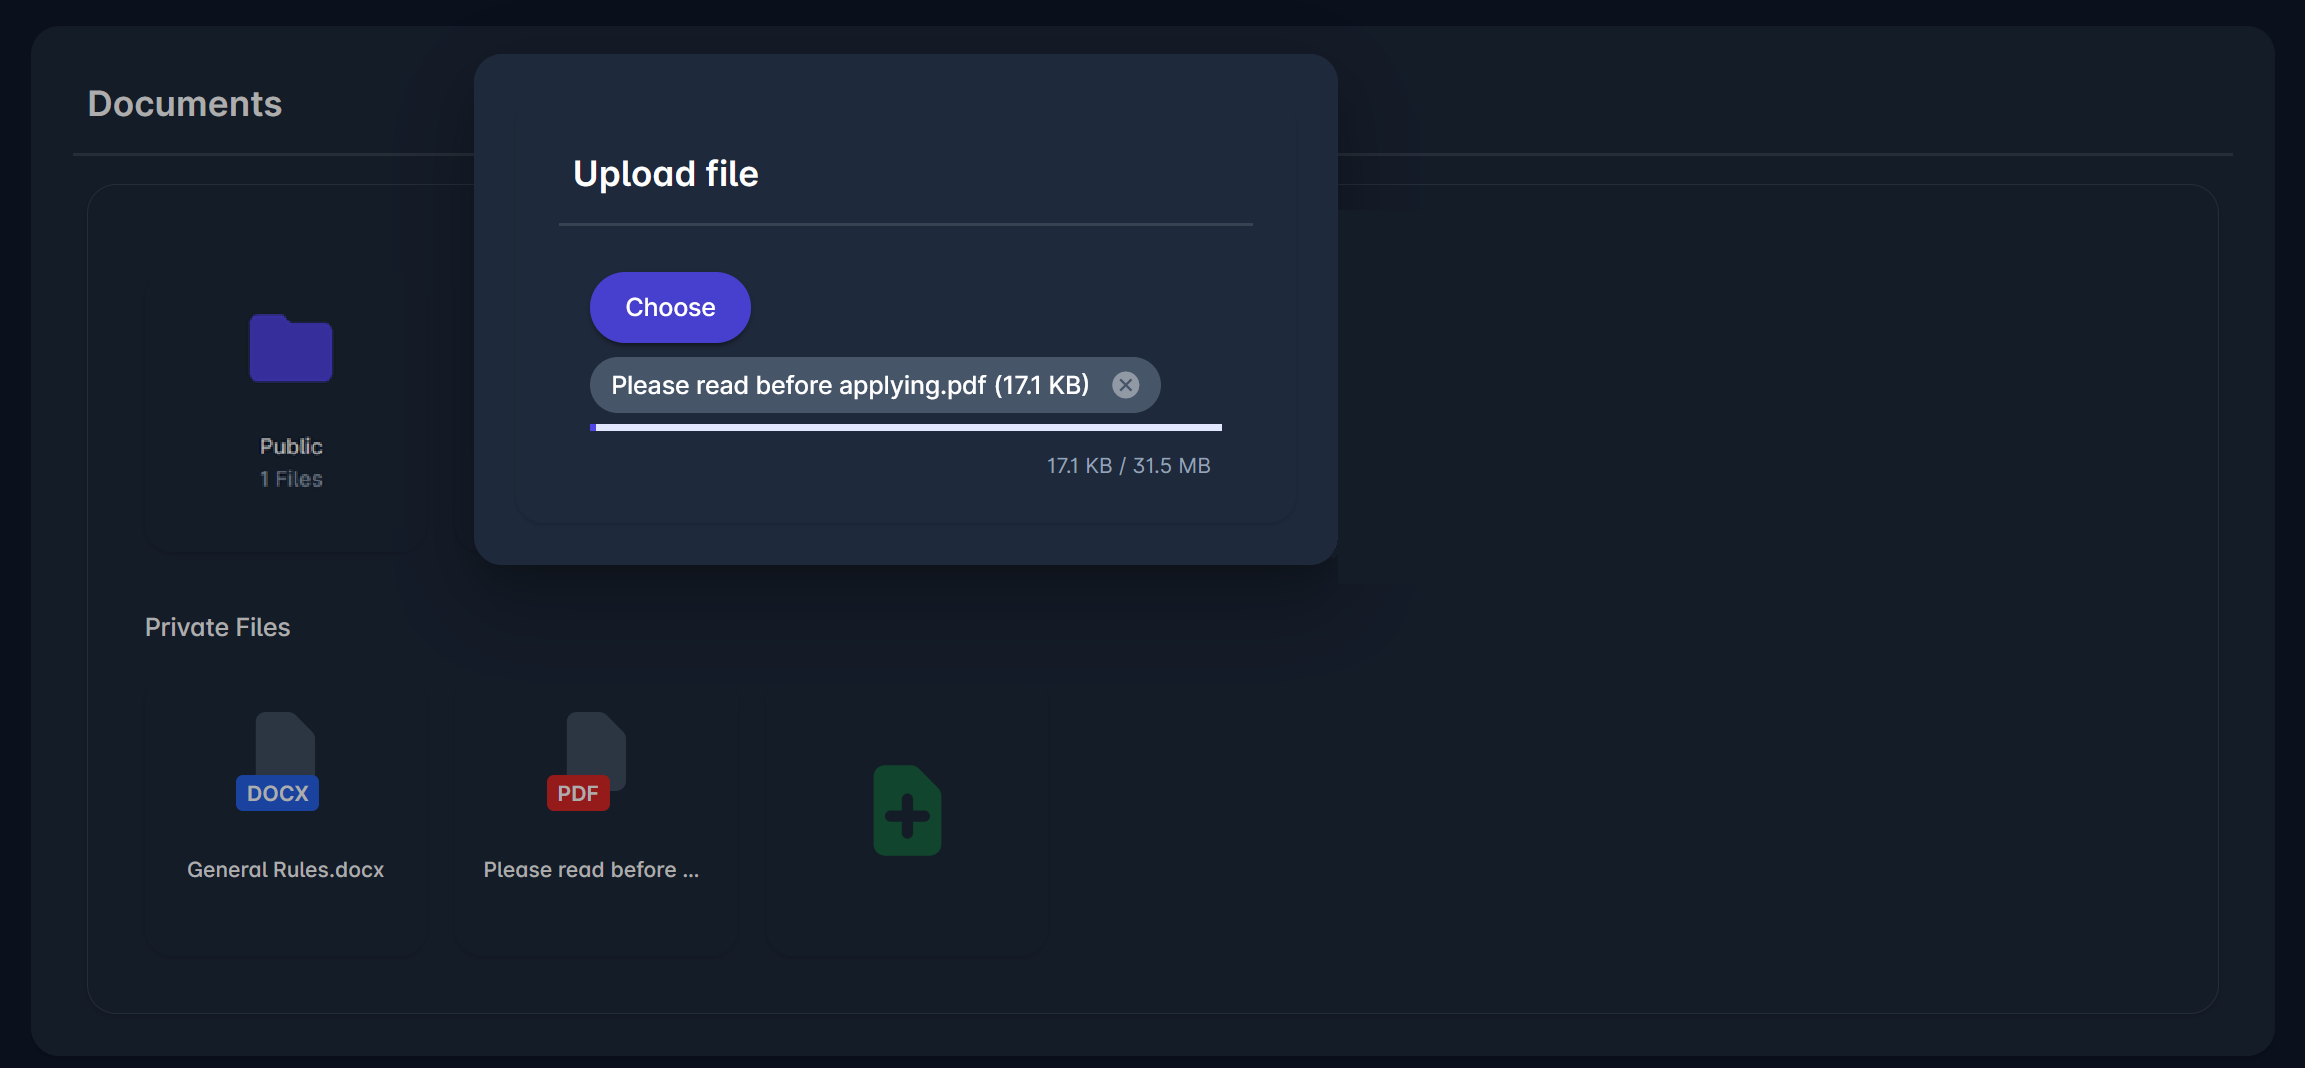
Upload a file
To upload a file:
-
First, make sure you are in the correct folder, considering the desired privacy of your resources
-
In the lower row of the Documents section, under Public/Private files, click on the
Add button
-
On the newly appeared pop-up named Upload file, click on the 📎 Paperclip symbol
-
This opens one of your local folders from where you can navigate to the desired folder and file
-
Select a file and then click on Open in the same window - this action will add your file to the Upload file pop-up
-
This pop-up now shows you the list of all currently selected and pre-uploaded files, with their names and their accumulated size
-
Please note that the maximum file size per folder is 30 MB.
-
-
If you wish to add more files to the same upload, select the 📎 Paperclip symbol and repeat the process
-
Your newly uploaded file has now appeared next to the previously uploaded documents in the folder
-
With the name of the file, the Files section also shows you the file type of your uploaded files
After your file has been uploaded, you can see more information about it in the right-hand window by clicking the desired file. This window shows the upload time and date, the file size, and the file's privacy type.
In the info panel, there are several options:
-
preview the file (applicable only for PDF and images),
-
download the file,
-
delete the file.
Each option can be applied by clicking on the associated symbol.
Previews are available for selected file types: .pdf and .png.
Applicant’s View of the Resources Tab
As with other COMET features, not all users have the same permission level when accessing a Licensing Cycle.
As mentioned, the uploaded documents and added sections are marked as public or private. An applicant won’t see files in the Resources panel in some events if no files are uploaded for that cycle or only private files are uploaded, and the user is not yet a confirmed applicant. When public files exist, they are visible.
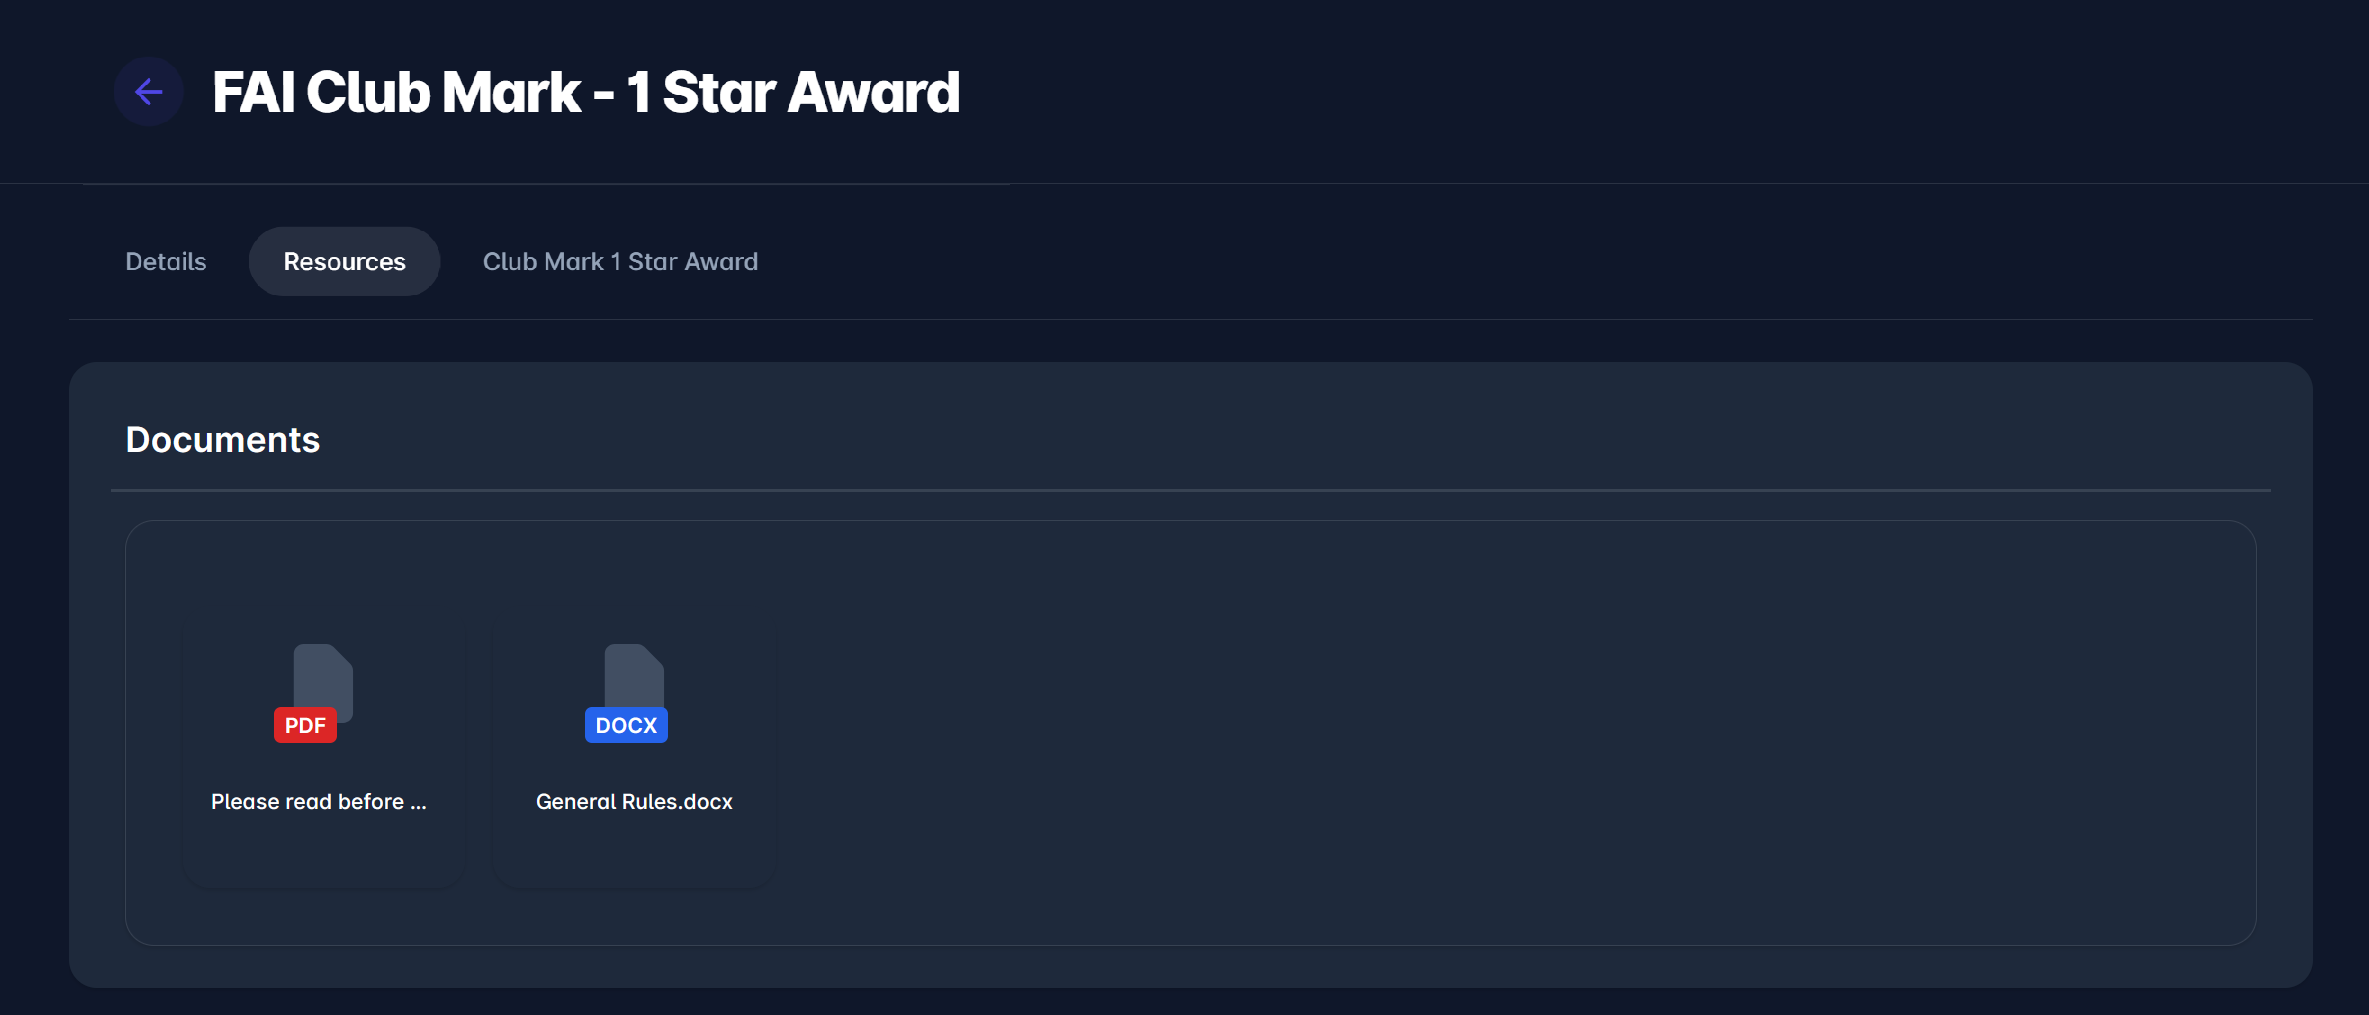
When there is only one file type, there are no folders; there are only files of that type.
Authorizations of the Resources Tab
Cycle resources are managed by the Licensing Admins and Licensing Managers appointed to Cycle.
Applicant clubs can only preview (certain file types) and download files. They cannot upload or delete the files.
-
Public resources: visible to all Clubs
-
Private resources: visible to Clubs in statuses Confirmed, Passed, Failed, Appeal in Progress, Appealed, Appeal Passed