
Create Cycle
-
Access the MyComet App (by adding /mycomet to your Comet homepage address or from the direct link in the COMET App)
-
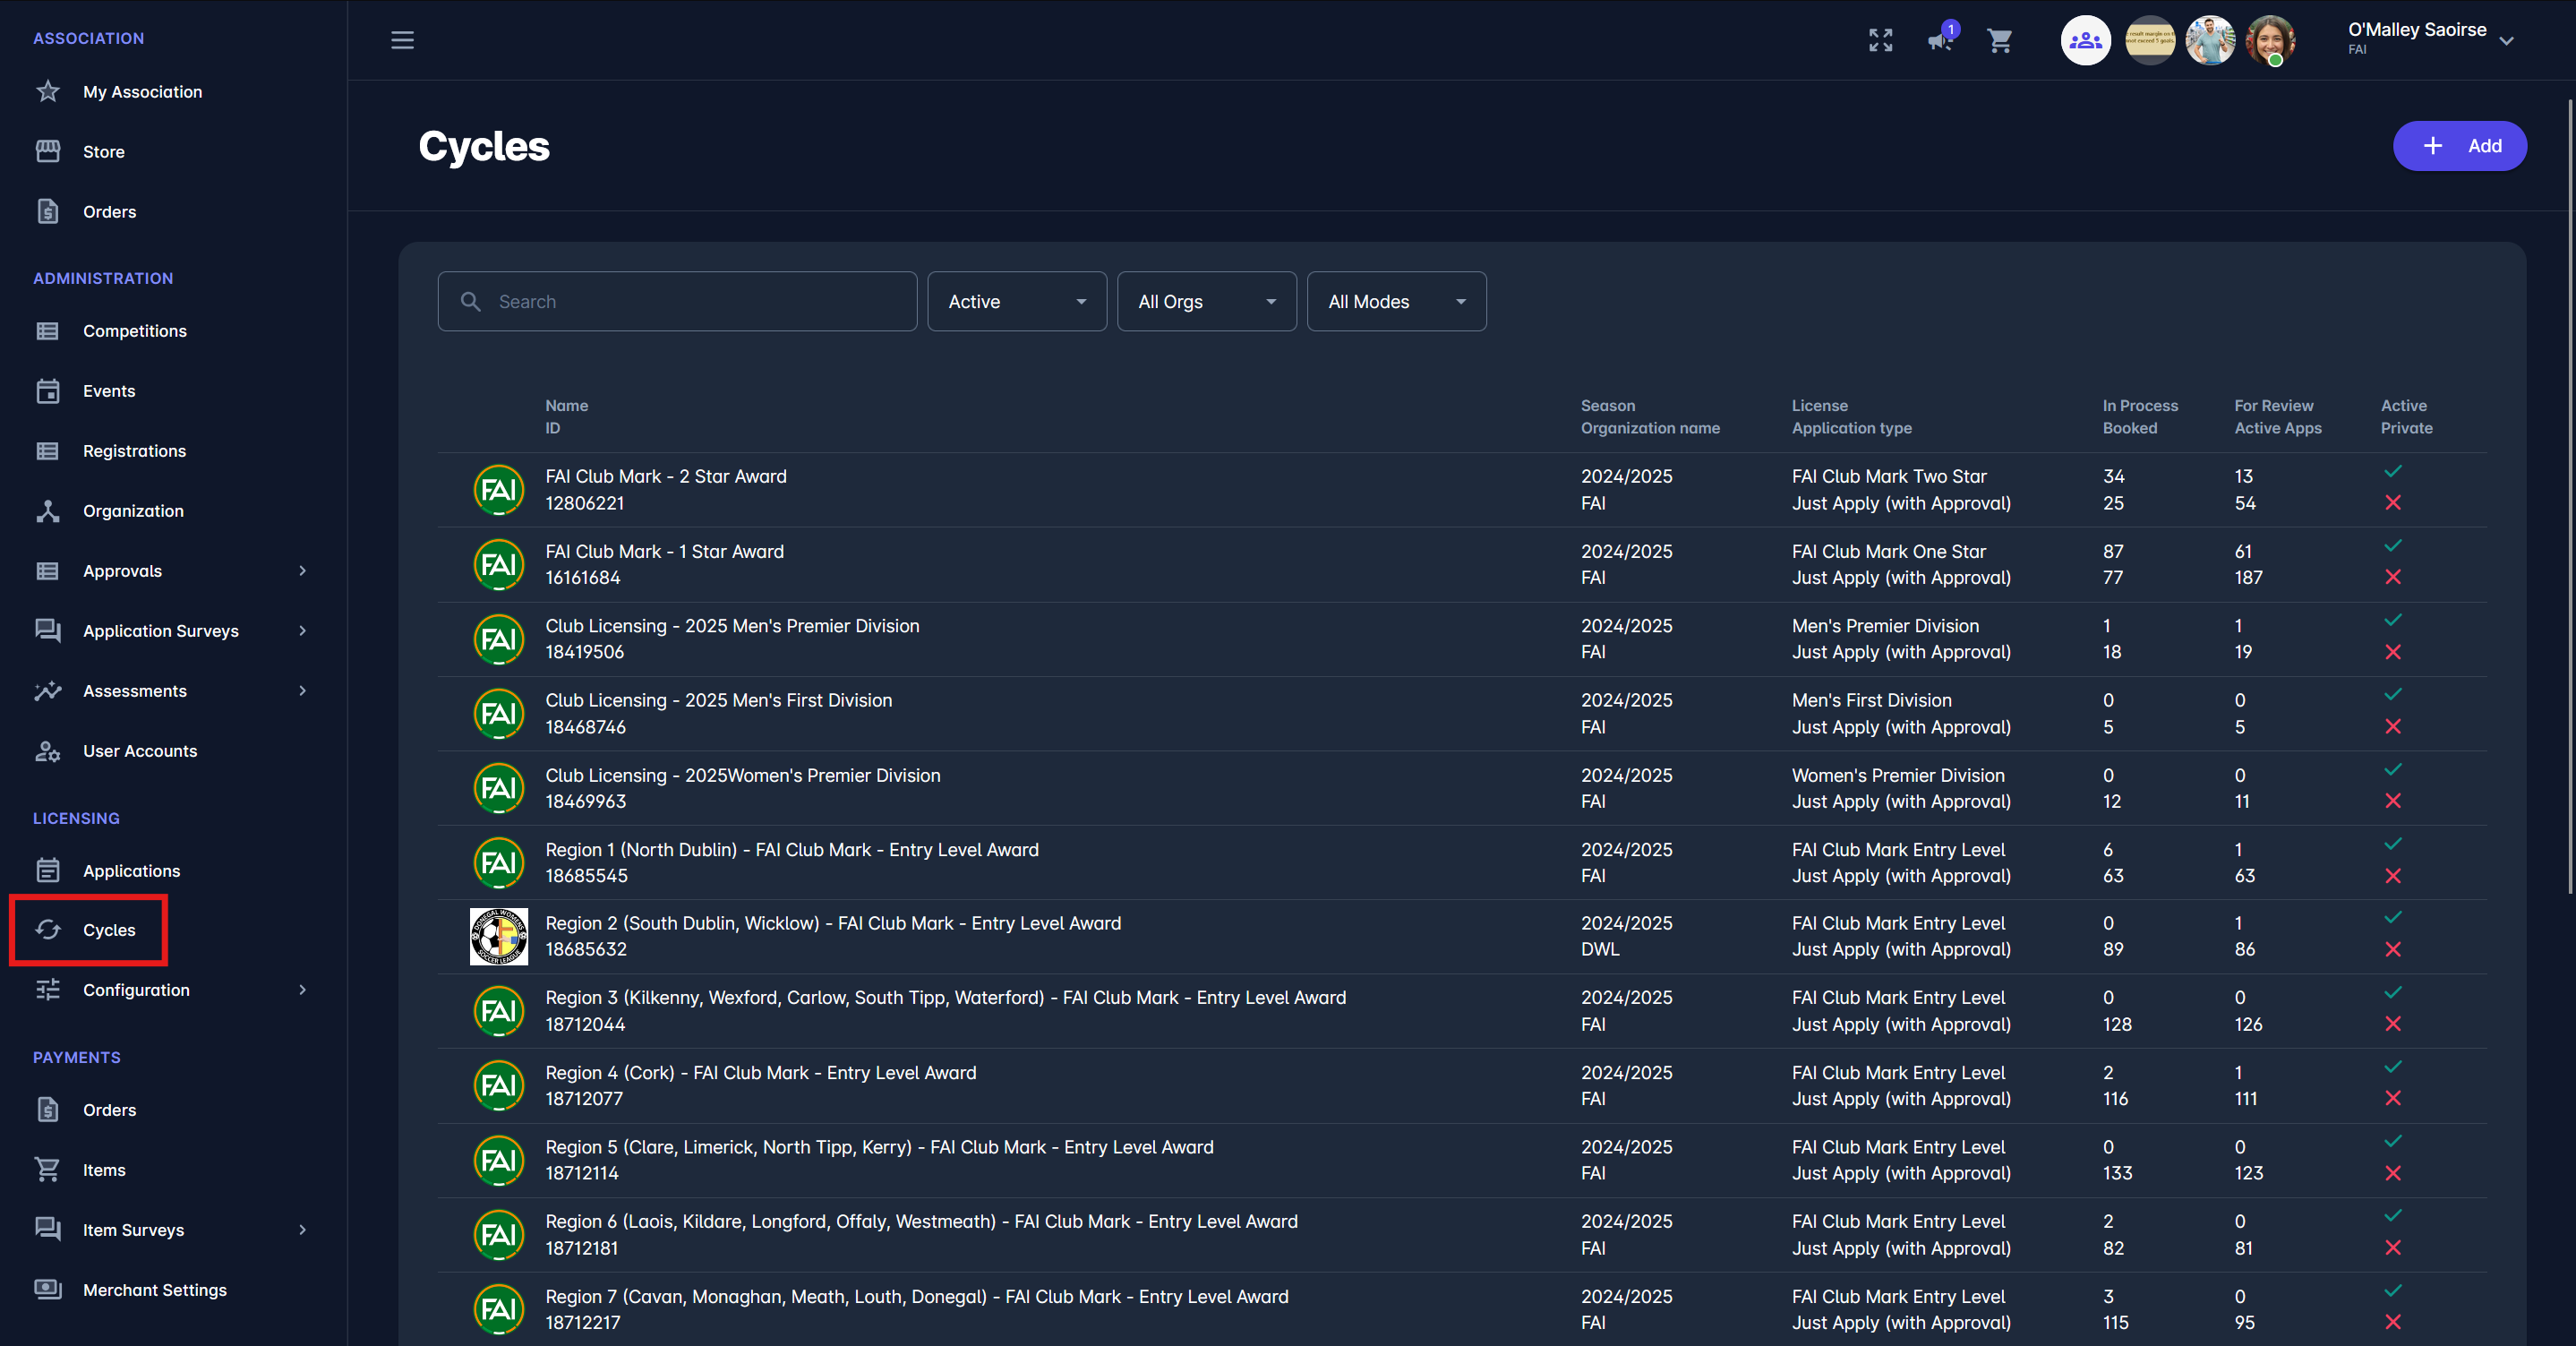
Select 🗓️ Cycles under the Licensing menu on the left nav-bar
-
The list of all License Cycles can be filtered as Active/All (note that only active cycles can be used for applications), by Organization, and by Modes of applying
-
The list of all Cycles is displayed. The list consists of the following details:
-
Name and ID
-
Season and Organization Name
-
License and Application Type
-
In Process (an indicator of applicants whose club application is not yet confirmed) and Booked (an indicator of clubs that have reserved their spot for club licensing)
-
For Review (an indicator of the number of applications in status that requires further review: i.e., SUBMITTED, APPEAL SUBMITTED) and Active applications
-
Active and Private (an indicator of privacy status)
-
The search box (use the search box to search the list of cycles in the system)
-
-
Click on the ➕ Add button in the top right corner to create a new License Cycle.
-
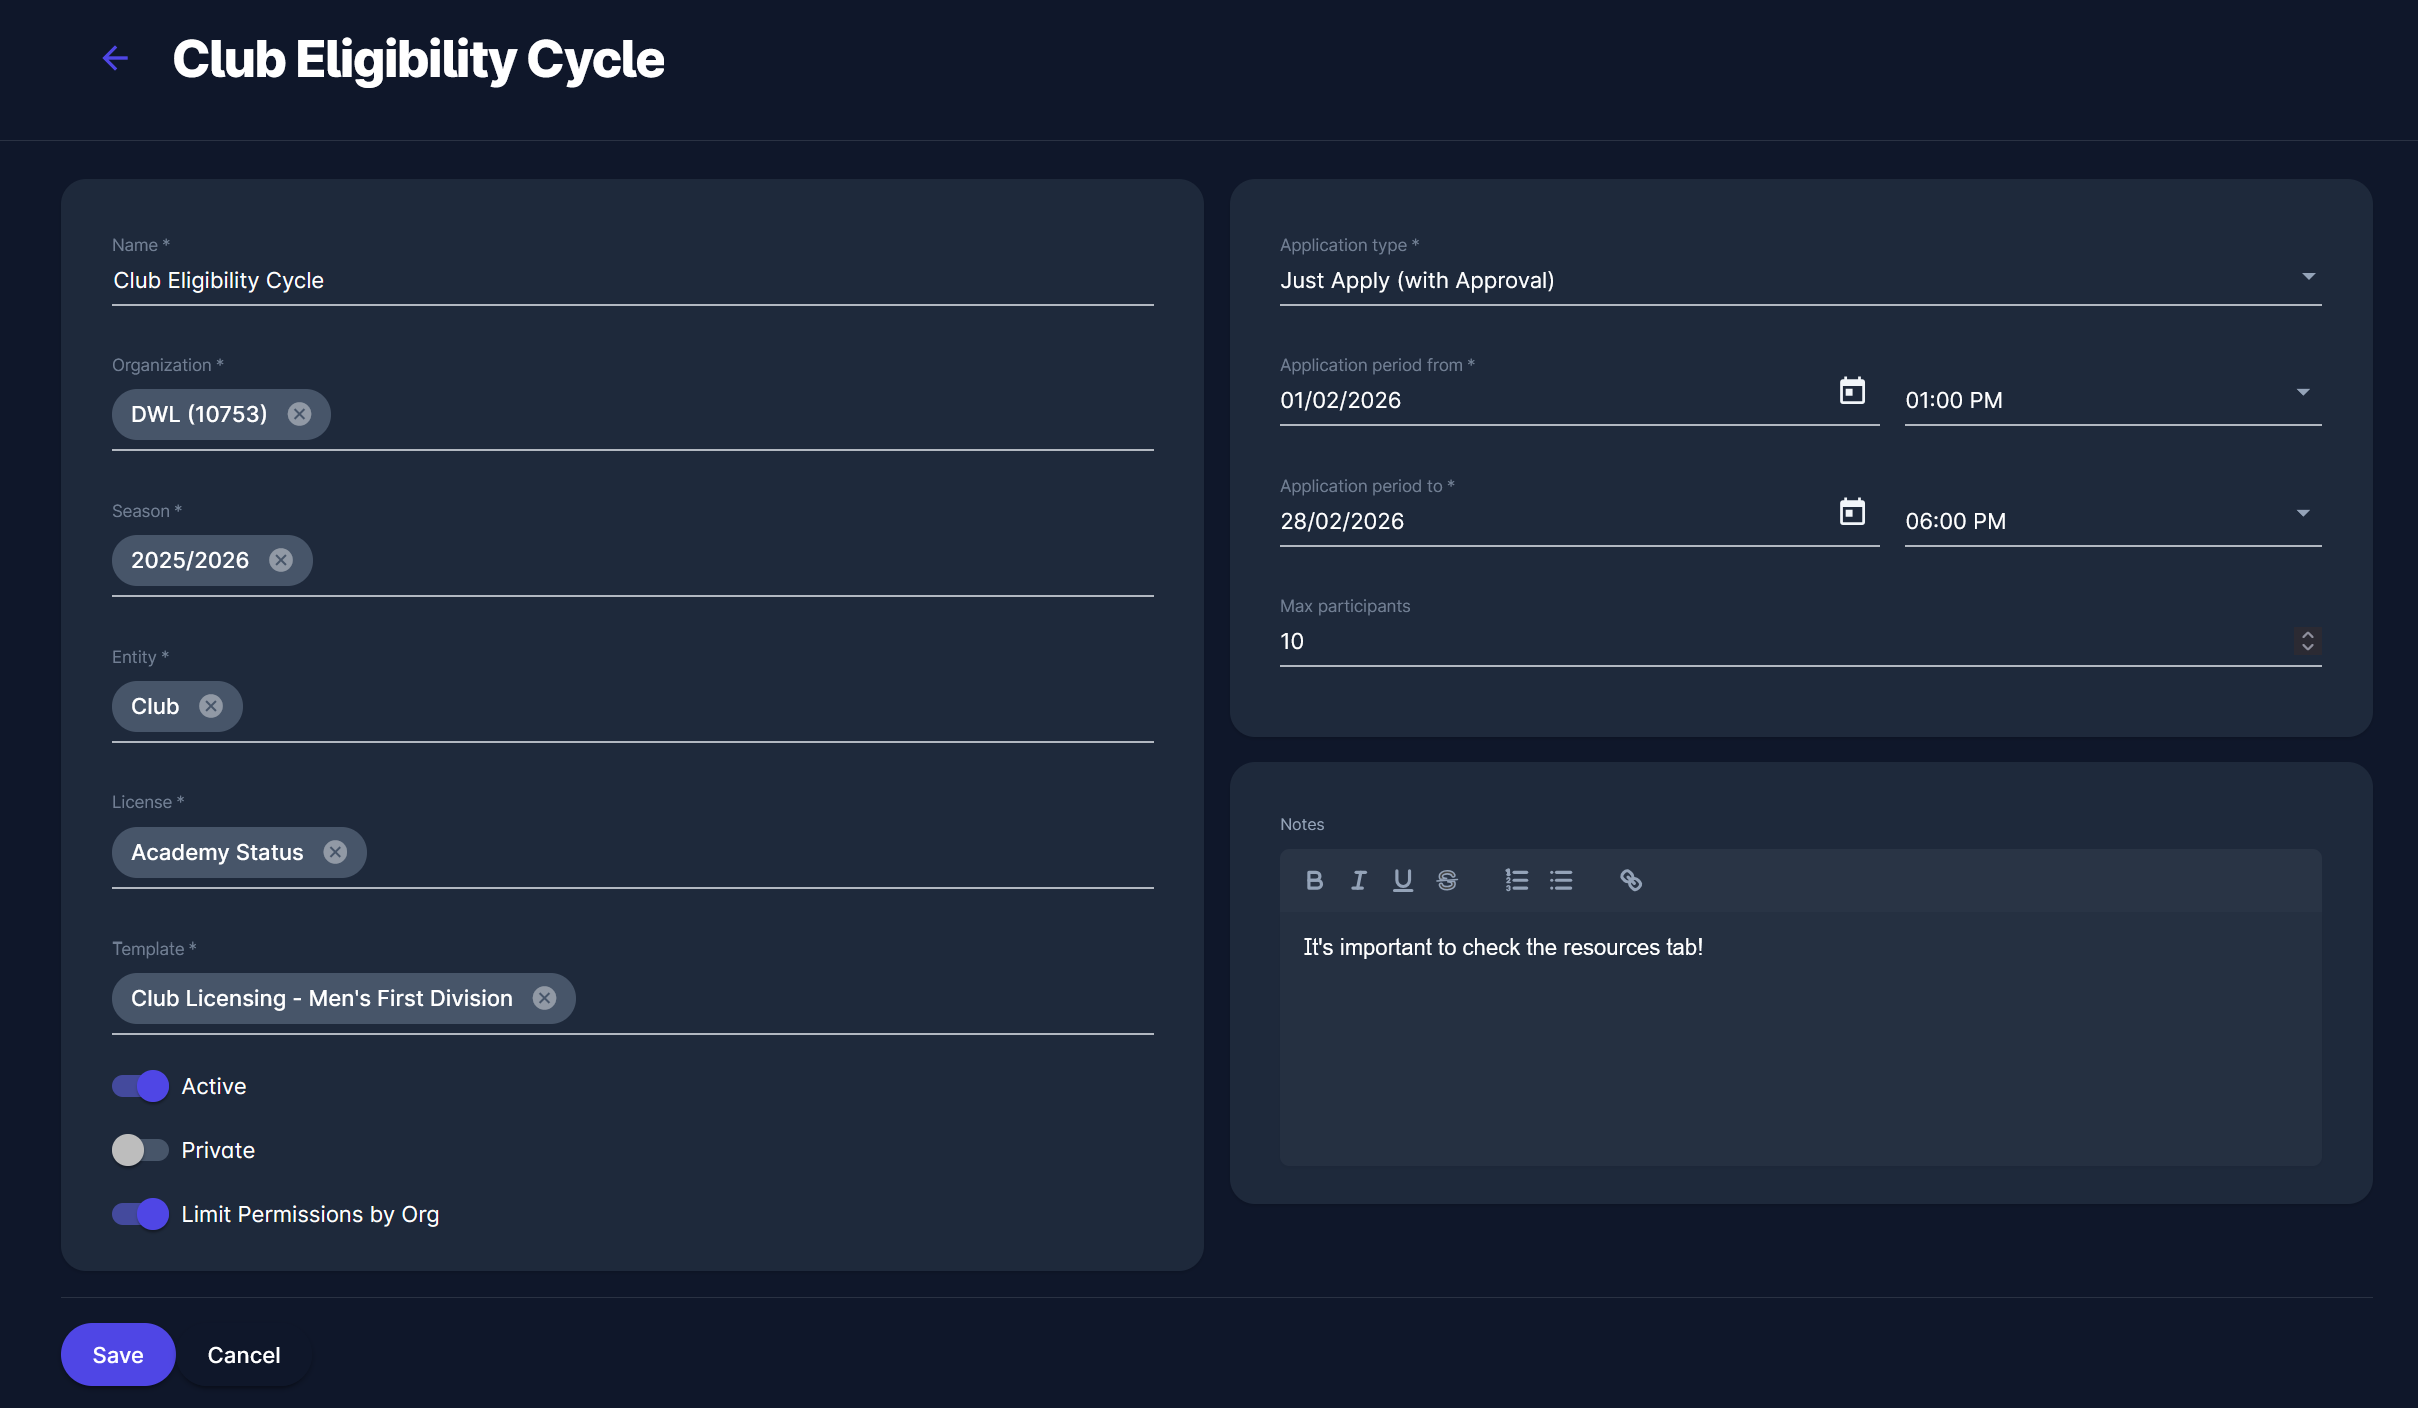
A click on an ➕ Add button opens a New License Cycle Page to fill in the details:
-
Name
-
Organization
-
Season
-
Entity (e.g., club, stadium)
-
License
-
Application Type (please check the link for a detailed explanation of the workflow for each application type)
-
Application Period (please take into account that applications can only be submitted within this time interval)
-
Max Participants (please check the link for a detailed explanation of the Max Participants feature)
-
Notes
-
The switch buttons:
-
Active/ Inactive (inactive cycles are not displayed on the All tab)
-
Private (please check the link for a detailed explanation)
-
Limit Permissions by Org → Please consider that if this switch is enabled, the permissions within the Cycle will be set so that Licensing Managers/Experts can conduct actions and transactions only for Clubs underneath their organization.
-
-
-
Once you have entered all the data, press 💾 the Save button.
Edit Cycle
-
Select 🗓️ Cycles under the Licensing menu on the left nav-bar
-
The list of all License Cycles is displayed
-
A single click on the Cycle from the list will open a Cycle page
-
Hit the Edit button to make changes
-
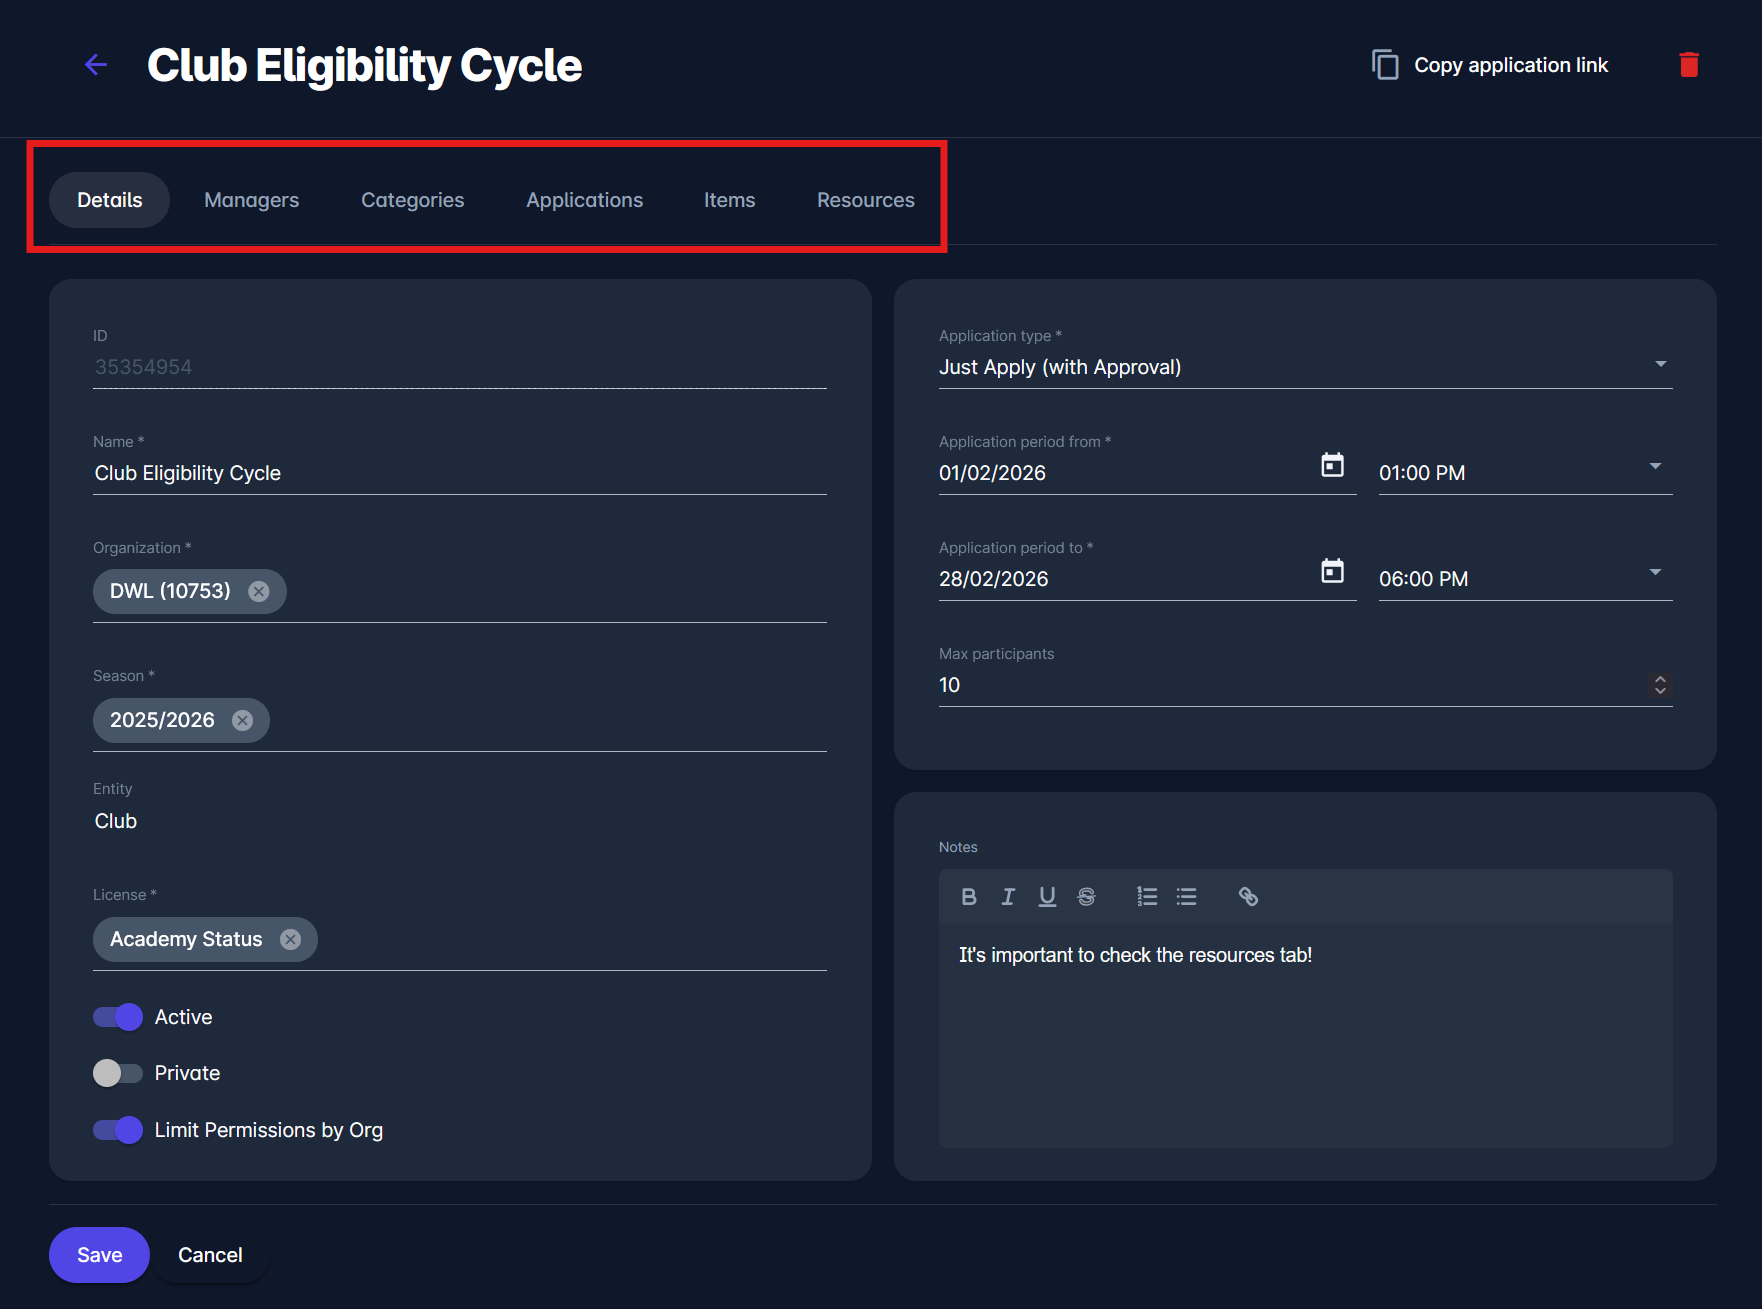
Navigate through tabs to edit a specific group of data
-
Once you have entered all the changes, press the 💾 Save button
-
To delete the Cycle, hit the 🪣 Bin icon button at the top right corner
License Cycle Tabs
Once the License cycle is created, info tabs are generated depending on your chosen Application Type. Each cycle can contain the following tabs:
-
Details tab
-
Managers tab
-
Categories tab
-
Application tab
-
Items tab
-
Resources tab
Read more about the mentioned tabs in the following article: Licensing Cycle Tabs.